Sticker Paper Method
You will need:
* White sticker paper, available from office supplies stores
* Rubber stamps and ink
* Color markers, gel pens, or colored pencils
* Glitter glue
* Scissors
* Computer and printer (optional)
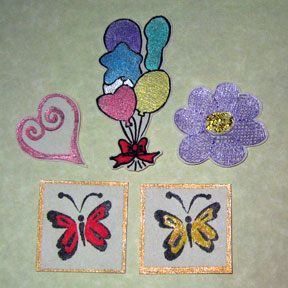
Stamp a number of images on the white side of the sticker paper, leaving a 1/4-inch space between images. Try to get as many images as you can on the sheet without crowding them. Cut out each image, leaving a thin border (around 1/16 of an inch) around it. You may then want to color each image with markers or gel pens. Add some sparkle to the sticker with glitter glue, and let dry. Store them for future projects, or use them right away!
Alternatively, you can make your own doodles or drawings on the sticker paper with markers, gel pens or colored pencils instead of using rubber stamps. Finish off with glitter glue.
If you have access to a computer and inkjet printer, you can arrange clipart or your favorite digital photos on a page in Microsoft Word (or any software that allows you to add and arrange images on a page or canvas), then print the page onto the sticker paper and cut out the images.
Clear Packaging Tape or Contact Paper Method
You will need:
* Clear packaging tape or clear contact paper
* Wax paper
* Image (drawn, stamped, printed, punched on paper, or cut out from an old magazine or book). This shouldn't be wider than your packaging tape or contact paper
* Scissors
Unless it's a punched or die cut shape, cut out your image if you haven't done so yet. Next, carefully cut a piece of clear packaging tape, big enough to cover your sticker and add a half-inch allowance all around. Carefully stick your cutout to the tape, such that the side with the design is stuck to the sticky side of the tape. Try as much as possible not to get any fingerprints onto the tape. Now stick the tape with the cutout to the waxy side of the wax paper, and rub on the tape to remove any air bubbles between the cutout and the tape (it's OK if the wax paper gets wrinkled in the process). The wax paper serves as the backing paper so that you can save your sticker for later. Now trim around the sticker, leaving a border of 1/8 inch. This is important because your sticker will rely on this sticky border for it to work. When it's time to use your sticker, peel off the wax paper, and apply the sticker.
The steps are similar with clear contact paper. Cut out your image, and then cut a piece of contact paper that's big enough to cover your image and add a half-inch allowance all around. Carefully peel off the backing paper, and then stick the design side of the image to the sticky side of the contact paper, making sure there are no air bubbles. Stick back the contact paper to the backing paper, and then cut around the sticker, leaving a 1/8 inch border around it.
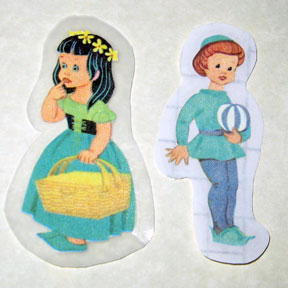
The photo below shows cutouts rescued from a damaged book and made into stickers using packaging tape (left) and contact paper (right).