 |
Have you ever tried to convert a knit pattern to a crochet one? This article is in no way a complete lesson on creating patterns. This is just a quick overview of how I made up this dog sweater pattern.
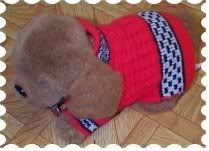
Well this is what I did when I found this cute little dog sweater in a thrift store. This is the tiny knitted dog sweater I found in a thrift store that inspired me to create this little crochet dog sweater for my furbabies. The sweater is so tiny it was no doubt made for a stuffed animal. For some reason it just caught my eye and I bought it and brought it home to try and recreate it.
When I got the sweater home I decided to try to reproduce it in crochet instead of knit. Naturally I had to enlarge it for my dogs as they are between 5 and 10 lbs. You can enlarge the pattern or make it smaller by adding to or taking from the count in the beginning chain stitches.
This sweater pattern I made up will fit any small breed between the weights of 5 to 15 pounds and 9 to 11 inches from neck to tail. If you need it longer or shorter between the neck and tail again just add or decrease the number of rows crocheted.
There are programs that will convert knit patterns to crochet or vice versa, but I just made up my own pattern. I find the block method works best for me. This may not be the best way to create a pattern but this is my way.
First I measure length, than width of garment needed. In this case my dogs. I measured from neck to tail. Than around their chest area, the belly is wider but doesnít make much of a difference because the chest piece doesnít go that far down.
I make up a square with the hook, yarn and stitches I plan to use so I can measure how many stitches I will get per inch and how many rows are in an inch. Now I draw out how I want it to be. First I make the back piece square, than taper down the end for the neck so that it will meet around the neck without being tight. Than I draw a triangular piece that will be the under side. See diagram.
Now we have an idea of the shape of the two pieces we will use. We also have the number of stitches and rows that we will get with the items used. Now we must multiply the number of stitches per inch times the amount of inches around the body. Than multiply the number rows times the inches of the length of the dog.
You can find a link to the pattern below if you donít want to create a pattern yourself. I used 4 ply worsted weight yarn for this sweater and a size J crochet hook.
There are two main pieces when making a dog sweater. The back or body part and than there is the insert or belly part. There are other patterns that have ties, bellybands, collars, and cuffs. I am keeping this as basic as I can and still have a nice looking sweater.
Top: This includes the turtleneck collar and the body all done as one piece. The neck could just as easily be a simple roll collar rather than the turtleneck.
Insert: or belly part is crocheted separately and than sewn in with slipstitches leaving openings for the front legs.
Donít forget you will want to make the insert a bit shorter for a male dog. The females naturally can have a longer insert to keep their belly warm. Donít be afraid to create your own patterns. I am not as talented as some are, but I still have fun making up my own crochet patterns.


