
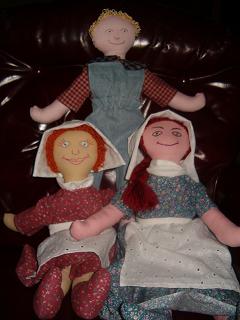
AS you can see in the picture, I used 2 different plaids, one dark navy and one dark red, to make the shirt. This doll was a gift for a small boy and I liked the sense of whimsy that different fabrics gave it. When you place your pattern pieces on the fabric keep in mind how you want your shirt to look, with regard to how the plaid pieces will come together. Also note that the front and back pattern pieces are given in one piece, so you will need to print it out and copy it so that you can end up with 2 pattern pieces to use. The pattern is drawn on 1/2 inch grid so enlarge it as necessary to get the correct size.
Materials List
1/4 yard of plaid fabric
matching thread
3 small snaps
3 small buttons
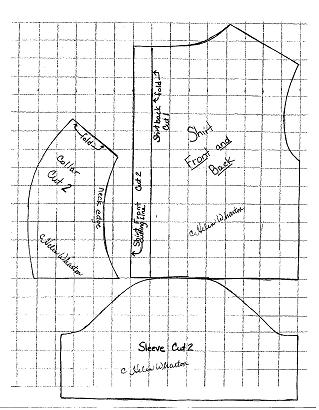
All pieces include 1/4 inch seam allowance.
Start by sewing the shirt front pieces to the back at the shoulders, right sides together. Press seams open.
Sew the 2 collar pieces together around the 3 outside edges, right sides together. Leave the neck edge open. Clip the curves and corners, then turn right side out.Pin and stitch the collar to the shirt at the neck edge with both right sides facing up. Press the seam allowance down toward the shirt and top stitch it in place, following the neck seam very closely.
Using a long basting stitch, gather the top of both sleeves and pin the sleeves to the shirt, right sides together and easing to fit. Stitch the sleeves to the shirt and clip the curves. Hem the sleeves by turning the bottom edge of sleeves to the wrong side 1/8 inch, twice, and stitch. Pin and stitch shirt side seams and sleeve seams. Press the seams open.
Turn under (to the wrong side) the center edges of both sides of shirt front q/8 inch and press. Turn under the same edges 1/4 inch and stitch in place. Stitch the buttons on the right side of the shirt front, placing one near the top, one near the bottom and one half way between the other two. Stitch snaps in place so they are under the buttons.
Hem the bottom of the shirt by turning the bottom edge to the wrong side 1/4 inch, twice, and stitch.
