
If your cloth doll is washable you might want to make sure you use washable acrylic yarn. Cotton yarn is certainly another option, which is what I used in the pictures, but if you want it to be washable make sure it won't shrink. I think it would be a lot of fun, especially if your dolls tend toward being art dolls, to try some of the new fur yarns or yarns with ribbon in them; or even some of the different (non-hair) colors.
You will need sufficient yarn to cover the doll's head. The amount will vary depending on how long you want the hair to be and how thick you want it.Obviously, long or very thick hair will require more yarn. Also necessary is a sharp needle with a large eye, I use a carpet needle. I like this needle because it has a wide, tapered point which is very sharp so it makes a large enough hole in the cloth for the yarn to follow through easily, but because it is so sharp it doesn't tear the fabric so the hole in the cloth closes tightly around the yarn after the needle passes through.
To begin, cut each piece of yarn about 24 inches long. Start by inserting the needle into the back of the head so the end will blend into the rest of the hair when completed. Bring the needle out at the side of the face at a point even with the mouth. Pull the yarn through, leaving a 2 inch end free at the back of the head.
*Take a 1/4 inch stitch, starting 1/4 inch above where you brought the needle out and pull the stitch tight. It should not be so tight that the fabric puckers, it should lie flat.
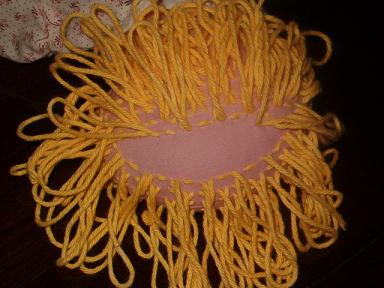
*Take another 1/4 inch stitch, starting 1/4 inch above the previous stitch, do not pull it tight. Leave a loop of yarn as long as you want the hair to be. In the picture I used 2 inch loops.
Repeat these 2 stitches, always beginning and ending each piece of yarn with a tight stitch. Bring the end of each piece of yarn out in the middle of the back of the head.
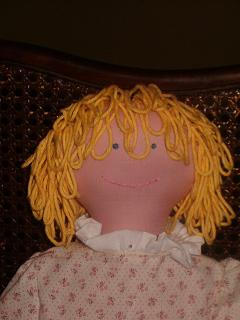
The first row of stitching should go up and around the face; ending straight across the face from where you started, at the level of the mouth. Each successive row of stitching should be about 1/4 inch back from the one before. I recommend alternating the stitches so that a long loop in row 2 is behind a flat stitch in row 1 and in front of a flat stitch in row 3. Continue going up and around the face with each row of stitching, alternating the direction of your stitching, until the head is covered.
Making and Dressing Cloth Dolls
Ebook with patterns and instructions to make 5 cloth dolls as well as chapters on general doll making techniques.The book includes 21 inch Lalena Doll, 21 inch David Doll, Bear Dolls, 9 inch Destiny Doll and 15 inch Annie Doll, all together in one handy book. 53 pages.Making and Dressing Cloth Dolls.
