
Photoshop Animation - Graphics and Smart Objects
In this Photoshop tutorial, we will create a smart object in our Facebook video cover template. This smart object will make it easy for the template user to replace the solid gray color fill with a custom photo.
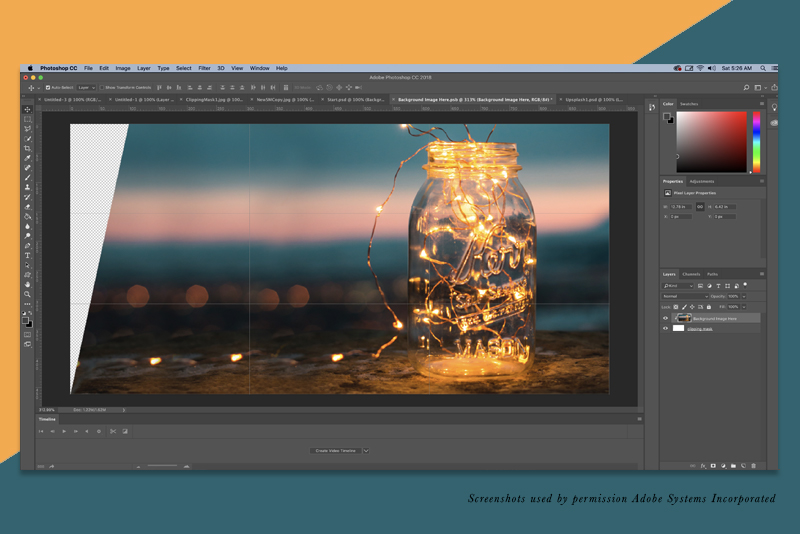
But as this is a video project, we will eventually be animating this smart object layer in Photoshop's video timeline. Let's add a little interest by creating a slanted left edge to this smart object (see screenshot). This slanted edge will be visible as the photo slides on to the screen, creating a nice transition. We can create this slanted left edge with a nondestructive clipping mask. This clipping mask will hide, but not remove, the pixels on the left side of the photo.
Convert Layer to Smart Object
We will duplicate the smart object layer that we just created. But we don't want these two smart object layers connected or linked, because we want to replace the placeholders with two different photos. So we will use the New Smart Object via Copy to duplicate the first layer into a second independent smart object.
Back | Next
Copyright 2018 Adobe Systems Incorporated. All rights reserved. Adobe product screen shot(s) reprinted with permission from Adobe Systems Incorporated. Adobe, Photoshop is/are either [a] registered trademark[s] or a trademark[s] of Adobe Systems Incorporated in the United States and/or other countries.
But as this is a video project, we will eventually be animating this smart object layer in Photoshop's video timeline. Let's add a little interest by creating a slanted left edge to this smart object (see screenshot). This slanted edge will be visible as the photo slides on to the screen, creating a nice transition. We can create this slanted left edge with a nondestructive clipping mask. This clipping mask will hide, but not remove, the pixels on the left side of the photo.
Convert Layer to Smart Object
- Right-click on the [Background Image Here] layer and choose Convert to Smart Object from the menu.
- Double-click on the smart object thumbnail to open the smart object in a .psb temp file.
We need to add an extra 100 pixels to the width of the smart object for the slant. - Click Image - Canvas Size and change the Width from 820 to 920 pixels in the Canvas Size window (see screenshot). Also, click the middle-right arrow to force the new pixels to the left side of the layer.
- Fill the empty 100 pixels area with the same gray color 666666 that we used to fill the smart object in the previous tutorial.
Now we can create a clipping mask that will nondestructively remove the pixels to create our slanted left edge. - Click the New Layer icon at the bottom of the Layers panel to start a new layer for the clipping mask and fill it with white. Name this layer clipping mask.
- To create the slant, draw a diagonal selection with the Polygonal Lasso tool, starting at 100 pixels from the top left to the bottom left edge (see screenshot). This will give us an inverted triangle.
- Click Edit - Cut to remove the selection. Click Select - Deselect.
- Drag this layer below the gray [Background Image Here] layer.
- Select the [Background Image Here] layer. Right-click and choose Create Clipping Mask (see screenshot).
You should see an inverted triangle removed from the top layer (see screenshot). - Save and close the temp file and return to the template file.
If you see the cut out triangle, use the Move tool to move the gray placeholder to the left until you cannot see any cut out area (see screenshot) and the right edge of the placeholder is at the right edge of the screen.
We will duplicate the smart object layer that we just created. But we don't want these two smart object layers connected or linked, because we want to replace the placeholders with two different photos. So we will use the New Smart Object via Copy to duplicate the first layer into a second independent smart object.
- Right-click on the [Background Image Here] layer and choose New Smart Object via Copy from the menu (see screenshot).
- Rename this new layer to [Background Image Here - 2].
Let's give this second placeholder graphic a new color. - Set the Foreground color to a medium pink color (c57287).
- Double-click on the thumbnail to open this layer in a .psb temp file. Use the Paint Bucket tool to fill the layer with this color.
- Save the temp file and return to the template file.
Back | Next
Copyright 2018 Adobe Systems Incorporated. All rights reserved. Adobe product screen shot(s) reprinted with permission from Adobe Systems Incorporated. Adobe, Photoshop is/are either [a] registered trademark[s] or a trademark[s] of Adobe Systems Incorporated in the United States and/or other countries.

Related Articles
Editor's Picks Articles
Top Ten Articles
Previous Features
Site Map
Content copyright © 2023 by Diane Cipollo. All rights reserved.
This content was written by Diane Cipollo. If you wish to use this content in any manner, you need written permission. Contact Diane Cipollo for details.


