
Populate the Color Palette eBook Pages
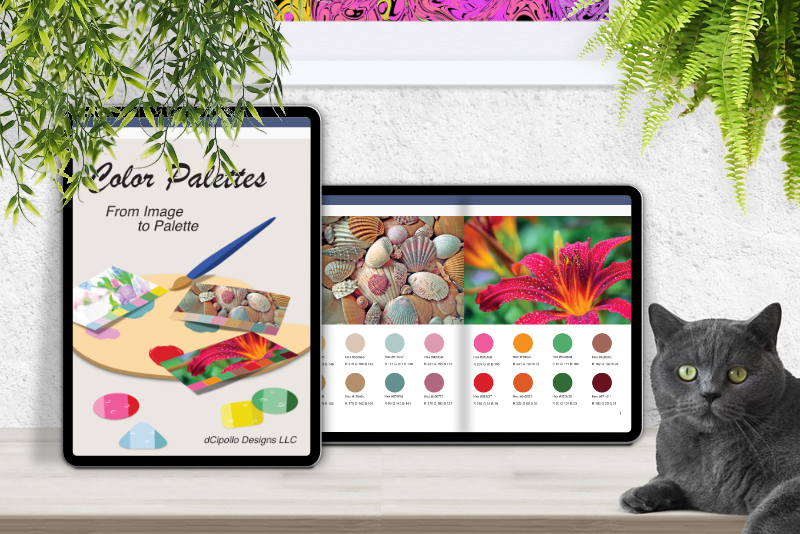
Now that we have the Color Palette eBook template complete, it's time to add the first graphic that we will use to generate the first color palette, using the Create Palette From Image feature. In the example, I choose a very colorful closeup of a flower. This could be your own photograph or try one of the royalty free graphic websites such as Pixabay.com.
The first step is to load the page that you wish to work on into the work area. We will be using page 1 for the cover. So let's start with page 2 in our eBook. Because all of the details on the page are loaded from the Master Page, the contents of the page is locked in the Layers panel. But it's easily unlocked.
INDEX Color Palette Book Template Affinity Publisher - Series Index
Screenshots used by permission of Serif (Europe) Ltd. This article is not endorsed by Serif Ltd.
The first step is to load the page that you wish to work on into the work area. We will be using page 1 for the cover. So let's start with page 2 in our eBook. Because all of the details on the page are loaded from the Master Page, the contents of the page is locked in the Layers panel. But it's easily unlocked.
- In the Pages panel, double-click on the page that you wish to work on, to open that page into the work area.
- In the Swatches panel, open the pop-up menu. Select Create Palette From Image (see screenshot).
- In the pop-up window, click the Select Image button at the top of the window. Select your image and click Open.
- After your image loads into the window, use the Number of Colors slider to get the number of colors that you wish for your palette. The eBook has eight swatches per page. If you choose to set the slider to a new number, click the Preview button to load the new colors into the window (see screenshot).
- With the Location option set to Document, click the Create button to load the color palette swatches into the Swatches palette (see screenshot).
- To unlock the layer contents, right-click on the Inner Page Spread layer and choose Edit Detached (see screenshot). You should see a message at the top of the work area (see screenshot).
- Now, select the Picture Frame layer in the Layers panel.
- In the Context toolbar, open the Properties tab. The Scale to Max Fit is usually the correct choice but change it if needed. Click Done (see screenshot).
- Click the Replace Image button (next to the Properties button) to add your image to the Picture Frame. Use the Scale slider to resize your image if needed (see screenshot).
- To load the first color into the page, select the first color circle on the canvas and click the first color swatch in the Swatches panel. This will load the swatch color into the circle on the page. Deselect the circle (see screenshot).
- In the Swatches panel, double-click on the color swatch, to open the Color Picket. Set the pop-up list to RGB sliders and write down the numbers for the Red, Green and Blue options (see screenshot).
- Change the pop-up list to RGB Hex Sliders and write down the Hex number for that color (see screenshot).
- Going back to the page, select the Hex code text and change the numbers to the Hex number for this color. Next, select the RGB text and change these numbers for this color (see screenshot).
In the Layers panel, you will see that this page in labeled Inner Page Spread. Inner Page Spread is the name of the Master Page.
In the Affinity apps, there is a feature that allows you to grab the most important colors from an image as a color palette. I believe that it does a better job than some online websites. So, we will start by building the first color palette for our eBook, using the Swatches panel feature.
Your image choice should load into the window and you will see the default five color swatches.
Now we will load the image and the color swatches into the page but the layers are still locked.
INDEX Color Palette Book Template Affinity Publisher - Series Index
Screenshots used by permission of Serif (Europe) Ltd. This article is not endorsed by Serif Ltd.

Related Articles
Editor's Picks Articles
Top Ten Articles
Previous Features
Site Map
Content copyright © 2023 by Diane Cipollo. All rights reserved.
This content was written by Diane Cipollo. If you wish to use this content in any manner, you need written permission. Contact Diane Cipollo for details.


