
You will need:
* A finished Artist Trading Card (ATC)
* Colored cardstock measuring 11 by 5 inches
* Page from old book torn to a rectangle measuring 4-1/2 by 2-3/4 inches
* Vellum torn to a rectangle measuring 3-3/4 by 3-1/2 inches
* Flourish rubber stamp
* Stamp pad
* Glue stick
* Double-sided tape
* Sewing machine, or sewing needle and embroidery floss
* Scissors
* Ruler
* Pencil
* Craft knife
* Cutting mat
Measure and cut the cardstock to the indicated size. Score the cardstock into three equal panels. Fold the leftmost panel over the middle panel; this is needed to cover the stitching that will be done later. Now fold these two panels over the third panel.
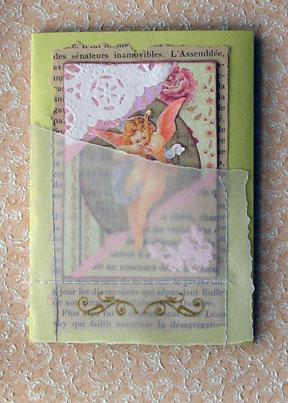
Tear the book page to the size indicated and glue it to the center panel (which is now the front of the card), leaving a border around the edges.
Tear the vellum to the indicated size, and then tear off one corner. With the cardstock unfolded, put the vellum on top of the text paper, aligning the bottom and sides of the vellum with the bottom and sides of the panel. Take the ATC and position it on top the vellum. Using a pencil, lightly mark the lines where the pocket will be sewn; the pocket should be wider than the ATC by about 1/8 of inch on both sides. Remove the ATC and then sew along the lines using a straight stitch. (Note: if youre using a sewing machine, use a long stitch so that the paper doesnt tear). Trim off any loose threads. Stamp a flourish at the bottom of the vellum and allow it to dry.
Now fold the card again, and using double sided tape, adhere the leftmost panel to the back of the center panel to hide the stitching. Slip the ATC into the pocket.
