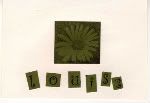
To begin, here is a small list of a few items that it would be good to have on hand to start:
1. A pack of blank cards and envelops.
2. A few simple rubber stamps. Some good stamps to own would be an alphabet set since you can form any word or name with it. A flower or a heart is handy to have. If you are a beginner looking to buy a few stamps, think small. It is easier to learn how to stamp a smaller stamp than a larger one.
3. One black inkpad.
4. Solid colored paper.
5. A glue stick.
6. Scissors.
Once you have these few start up tools, you can begin practicing how to stamp. Itís an easy process, and as you gain experience you can make it even more interesting by adding other techniques. For now, all you need to do is tap the stamp gently onto the ink pad a few times. When you feel the stamp is covered properly in ink, try it on a test paper. Repeat the process a few times until you have successfully stamped a few images.
Ready to stamp on to the real paper? Try it. Stamp your image onto the solid colored paper. If itís perfect, you can put it aside and let it dry. Most inks will dry within a few seconds. If you are not satisfied with your stamp you can try again on the colored paper. Keep stamping until you get the perfect image. If you want to read more about how to stamp a Good Clean Image you can read this article: http://www.bellaonline.com/articles/art3396.asp
Your ink must be dry before you can handle it. If you are using a slow drying ink you can blow dry it with a hair dryer to speed up your process, or put it aside and work on it tomorrow.

Once it is dry you can cut it out. If it is a simple shape you can follow all of the lines and cut it out carefully. Or, if it is too detailed you can cut it out in a box shape or a rectangle. Turn the stamped image over, and glue the back with a glue stick. Now you can adhere your image onto the card. For a special effect, you can adhere your image using a pop dot, which is a foam tape that will raise your image off the paper when adhering it.
Now that you have your stamped image on the card you can write a word or two to personalize it. I like to write the personís name since there is nothing more personal. If you have a rubber stamp alphabet this is easy to do. You can stamp on the colored paper and cut each letter out, then glue it onto the card.
 >
>As you get more experienced, you will probably want to make your cards more detailed. You might want to add bows and tags and brads and buttons and rub ons and stickers and Ö well, you get the idea.


