
You will need:
* 1 sheet white vellum paper, 8-1/2 x 11 inches
* 1 sheet pink text-weight paper, 8-1/2 x 11 inches
* 1 sheet white cardstock, 8-1/2 x 11 inches
* 1 sheet copy paper for mask, 8-1/2 x 11 inches
* Heart template (available here)
* Pink satin ribbon, 20 inches
* Red stamp pad
* Small heart stamp
* Cellophane or masking tape
* Scissors
* Cutting mat
* Craft knife
* Ruler
* Pencil
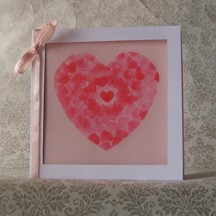
Measure and cut the white cardstock to 11 inches by 5-1/2 inches. Fold it in half crosswise to get a square card. On the front of the card, measure and mark a half-inch frame around the edges. Carefully cut along the lines with a craft knife to form a window. Set the card aside.
Measure and cut the white vellum to 11 inches by 5-1/2 inches. Fold it in half to form a square. Set aside.
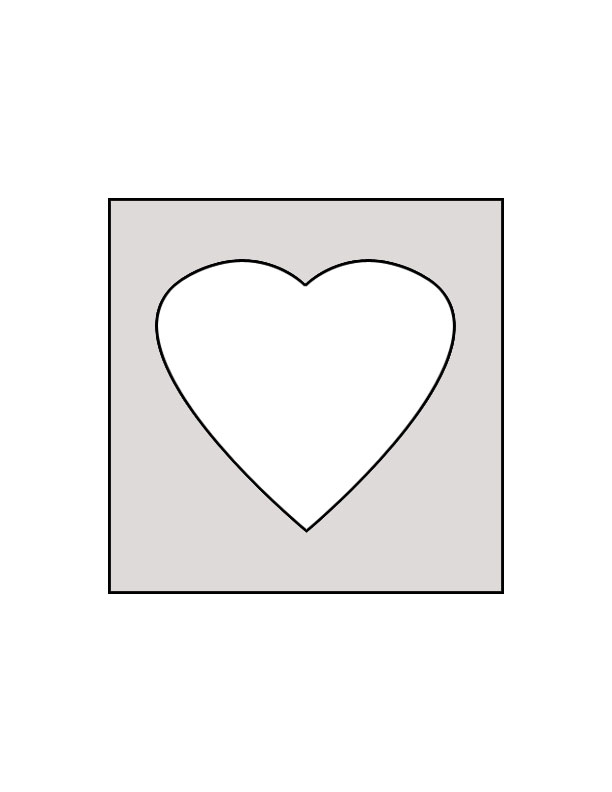
Make the heart-shaped mask. Print out the template on plain paper, cut off the white areas, and keep the shaded area. You can also draw a heart in the middle of a 5-1/2 by 5-1/2 piece of paper, and then cut it out, leaving the mask.
Put the folded vellum on a flat work surface, with the folded edge at your left. Put the heart mask on top of the vellum. Secure both the vellum and the mask to the work surface with tape. Note: To make low-tack tape, simply stick the tape to your clothes and peel it off; the fiber from the cloth will make the tape less sticky.
Using the red stamp pad and heart stamp, stamp a heart on the vellum in the middle of the heart shaped area. Without re-inking the stamp, stamp more hearts around the first heart, moving in a circle with the points of the hearts facing the center. Don't worry about the spacing of the hearts. It's OK for them to overlap, or to have spaces between them. You'll fill up the spaces later. The hearts will grow fainter as you go along, but that's the effect were after. When the impression is too faint to be seen, re-ink the stamp and continue stamping in this manner until the whole area is covered with hearts. Make sure to stamp on the edges of the mask in order to get a clearly defined heart shape. Fill in any white spaces with hearts. Set the vellum aside to dry completely before peeling off the tape and removing the mask from the vellum. You should now have a big heart shape made up of little heart shapes.
Now cut the pink paper to 11 by 5-1/2 inches, and fold it in half to make a square. Nest the pink paper inside the vellum, and then nest the vellum inside the cardstock so that the heart is visible through the window. Tie the nested sheets together with the satin ribbon knot the ends together snugly and finish off with a bow. Trim the ends of the ribbon at an angle.
Write your message on the innermost pages of the card. It can be a simple "I Love You" or, if you want to write a whole sonnet or love letter, simply add more pages inside to accommodate your declaration of love. Happy Valentine's Day!
