
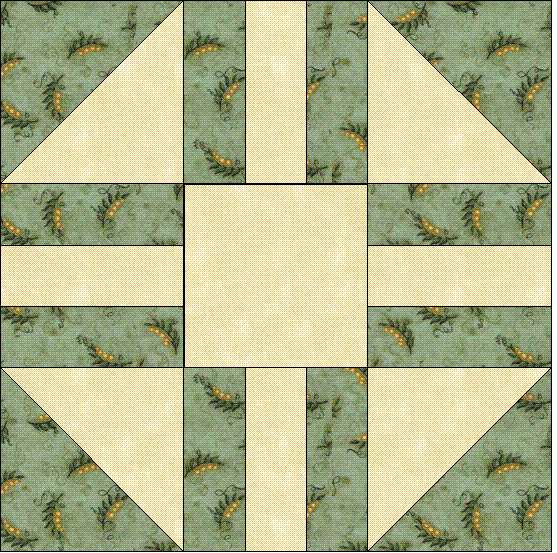
Free Wedding Quilt Block

This wedding block is a type of album block, and contains 9 spaces per block for writing best wishes and signatures.
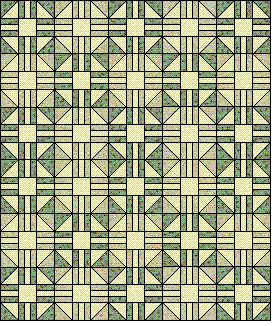
The block is created using a cream homespun for easy reading of the names and best wishes, with a contrasting green fabric to complete the block. The quilt illustrated here has been created using a cream homespun for the signature sections, and two different green fabrics, alternating each block.
Five blocks across and five down make a square quilt of 25 blocks, which equates to 225 spaces for comments and signatures. If you wish you can add extra blocks where required.
Here are the instructions for make a Wedding Block. Have fun!
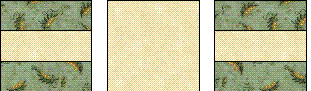
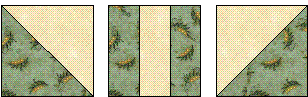
 Wedding Block - 9" Quilt Block
Here is a template map for easy identification of each of the templates and their location within the block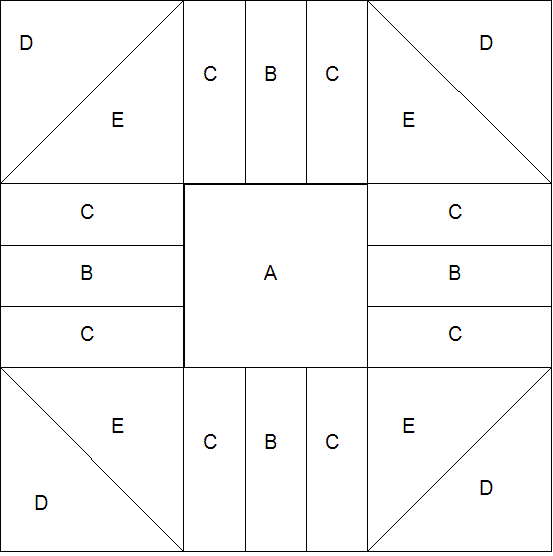
Cutting Instructions
 Cream Fabric:
 - Cut one 3 1/2" square (A)
- Cut four 1 1/2" x 3 1/2" rectangles.(B)
- Cut four 3 7/8" squares (E)
 Green Fabric:
Sewing Instructions:
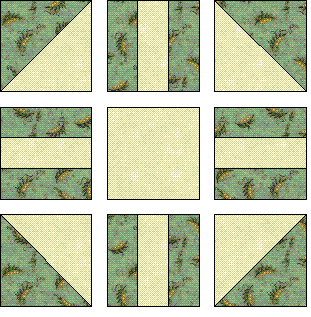
Step 1: Making the Half Square Triangles first. Draw a diagonal line on the wrong side of each of the cream squares (E). Place this shape onto a green square (D) and sew 1/4" either side of the drawn line. Cut on the drawn line and press the seam to the dark fabric. Repeat for other three E&D pieces.

Step 2:
Step 3: Lay out all of the pieces required according to the template map above on your work surface, ready to piece together 
Step 4: Top Row: Top Row:Take one CBC unit and sew a DE unit to either side of the CBC unit to create the top row. Step 5: Centre Row: Take the centre block A and sew a CBC block either side of the A block to make the centre row. Step 6: Bottom Row: Take a CBC unit and sew a ED unit to either side of the CBC unit to make a bottom row. Step 7: Joining the Rows. Stitch the top row to the centre row, then stitch the bottom row to the centre row. Your block should measure 9 1/2" on all sides. It will measure 9" finished size when it is sewn into a quilt.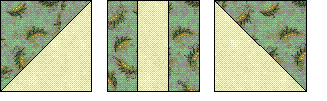

Related Articles
Editor's Picks Articles
Top Ten Articles
Previous Features
Site Map
Content copyright © 2023 by Judie Bellingham. All rights reserved.
This content was written by Judie Bellingham. If you wish to use this content in any manner, you need written permission. Contact Judie Bellingham for details.

