
Quilt Rod Pocket

Most Quilt Show organisers require each quilt that is entered to be exhibited to have a hanging sleeve to be firmly attached to quilts. Some organisers only require rod pockets for any quilt that has a width greater than 50cm; others require a rod pocket for all quilts entered. A properly attached hanging sleeve helps to ensure your quilt hangs well for the duration of the quilt show.
I have described to ways to attach a sleeve to your quilt. The first is attaching the rod pocket or sleeve AT THE SAME TIME as completing the binding. The second is attaching the rod pocket or sleeve after the binding has been completed.
Attaching the sleeve at the same time binding your quilt.
The sleeve needs to be made of a piece of cloth (7 ½ “), and the measurement across the top of the quilt. So if your quilt is 70” x 95”, the fabric needs to be 7 ½” x 70”.
Hem both ends by twice turning under ¼ “, across both ends of the sleeve and machine stitch. This hem makes your sleeve a little shorter so that it does not protrude from the sides of your quilt.
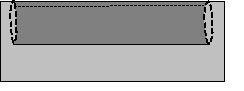
Fold your strip in half, wrong sides together, along the length of the sleeve (the measurement of the top of your quilt) and press.
Then press another fold ¼ “ in from the first fold line. This gives fullness to the sleeve, allowing for the rod.
Fold this strip in half lengthwise to find the centre point. Also mark the centre point on the back of your quilt top.
Match these points and pin together. Lay the rest of the sleeve flat along the back of your quilt top and pin in place. Make sure that the second fold line is on the outside of the sleeve, not against the quilt back.
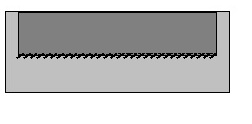
Machine stitch through all layers, along the top edge, of your sleeve and quilt back, using your walking foot. If you make the sleeve stitching line a little closer to the edge of the quilt, it ensures your binding stitching line is positioned correctly.
Now attach your binding to the front of your quilt, stitching through all layers of fabric.
The outer side of the sleeve needs to be rounded so that the quilt hangs without rod distortion. This is achieved by hand stitching the ends of the back of the sleeve down to the second press line, flat against the quilt.
Attach the bottom edge of the sleeve to your quilt by pinning and neatly hand stitching along the second press line of the sleeve, across the width of the quilt.
Attaching the sleeve after the binding has been completed.
Use the same measurements as above, this time making a long tube.
Press your two fold lines as above.
Measure and pin the sleeve as above but this time attach the top of the tube along under the inside edge of the binding. You must make sure that your stitches on the upper edge are firm, small and close together as this line of stitching will be supporting the full weight of your quilt when it hangs.
Attach the bottom edge of the sleeve to your quilt by pinning and neatly hand stitching along the second press line of the sleeve, across the width of the quilt.
I have described to ways to attach a sleeve to your quilt. The first is attaching the rod pocket or sleeve AT THE SAME TIME as completing the binding. The second is attaching the rod pocket or sleeve after the binding has been completed.
Attaching the sleeve at the same time binding your quilt.


Attaching the sleeve after the binding has been completed.

Related Articles
Editor's Picks Articles
Top Ten Articles
Previous Features
Site Map
Content copyright © 2023 by Judie Bellingham. All rights reserved.
This content was written by Judie Bellingham. If you wish to use this content in any manner, you need written permission. Contact Judie Bellingham for details.

