
How To Do It
Now that you have acquired some stamps and have them organized, it is now time to prepare them for resale. Remember to always handle your stamps with stamp tongs! This point can never be emphasized enough. Next we will cover some steps on how to sell your new stamps for a profit.
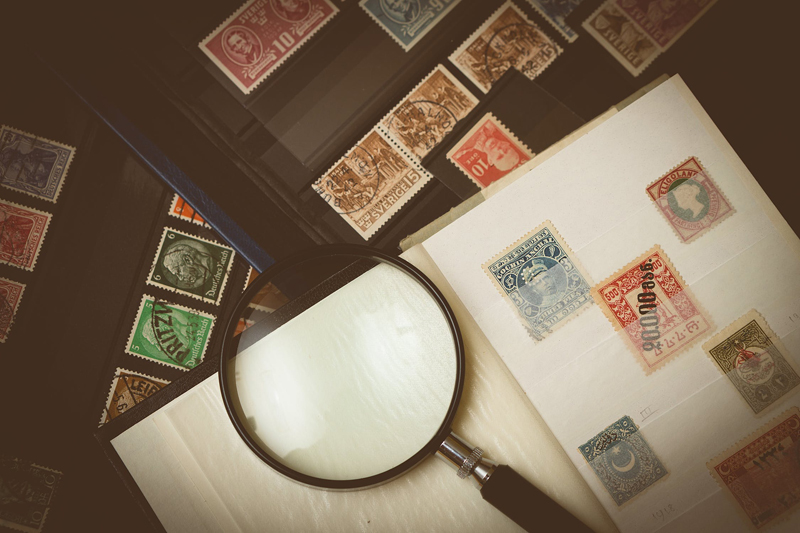
Scanning
When you sell stamps on the Internet, it is very important to have a bright, clear, scan or picture of the stamp you are selling. There is nothing worse than looking at a stamp to buy that is out of focus or an ad with no pictures. Stamps that are photographed often don’t show enough resolution to make an informed decision, and it’s impossible to get it in the correct perspective. The better your pictures, the higher the prices you will realize when you sell the stamp.
Make sure you clean the glass on your scanner to ensure the best images. Use a spray cleaner onto a lint-free rag, and then clean the glass. If you spray the cleaner directly on the glass, some of the spray solution could seep under the edges and cause some major issues.
Always use a black background when scanning stamps. The edges will show up better, and the image will stand out more. If you use a white background, the edges of the stamps will blend into it, and it will be hard to see the details.
You can scan stamps a number of ways. Be creative, but make sure your method will not damage the stamps, and will still provide crisp and clear images.
When you are scanning your stamps, you can use any method you are comfortable with, but here are some recommendations you are welcome to try for yourself:
Whatever method you decide to use, do your best to keep the stamps as straight as possible. This will reduce your work in the long run with your imaging program.
The first method for scanning stamps is setting the stamp directly on the scanner glass, face down. It can be difficult to keep a stamp aligned properly using this method. Make sure you use your stamp tongs to minimize damage to the stamp, such as bending or creasing the stamp.
Cover the stamp with a small, black piece of cardboard. If you set the cardboard down too quickly, the stamp could blow out of position, so try to go slowly. Gently close the scanner lid.
The second method to scan stamps is to use dealer’s stock pages. These are sheets of stiff paper or cardboard designed to fit in stock books. The ones you should look for should have a black background with clear plastic strips running horizontally across the pages.
The background and the plastic strips are made of acid-free materials to avoid damage to the stamps. The plastic strips are fastened to the background so the stamps can be easily slid in and out, yet are held securely. To use them, simply slide your stamps face up behind the strips.
Use tongs to hold the stamp while you are positioning it. Use care to get each stamp as straight as possible. This will minimize your work later. Once the stamps are held in place, turn the page face down on the scanner glass. Gently close the scanner lid.
Refer to your scanner’s documentation on how to scan images using the scanner. The software that came with your scanner should allow you to change a number of different settings.
The default scan resolution, or speed is generally set around 100 to 200 DPI. Change this setting to a higher resolution. Using a resolution of 300 to 400 DPI will allow the scanner to capture more detail. Of course this process results in much bigger file sizes and takes a bit longer but the results are worth it. Go ahead and begin the scan and observe the results.
Labeling
When the scan has completed, remove the stamps from the scanner glass and flip them over to scan the backs, or just put them away. When you put them away, place the stamp into a glassine envelope, with a label as to what it is. You can use printable labels to write information about the stamps.
Just write headings with a line to fill in for the information you need, such as the online a=auction #, Country, Scott Catalog #, Description, Condition, Value, Etc. Never write on the labels when there are stamps in the envelope. In fact, fill out as much of the information as you can before you affix the label to the envelope. The risk of damage to a stamp is just too great.
Make sure you label your images. Try to use a straightforward labeling system, so that you can easily find the correct image you want. If you use the Scott Catalog Number, you will wind up creating duplicates after a while, and it will easily get confusing.
It is much better to number your stamps using your own system. For example, you could start labeling with AA01, AA02, AA03, etc. After AA99, start over with AB01, AB02, etc. This will give you around 67,000 combinations.
By the time you scan that many images, you should be able to start over at the beginning again. Set up a reference page so that you know what image each code refers to. For example:
AA01 US #1 used, red cancel
AA02 Cuba #56 mint never hinged
AA03 US #c3a, inverted, mint, no gum
This way, when you are posting your online auctions, you will know at a glance what image to use. You can set up this labeling system in a spreadsheet such as the one in Microsoft Office or Open Office.

Related Articles
Editor's Picks Articles
Top Ten Articles
Previous Features
Site Map
Content copyright © 2023 by Gary Eggleston. All rights reserved.
This content was written by Gary Eggleston. If you wish to use this content in any manner, you need written permission. Contact Gary Eggleston for details.
