
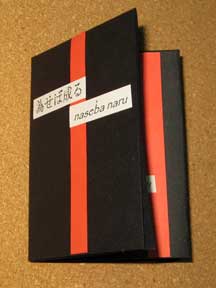
 Heres how to make a mini book using a single sheet of cardstock no binding required. Whats great about this card is that it folds into a typical book form, but can be unfolded to reveal more text or an image on the inside.
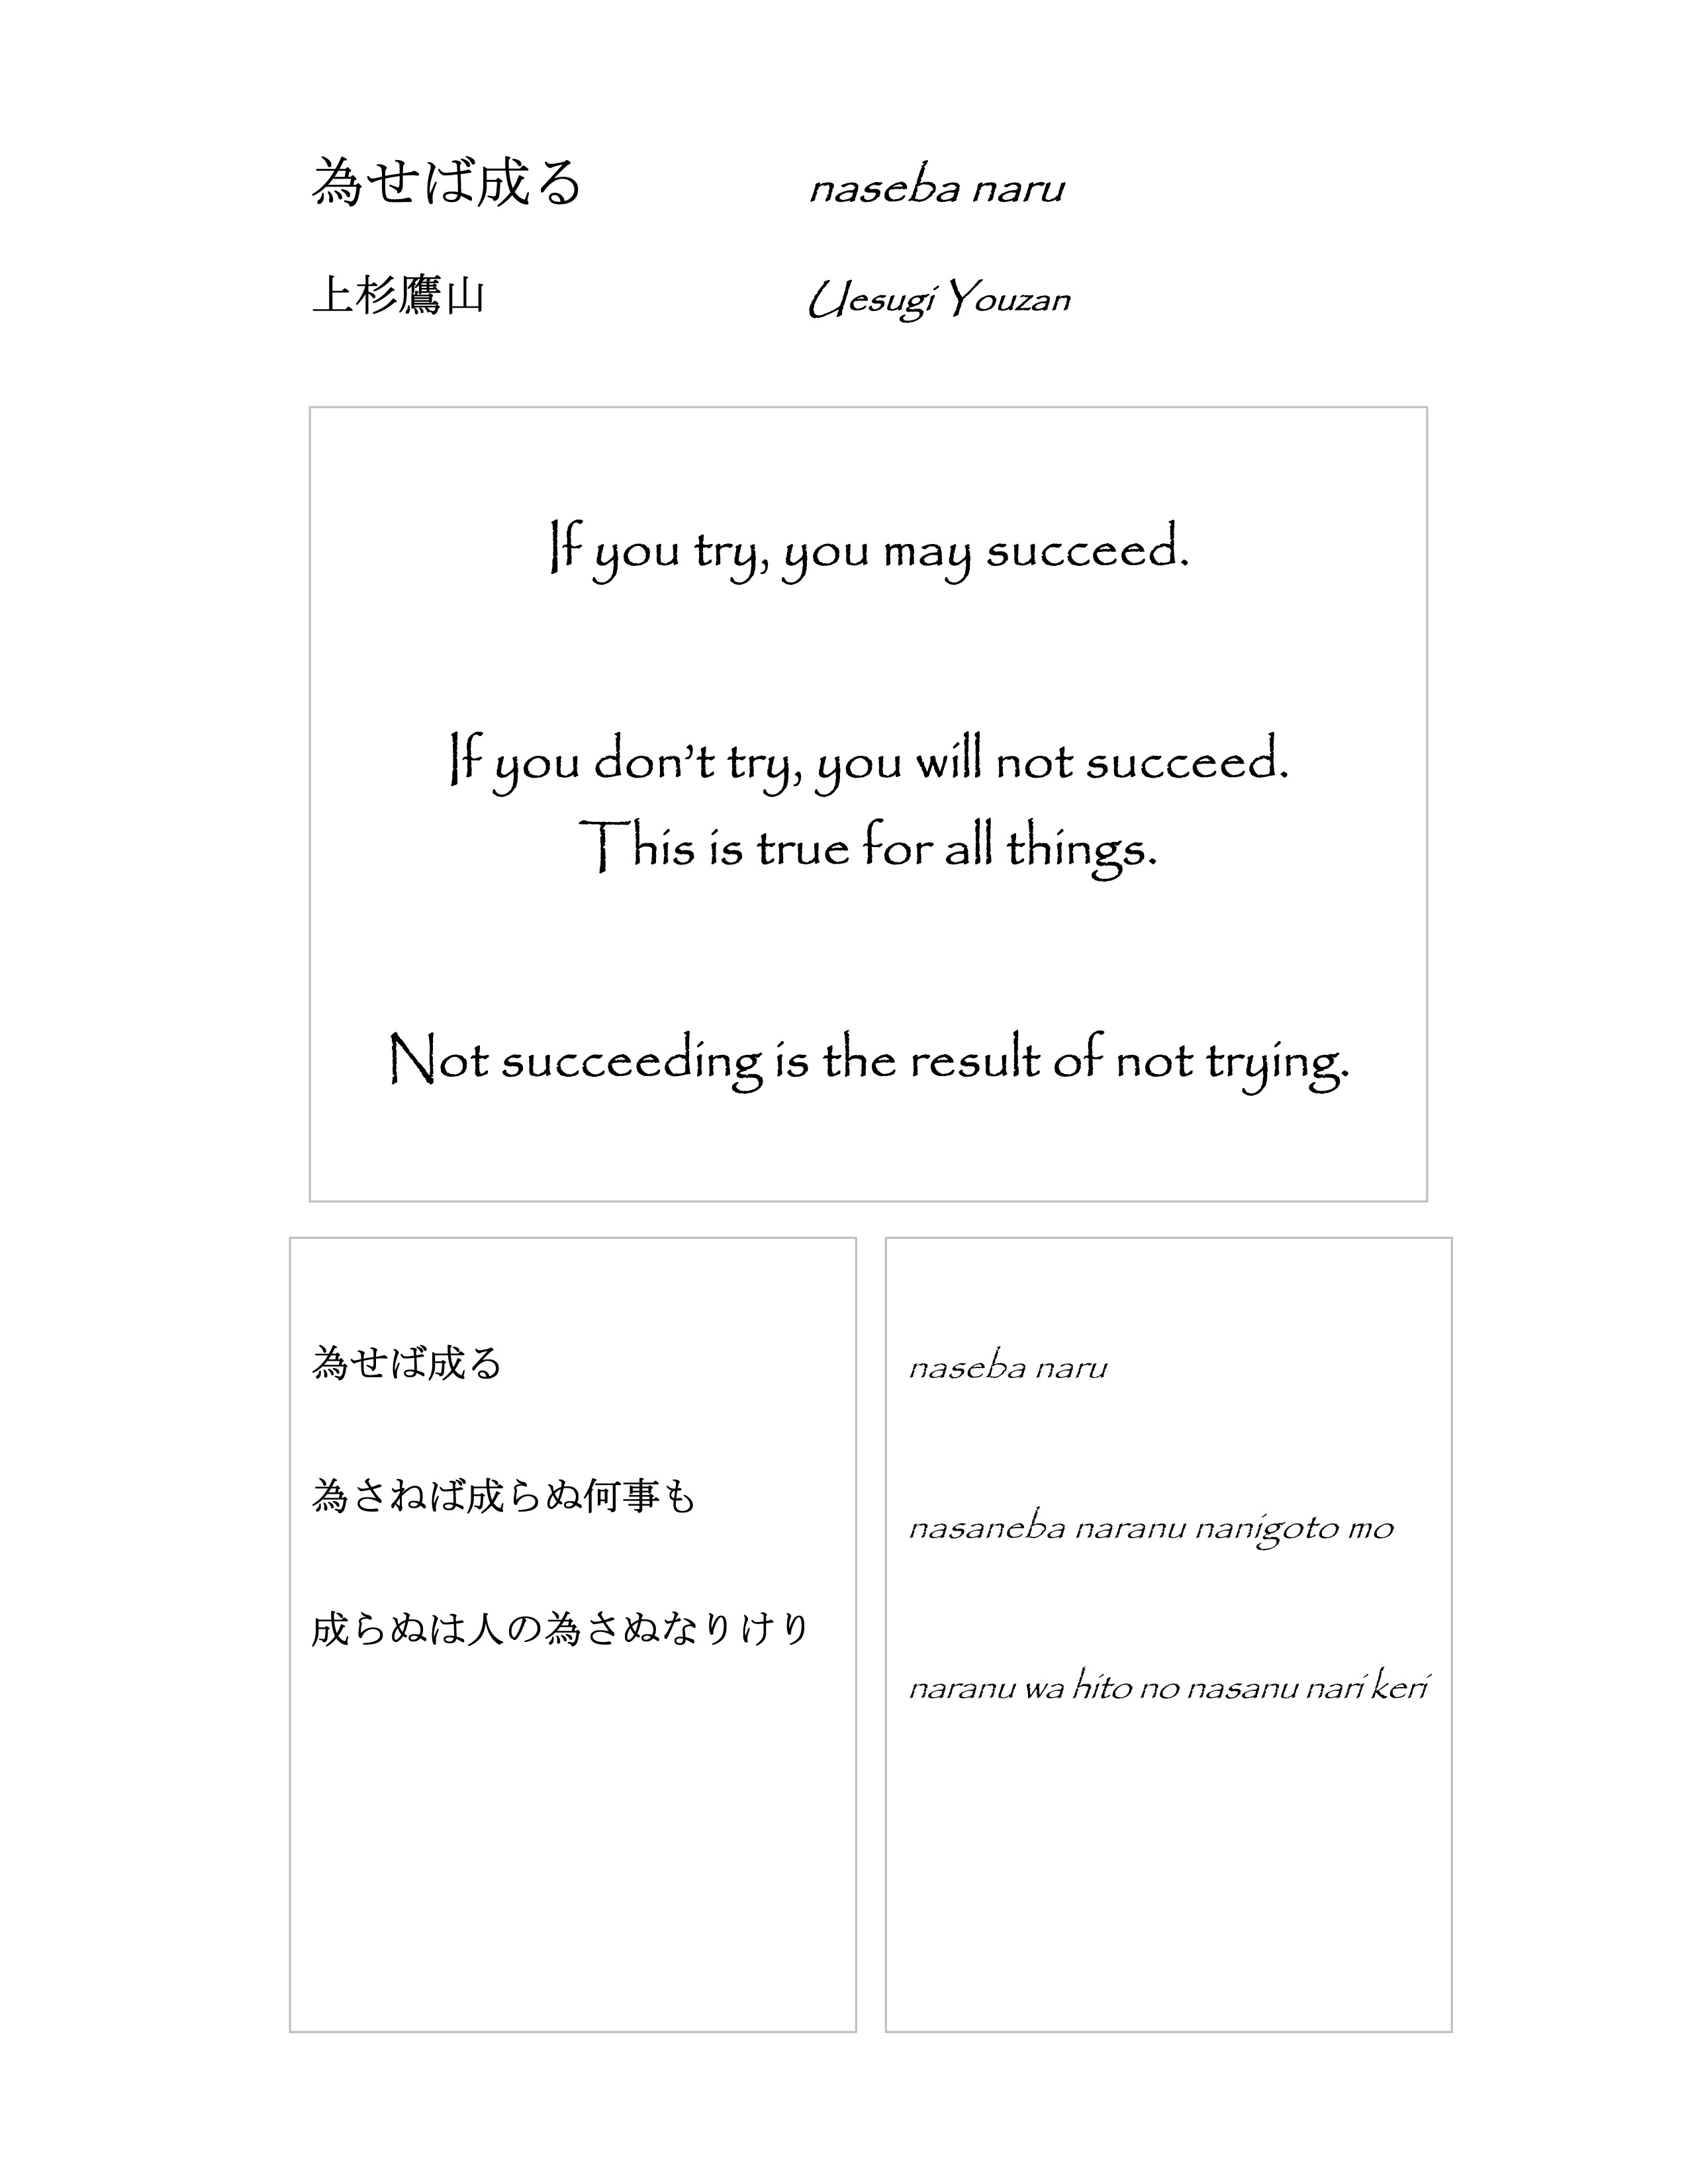
 For this project, I wanted to highlight a lovely piece of Japanese paper, and so decided to use a short poem by Uesugi Youzan, a Japanese lord from the Edo period, to match the paper. (Thanks to Lloyd Vincent of Nihonshock.com for the text and translation!) If youd like to follow along, you can download the file with the text here, and print it out. If you dont have access to a printer, you may also hand letter the text using a pen.
Try making this kind of book with double-sided patterned paper and decorate it as much or as little as you want with stamped images, die cuts and punched shapes, stickers, collages, doodles make it your own, and have fun!
 You will need:
* Black cardstock, A4 size
* Japanese paper, around 5-3/4 by 4 inches
* Red paper, 3 by x 4 inches
* White copy paper, A4 size
* Text for the pages (use this or create your own)
* Access to a computer printer
* Ruler
* Craft knife and cutting mat
* Scissors
* Glue stick
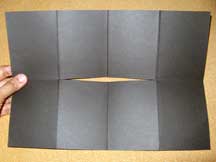
Fold and unfold the cardstock in half lengthwise to crease it, then fold and unfold it crosswise. Take the two short ends of the sheet and fold them so that they meet in the center; the sheet should now be divided into eight sections. Now carefully make a slit lengthwise down the middle of the four inner sections:
Fold the sheet lengthwise, then fold the middle sections outward, forming a diamond shape:
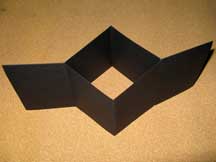
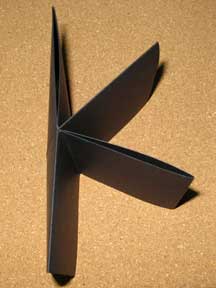
Flatten the diamond so that the flaps or pages all meet at the spine and form something like the letter K:
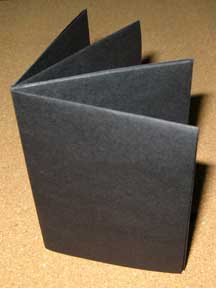
Close the book. The first and third pages (or flaps) should have a fold on top, while the second and fourth pages would have the fold in front. Your book is now ready for decorating!
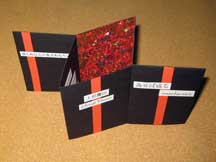
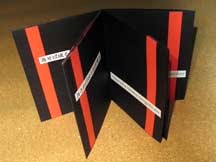
Cut a strip of red paper measuring 3/8 by 4 inches, and stick it right down the middle of the cover. Do the same for the back cover. For the pages, cut six more strips of red paper measuring 3/8 by 4 inches. For each left-hand page, glue the strip on the left side; for each right-hand page, glue the strip on the right.
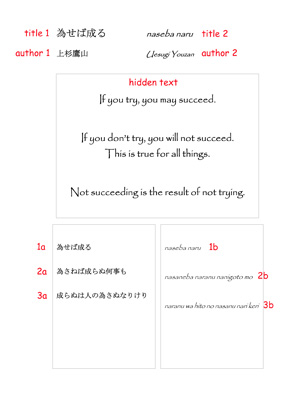
Next, print out the Japanese poem onto plain white copy paper. Cut out the title in Japanese characters (marked as title 1 in the guide). Glue the text on the left side of the cover, about one third from the top, and overlapping the red paper. Cut out the title in western characters (title 2) glue it to the right side of the cover, just below the Japanese characters and overlapping the red paper.
Flip the book and work on the back cover. Cut out the authors name in Japanese (author 1) and western (author 2) characters and, with the Japanese text above the western text, glue them right on the red paper, a third of the way from the top of the cover.
For the pages, all the Japanese text goes on the left page near the top, while all the western text goes on the right page, near the bottom. So for the first page spread, cut the first lines of the poem (1a and 1b), and glue 1a on the left page, about a third of the way from the top and overlapping the red paper, and glue 1b on the right page, about a third of the way from the bottom and overlapping the red paper. Repeat on the next two spreads, using the respective text (2a and 2b for the second spread, and 3a and 3b for the third).
Now for the inside. Unfold the sheet and lay it with the plain side facing up; the front and back covers (at the back of the sheet) should be at the lower left corner. Now cut into strips the English version of the poem (marked as hidden text in the guide), and then glue them all onto the two middle bottom pages (below the slit), making sure that they are evenly spaced and that they are in the same orientation as the text behind them.
Next, cut the Japanese paper to the indicated size, and glue it to the two middle pages right above the English version of the poem. Trim any excess paper. Note: If the design of the Japanese paper has a distinct top and bottom, see to it that paper is placed the right way, that is, the top of the paper should be at the slit.
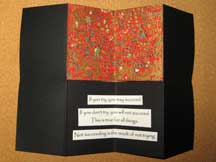
Fold the book. Youre done! When you flip through the pages, youll see just the Japanese version of the poem, but if you expand the book by pulling on the top-folded pages, youll see a patch of beautiful paper and the English version of the poem peeking at you from the inside simply unfold the book to see everything!
