You will need:
* Clean, empty snack food canister (our example uses a 50g container of shoestring potatoes)
* Decorative paper, long enough to wrap around the canister with a bit of overlap, and as wide as the height of the canister
* Decorative paper, the same length as the first piece and about half its width
* Ribbon, two pieces each as long as the decorative paper
* Ruler
* Pencil
* Scissors
* Double-sided tape
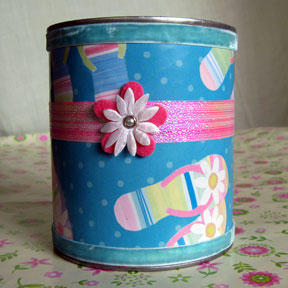
Measure and cut the larger piece of decorative paper. Wrap the paper around the canister and secure with double-sided tape. Trim off any excess.
Measure and cut the smaller piece of decorative paper. Wrap it around the canister, centering it so that there is an even border above and below it. Secure with double-sided tape.
Measure and cut the two pieces of ribbon. Stick a length of double-sided tape to the back of the ribbons. Depending on the width of the tape and ribbon, you may have to trim the tape in half lengthwise to fit the ribbon. Tape the ribbon around the bottom edge of the smaller piece of paper. Tape the second ribbon around the top edge of the smaller piece of paper. That's it! The basic pencil holder is done, but you can spruce it up further with your choice of embellishments.
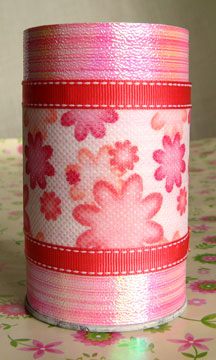
The second pencil holder is made from a bigger, 106g snack canister and is made by following the same procedure above, with a few adjustments. As with the first example, the larger piece of decorative paper is long and wide enough to cover the canister. The smaller piece of decorative paper is 3/4 of an inch wide, and is positioned 1/3 of the way from the top. A matching fabric flower attached to this strip with double-sided tape serves as an accent. The two pieces of ribbon are used to cover any irregularities at the edges of the can.