
The best paper to use for this project is patterned scrapbook paper or thin cardstock, since it’s thick enough to hold its shape yet not too thick to be unwieldy and difficult to bend.
You will need:
* 12 pieces of patterned scrapbook paper or thin, colored cardstock, each piece measuring 1 inch by 6 inches
* Paper fastener or brad
* 3/8-inch wide ribbon, 10-12 inches in length
* Ruler
* Pencil
* Scissors
* Craft knife and cutting mat, or paper trimmer
* Hole punch
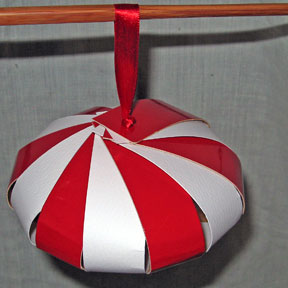
Measure and cut the paper strips to the specified size. Stack the strips with the patterned side (or front) facing up. Punch a hole through the strips about a half inch from each end. Insert a paper fastener or brad through the bottom hole from the front side of the stack and open the prongs to keep the strips together. Take the ribbon, put the ends together and tie them in a knot. From the back side of the stack, thread the ribbon loop through the other hole. Tie another knot on the ribbon as close to the stack as possible, so that the paper strips are snug against each other. Now bend the stack of paper into a C shape with the patterned side on the outside of the curve. Carefully spread out the strips to form a slightly flattened ball. Adjust the spacing of the strips as needed.
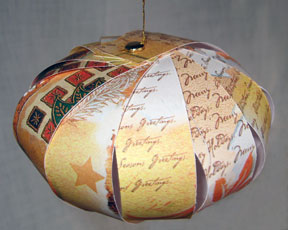
Another way to make the ornament is to use two fasteners and string instead of a ribbon. Insert the fasteners into the holes of the stack and open the prongs to keep the strips together. Take a 10-inch length of string (crochet thread or six-strand embroidery floss will do nicely), and bring the ends together and tie them in a knot. Tie the knotted end securely to the fastener, just below its head so that thread is between the fastener and the paper. The loop at the other end of the thread forms the hanger.
