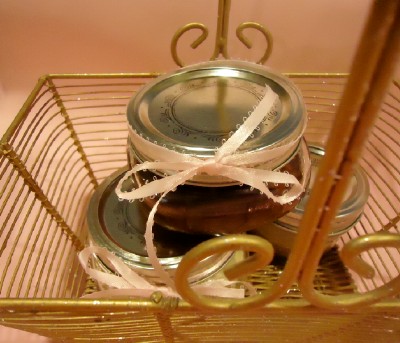
g
Printer Friendly Version

editor   Katherine Tomlinson
BellaOnline's Chocolate Editor
 

Halloween Cookie Recipe

I never carved a pumpkin for Halloween until I grew up. I was one of six children; even if we'd had the money for a pumpkin per kid, we didn't have room or knives enough for us all to carve -- and none of us would have been able to wait patiently for a sibling to finish.

But I did get to create faces for pumpkins every year. As many as I wanted. No worries about hurting myself or anyone else. And when I was done, I got to eat them.

My mother made this recipe every Halloween. Chocolate isn't the main ingredient, but it's the most important one. Without it, these would just be boring orange sugar cookies.

Soften three-fourths of a cup of butter (a stick and a half). Put a couple of eggs on the counter to come to room temperature at the same time that the butter is relaxing.

When the butter has some give (don't let it melt completely, or the cookies won't have the right crunch to them), cream it with a cup of granulated sugar. Beat these until light and fluffy with a wooden spoon or hand mixer. Add the two eggs and one to two teaspoons of vanilla, and beat the mixture thoroughly.

Now stir in food coloring to dye the dough orange -- these are going to be pumpkins, after all. If you can find orange food coloring, great. If not, three or four drops of yellow to one drop of red will get you there just fine.

You need to make the dough a pretty deep orange, because you'll be adding a lot of flour in a minute and that will lighten up the color quite a bit. You can always try adding more food coloring after that, but it's a lot easier to mix it in before you add the dry ingredients.

When the dough is colored to your satisfaction, stir together in a separate bowl two and a half cups all-purpose flour, one teaspoon baking powder, and one teaspoon salt. I like to use a whisk, to make sure that the baking powder doesn't get antisocial and clump together in a corner.

Stir the dry ingredients into the orange dough. Mix thoroughly with a wooden spoon. Shape into a ball, dust lightly with flour, and wrap in plastic. Chill in the refrigerator for at least an hour.

When the hour's up and the dough is nice and firm, preheat the oven to 350 degrees. Get the cookie dough out of the fridge and roll it out about a third of an inch thick on a floured surface. (I know it's a weird measurement, but a quarter of an inch is too thin -- the cookies will burn, and won't hold the chocolate chips -- and half an inch is just too much.)

Dip a cookie cutter or the mouth of a smallish glass in flour and use it to cut out two- or three-inch circles of dough. Put these on cookie sheets. Space them out a bit -- they'll expand as they bake.

When you have plenty of "pumpkins," get out a bag of chocolate chips and settle down to "carve." You have to use traditional chocolate chips, like Nestle's, for these. Chocolate chunks or mini chips won't do the trick.

Start with the basics. Push two sideways chocolate chips gently into a circle of dough. You'll know you have it right if they look like little triangles, just like you might carve into a pumpkin to make a couple of mischievous dark eyes. Put another chip under them for a nose, and then, of course, a smile or a frown of chips below.

Don't push the bottoms of the chips into the cookies, so the chips stand up like pyramids. The chips shouldn't be bulging out at you. They should lie sideways, like a chess king that's just been defeated.

Once you've got the basic face down, experiment. Make a vampire pumpkin. Point the triangles down instead of up. Make circles for eyes or a nose by pushing the points of the chips into the cookies.

When all your pumpkins have been carved, put them in the oven. They should be golden tan on the bottom. Start checking after ten minutes.

Take the cookie sheets out and put them on racks to cool. If you like your cookies very crisp and crunchy, slide them off the sheets after a minute to cool directly on the racks. If you like them softer, let them cool completely on the sheets.

Don't try to stack these cookies until they've cooled overnight, or the chips will smudge. Store them in an airtight container or freezer bags.

Chocolate Site @ BellaOnline
View This Article in Regular Layout

Content copyright © 2009 by Deborah Markus. All rights reserved.
This content was written by Deborah Markus. If you wish to use this content in any manner, you need written permission. Contact Katherine Tomlinson for details.


| About BellaOnline | Privacy Policy | Advertising | Become an Editor |
Website copyright © 2009 Minerva WebWorks LLC. All rights reserved.


BellaOnline Editor