
As you can see, there is only one frame in the Timeline so far. We will now divide the Timeline into sections that will represent the webpages of your site. We will do this on a new layer that we will call Actions. Although we will lay out the sections in a linear fashion that does not mean that your readers must view these webpages in this same linear order. This is just a way for us to visualize the webpages of your Flash movie. Open your Flash .fla file and let's get started.
Step 1. Rename Layer 1. Double click on Layer 1 and rename this layer Recurrent.
 Insert Layer Button
Step 2. New Actions Layer. Click on the Insert Layer button and Flash will create a new layer above the Recurrent layer. Rename this new layer Actions.
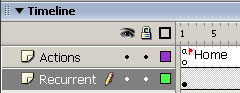
Step 3. Frame 1 Is Home. We will designate Frame 1 in the Timeline as the Home webpage. So click on Frame 1 in the Actions layer. You will notice that it already has a Keyframe (look for the little white circle) but we still need to label the frame Home. Go to the Property Inspector and type Home in the Frame label box. You should see a tiny flag appear in Frame 1 on the Timeline.
Continue
