
Crown Star Basic Block Instructions

Basic Blocks PLUS... is a series of instructions to make traditional 12" block patterns PLUS instructions for making the same block in 6", 8" or 10" dimensions.
This set of instructions is for the Crown Star. When you use your favourite search engine and look for the Crown block you will be amazed at the many different block patterns that result from that search. From a quick count over about 3 pages, I counted no less than 14 different Crown Star blocks. This particular version of Crown Star block is one of my favourites. It looks magnificent in just two colour ways, and also looks fantastic in a scrappy version, so it’s a great scrap buster.
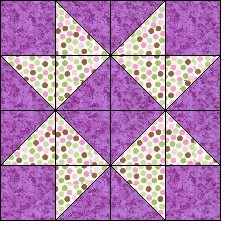
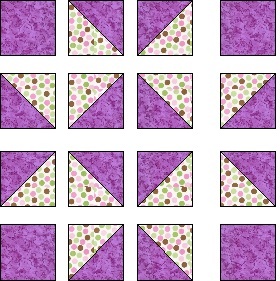
Here's a diagram of how this block looks when put together using a two color scheme.
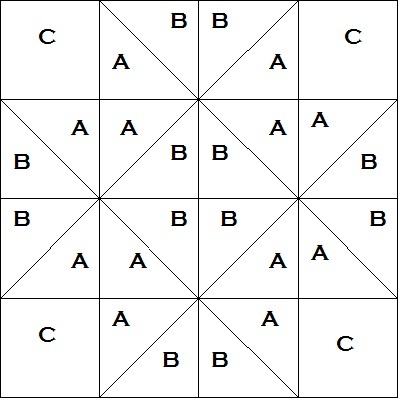
See below, the diagram of the block above, showing the three templates in a black and white setting for this block. Today we’re using a plain purple and a multicoloured spot. Yummy!
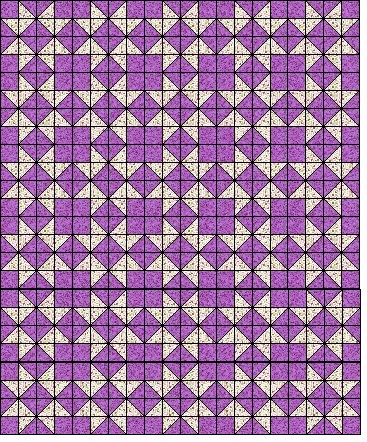
This version of Crown Star block is made using two color choices. It is a very simple block to make, and is a pleasing pattern. Here’s how the block can look when put together in a quilt. Please note, that there are many different ways this block can be placed. Once you’ve made a few blocks, have a play.
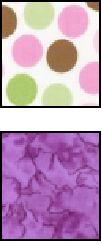
Two colors used are Purple and a multicoloured spot.
Cutting Instructions
First of all, lets refresh our memory for making Half Square Triangles. Both Templates A & B are triangles and sometimes stitching two triangles together on the bias can be difficult to achieve a neat finish. Half Square Triangles (HST’s) have been invented to make putting two triangles together so much easier.
Click here to download the instructions for making Half Square Triangles
Cutting Instructions for making a 6” block
Template A: Cut 1 x 2 3/8” wide strip of purple fabric and cut 6 x 2 3/8” squares. Cut the six squares diagonally to make 12 triangles.
Template B: Cut 1 x 2 3/8” wide strip of multicoloured spot fabric and cut 6 x 2 3/8” squares. Cut the six squares diagonally to make 12 triangles.
Template C: Cut 1 x 2” wide strip of purple fabric and cut 4 x 2” squares.
Cutting Instructions for making a 8" block
Template A: Cut 1 x 2 7/8” wide strip of purple fabric and cut 6 x 2 7/8” squares. Cut the six squares diagonally to make 12 triangles.
Template B: Cut 1 x 2 7/8” wide strip of multicoloured spot fabric and cut 6 x 2 7/8” squares. Cut the six squares diagonally to make 12 triangles.
Template C: Cut 1 x 2 1/2” wide strip of purple fabric and cut 4 x 2” squares.
Cutting Instructions for making a 10" block
Template A: Cut 1 x 3 3/8” wide strip of purple fabric and cut 6 x 3 3/8” squares. Cut the six squares diagonally to make 12 triangles.
Template B: Cut 1 x 3 3/8” wide strip of multicoloured spot fabric and cut 6 x 3 3/8” squares. Cut the six squares diagonally to make 12 triangles.
Template C: Cut 1 x 3” wide strip of purple fabric and cut 4 x 3” squares.
Cutting Instructions for making a 12" block
Template A: Cut 1 x 3 7/8” wide strip of purple fabric and cut 6 x 3 7/8” squares. Cut the six squares diagonally to make 12 triangles.
Template B: Cut 1 x 3 7/8” wide strip of multicoloured spot fabric and cut 6 x 3 7/8” squares. Cut the six squares diagonally to make 12 triangles.
Template C: Cut 1 x 3 1/2” wide strip of purple fabric and cut 4 x 3 1/2” squares.
Sewing Instructions
Step 1: Using the instructions for the Half Square Triangle Units, make 12 x HSTU from the purple and multicoloured spot fabric using templates A & B.
Step 2: Using the diagram above as a guilde, place the half square triangle units into a block on your work bench in front of you, and then place the remaining 4 squares to complete the block.
Step 3: Stitch the top row together first, then the second, third and fourth lines.(see diagram below)
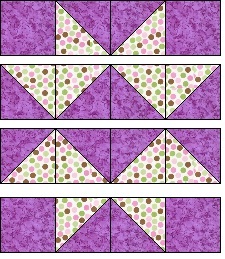
Step 4: Stitch rows one and two together, then three and four together, and then finally stitch the first top two rows to the bottom two rows.
Congratulations! This block is complete.

Related Articles
Editor's Picks Articles
Top Ten Articles
Previous Features
Site Map
Content copyright © 2023 by Judie Bellingham. All rights reserved.
This content was written by Judie Bellingham. If you wish to use this content in any manner, you need written permission. Contact Judie Bellingham for details.

