
How to Embroider Faces on Cloth Dolls

Probably the most popular way to put faces on cloth dolls is to embroider them. Cloth dolls lend themselves to embroidered faces, and it's easy to do.
Your doll's face can be as simple or detailed as you want it to be. Even if you don't have much experience with embroidery, you can do this. Eyes can be as simple as two French Knots, or as involved as Satin Stitch irises and long, curling eyelashes.
To begin, you'll need to decide how you want your doll to look. For an example of a Raggedy type face look at this article, 15 Inch Annie Doll.
To embroider Annie's face I used 3 strands of 6 strand embroidery floss. The line for the mouth, the underline of the eyes and the lashes are Outline Stitch and the nose and eyes are Satin Stitch. For an explanation of the most common stitches used in doll making Look Here.
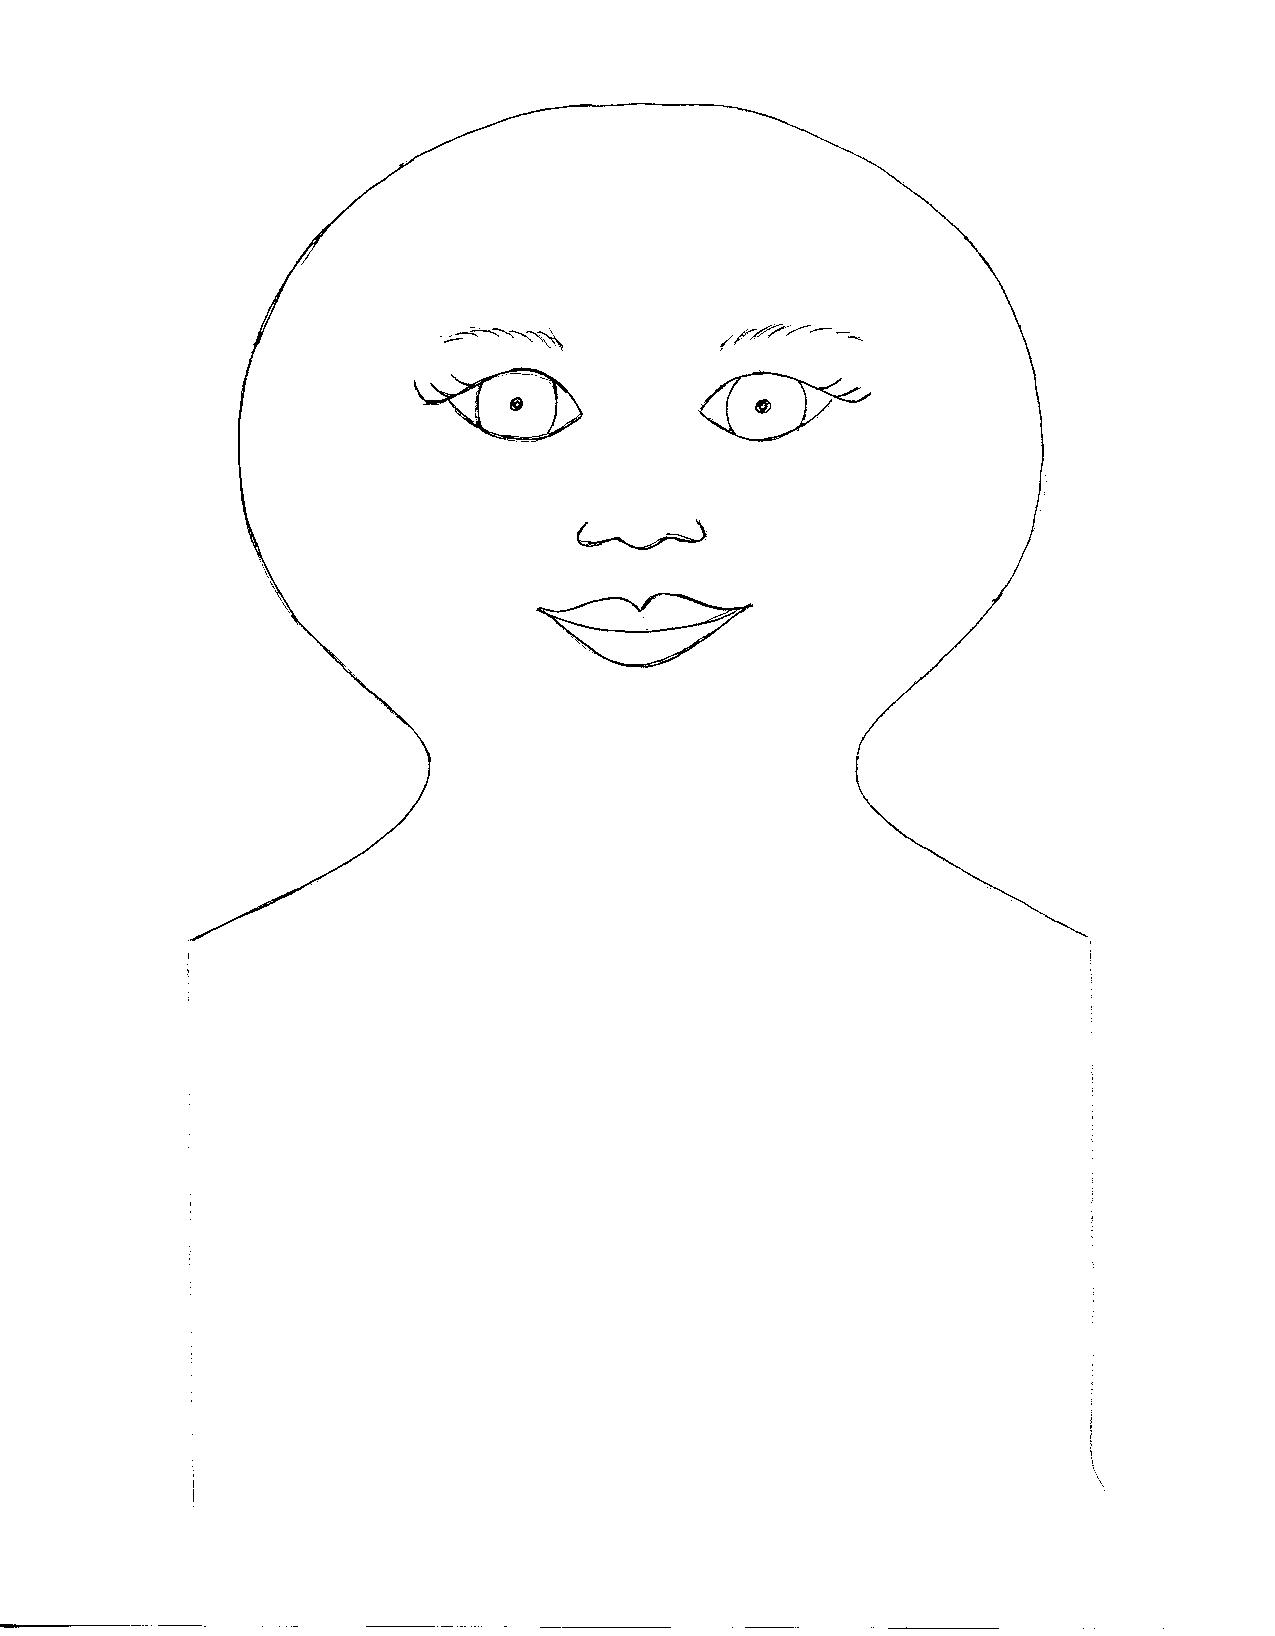
Once you've decided how you want your doll to look, it's time to make a pattern. The pattern below is one I use for painting doll faces onto cloth dolls, but it will work equally well for embroidery. You may use it for your own personal use. If you would like to design your own pattern trace the cut out head of your doll onto a plain piece of paper, being careful to center the head on the paper. Now fold the paper in half from top to bottom. Open it out flat and the fold line is the center of your face. The easiest way to make sure all features are the same on both sides is to draw half the features on one side of the fold. That is one eye, half the nose and half the mouth. Refold the paper, hold it up to a window, and trace the features onto the other side.
Trace your pattern onto the fabric using a fabric marker or pencil, then put the fabric into a small embroidery hoop to keep it tight while you stitch.
Making and Dressing Cloth Dolls
Ebook with patterns and instructions to make 5 cloth dolls as well as chapters on general doll making techniques.The book includes 21 inch Lalena Doll, 21 inch David Doll, Bear Dolls, 9 inch Destiny Doll and 15 inch Annie Doll, all together in one handy book. 53 pages.Making and Dressing Cloth Dolls.
Your doll's face can be as simple or detailed as you want it to be. Even if you don't have much experience with embroidery, you can do this. Eyes can be as simple as two French Knots, or as involved as Satin Stitch irises and long, curling eyelashes.
To begin, you'll need to decide how you want your doll to look. For an example of a Raggedy type face look at this article, 15 Inch Annie Doll.
To embroider Annie's face I used 3 strands of 6 strand embroidery floss. The line for the mouth, the underline of the eyes and the lashes are Outline Stitch and the nose and eyes are Satin Stitch. For an explanation of the most common stitches used in doll making Look Here.
Once you've decided how you want your doll to look, it's time to make a pattern. The pattern below is one I use for painting doll faces onto cloth dolls, but it will work equally well for embroidery. You may use it for your own personal use. If you would like to design your own pattern trace the cut out head of your doll onto a plain piece of paper, being careful to center the head on the paper. Now fold the paper in half from top to bottom. Open it out flat and the fold line is the center of your face. The easiest way to make sure all features are the same on both sides is to draw half the features on one side of the fold. That is one eye, half the nose and half the mouth. Refold the paper, hold it up to a window, and trace the features onto the other side.
Trace your pattern onto the fabric using a fabric marker or pencil, then put the fabric into a small embroidery hoop to keep it tight while you stitch.
Making and Dressing Cloth Dolls
Ebook with patterns and instructions to make 5 cloth dolls as well as chapters on general doll making techniques.The book includes 21 inch Lalena Doll, 21 inch David Doll, Bear Dolls, 9 inch Destiny Doll and 15 inch Annie Doll, all together in one handy book. 53 pages.Making and Dressing Cloth Dolls.
You Should Also Read:
Embroidery Stitches Used in Doll Making
Sewing on Yarn Doll Wigs
Care and Cleaning of Cloth Dolls

Related Articles
Editor's Picks Articles
Top Ten Articles
Previous Features
Site Map
Content copyright © 2023 by Helen B. Wharton. All rights reserved.
This content was written by Helen B. Wharton. If you wish to use this content in any manner, you need written permission. Contact Helen B. Wharton for details.
