
Doll Studio Wall Decor

My husband and I have just moved to a house where I can have a room of my own, for my dolls, doll making, sewing, crafts and office. I am so thrilled and so far the unpacking has been a lot of fun. One of the first things I unpacked and hung was an adorable piece of wall decor for my room. This was a gift to me from a three year old friend who also loves dolls, thank-you Jynessa! As soon as I got this lovely little design hung I knew I was home.
I hung my sign right above my computer so it can inspire me as I write my articles and design my dolls and doll clothes. So I thought it would be a great idea to pass along to all of you. Not only is it lovely to look at for yourself, but it would make a wonderful gift for any doll lover, and the Holidays will be here before you know it.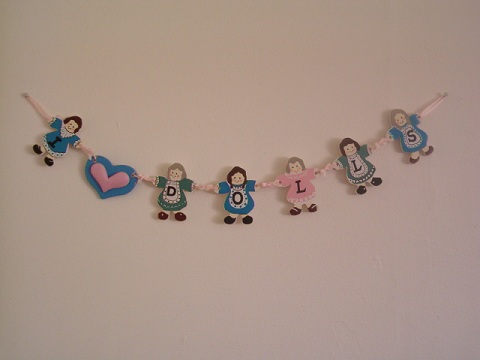
As I said, I was given my sign, but it would be easy to make one like it. You will need 6 girl shapes made of wood. Alternatively, you could use a combination of girl and boy shapes, depending on the dolls you like. You can find the wood shapes in the large craft supply stores. You will also need small amounts of a selection of acrylic craft paints, to paint the little dolls. In addition you will need a heart shape in wood, in a size to coordinate with your doll shapes; and some 1/8 inch wide satin ribbon.
My sign has 1/8 inch holes drilled into the hands of each doll, to thread the ribbon through. If you do not have a drill, or don't want to put holes in the little dolls you can glue them to the ribbon using a hot glue gun.
First paint the heart and the dolls in a color scheme of your choosing. As you can see in the photo, each doll is a little different from the others, so use your imagination when painting their hair and dresses, and don't forget the shoes!
When the paint dries completely, thread the ribbon through the first doll's hands, leave enough ribbon so you will be able to make a long enough loop to hang the sign with. Between the dolls, or the dolls and the heart, make a smaller loop and tie it so that there is a bow in the front, between each piece. When you get to the end repeat the larger loop like on the first doll, to hang it on. Enjoy!
Making and Dressing Cloth Dolls
Ebook with patterns and instructions to make 5 cloth dolls as well as chapters on general doll making techniques.The book includes 21 inch Lalena Doll, 21 inch David Doll, Bear Dolls, 9 inch Destiny Doll and 15 inch Annie Doll, all together in one handy book. 53 pages.Making and Dressing Cloth Dolls.

Related Articles
Editor's Picks Articles
Top Ten Articles
Previous Features
Site Map
Content copyright © 2023 by Helen B. Wharton. All rights reserved.
This content was written by Helen B. Wharton. If you wish to use this content in any manner, you need written permission. Contact Helen B. Wharton for details.
