
Simple Sashing Quilt for Charity

 Simple Sashing Quilt
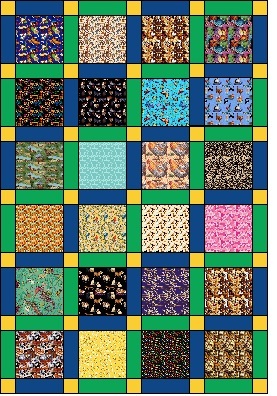
Here is a pattern I’ve created for those who wish to make a Linus quilt for charity. Many quilters are loathe to put together a quilt that requires sashing because it can sometimes be difficult to match up all the seams. This technique helps to make sashing much easier and very simply, without tears! This quilt measures 44 -1/2” x 65-1/2”when completed. This quilt makes a great size for a young adult quilt.
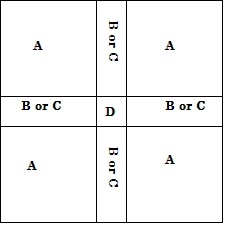
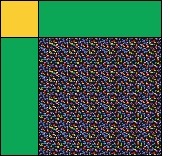
Here's a black and white map of one block for easy identification of templates and their placement.
Fabric Requirements:
Green Fabric:1/2 yard (50cm)
Blue Fabric:1/2 yard (50cm)
Yellow Fabric:1/4 yard (25cm)
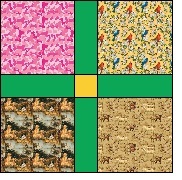
Theme Fabric:Approximately 10”x 10” square for each of the 24 theme fabrics (25cm x 25cm)
Binding:1/2 yard (50cm)
Cutting Instructions

Green Fabric:

Blue Fabric:

Yellow Fabric:

Theme Fabric:
Sewing Instructions:
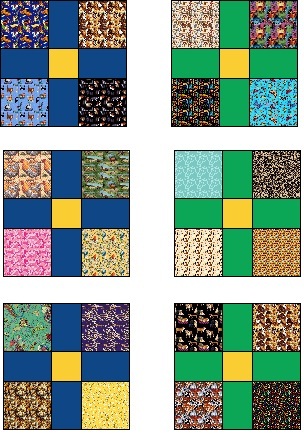
Step 1: First Step is to make up six SUPER BLOCKS. Make three super blocks using Templates A & B and three super blocks using Templates A & C. (See diagram).

Step 2: Piece together the remaining C & B templates together with the yellow C templates (See diagram) This becomes the final sashing for the outer right and bottom of the quilt. (Don’t worry if you don’t understand yet, it will become clear in a minute)

Step 3: Now it’s time for the MAGIC
Firstly, cut the previously pieced sashing in half. That’s right! Right down the middle to make two sashings. The two sashings should be 2-1/2” wide.
Step 4: Cut the six super blocks in half crosswise, and downwise. (See diagram).

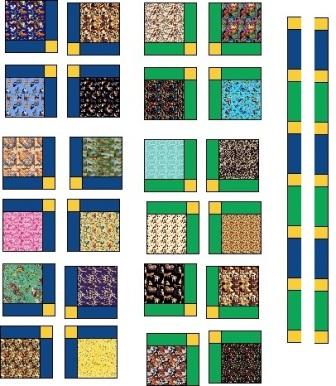
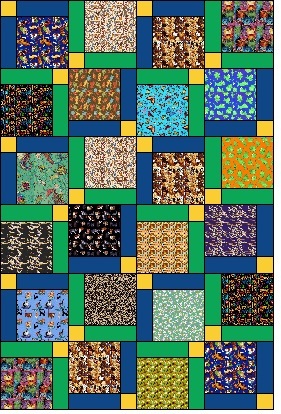
Step 5:Turn all the blocks, positioning the yellow square in the top left corner and lay them out ready for piecing together. (See diagram).
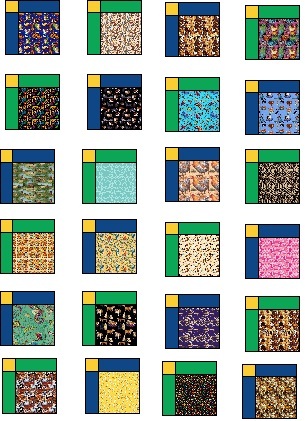
Step 6:Join all of these blocks together to match the diagram below. Notice that the sashing for the right side and bottom are missing. That’s where our two strips of sashing come into play.
Step 7:Sew the a sashing piece to the bottom of the quilt, leaving off the yellow square. (You will have a few waste bits here).Sew the remaining sashing piece to the side of the quilt, this time including the yellow square.
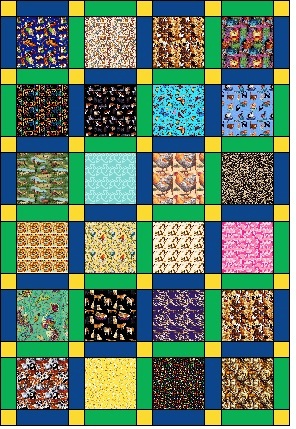
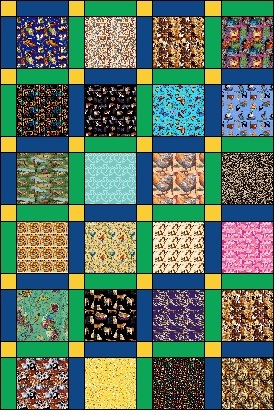
ALTERNATE PATTERN:Back at Step 5, you can place the blocks as shown in the diagram below and the result is another stunning quilt top.
Step 9:All that’s left now is to sandwich the quilt, machine or hand quilt it and finally bind the quilt. What a wonderful gift you’ve made for someone that is in need of your generous compassion.
Click here for a PDF of these instructions.

Related Articles
Editor's Picks Articles
Top Ten Articles
Previous Features
Site Map
Content copyright © 2023 by Judie Bellingham. All rights reserved.
This content was written by Judie Bellingham. If you wish to use this content in any manner, you need written permission. Contact Judie Bellingham for details.

