
Thank You Card in Affinity Designer
In this Affinity Designer tutorial, we will create a simple geometric thank you card design. This is a great tutorial for the beginner, as you will learn how easy it is to use the shape and text tools in Designer.
First we need to decide the dimensions for our card. I like to use the dimensions suggested by Canva just in case I decide to print the card. Canva's default card size is a landscape 5.5 x 4.25 inches at 300 dpi. They also suggest using CYMK colors, if you plan to have your project printed.
Next, we will size and position the shapes within the design.
Next
Screenshots used by permission of Serif (Europe) Ltd. This article is not endorsed by Serif Ltd.
First we need to decide the dimensions for our card. I like to use the dimensions suggested by Canva just in case I decide to print the card. Canva's default card size is a landscape 5.5 x 4.25 inches at 300 dpi. They also suggest using CYMK colors, if you plan to have your project printed.
- Start a new document in Affinity Designer using the following settings (see screenshot, screenshot).
Width: 5.5 inches
Height: 4.25 inches
DPI: 300
Units: Inches
Color Format: CMYK/8 - Lets add a solid white background layer. Using the Rectangle tool, draw a rectangle over the entire canvas. In the Context toolbar, set the Stroke to Null and the Fill to white (see screenshot).
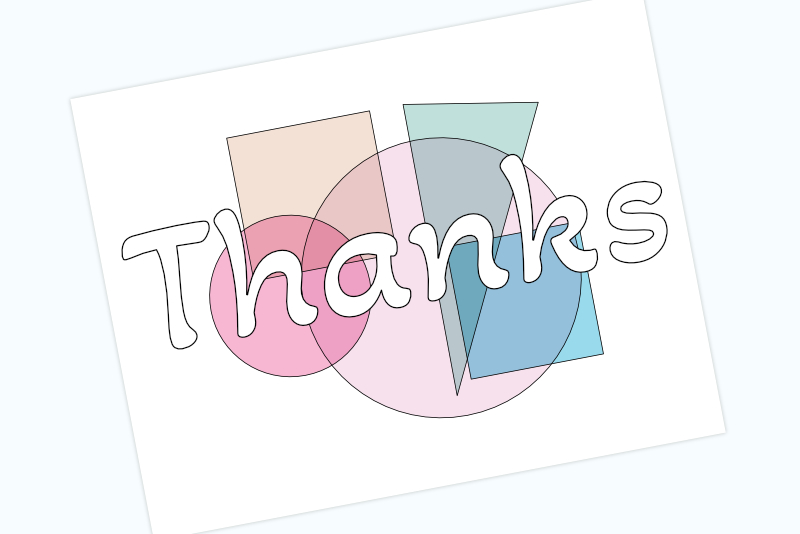
- Let's draw the first rectangle. Using the Rectangle tool again, draw a small rectangle on the canvas. In the Color panel, set the color to a light tan or the color of your choice. In the Layers panel, set the Blend Mode to Multiply (see screenshot).
CMYK (4, 11, 13, 0) - Repeat the previous step, but set the color to light blue or your choice (see screenshot).
CMYK (37, 0, 5, 0) - Next, with the Pen tool, draw a triangle on the canvas and set the color to a light green color. In the Layers panel, set the Blend Mode to Multiply (see screenshot).
CMYK (24, 2, 14, 0) - Using the Ellipse tool, draw a large circle on the canvas and set the color to a light pink. In the Layers panel set the Blend Mode to Multiply (see screenshot).
CMYK (2, 13, 0, 0) - Repeat the last step, but this time draw a smaller circle and set the color to a deeper pink color (see screenshot).
CMYK (0, 35, 0, 0)
In the next few steps, we will draw the geometric shapes. Each shape will have its own color and we will use the Multiply Blend Mode to create more colors when the shapes overlap.
Next, we will size and position the shapes within the design.
Next
Screenshots used by permission of Serif (Europe) Ltd. This article is not endorsed by Serif Ltd.

Related Articles
Editor's Picks Articles
Top Ten Articles
Previous Features
Site Map
Content copyright © 2023 by Diane Cipollo. All rights reserved.
This content was written by Diane Cipollo. If you wish to use this content in any manner, you need written permission. Contact Diane Cipollo for details.


