
Scalloped Circle and Illustrator CS6 Shape Builder
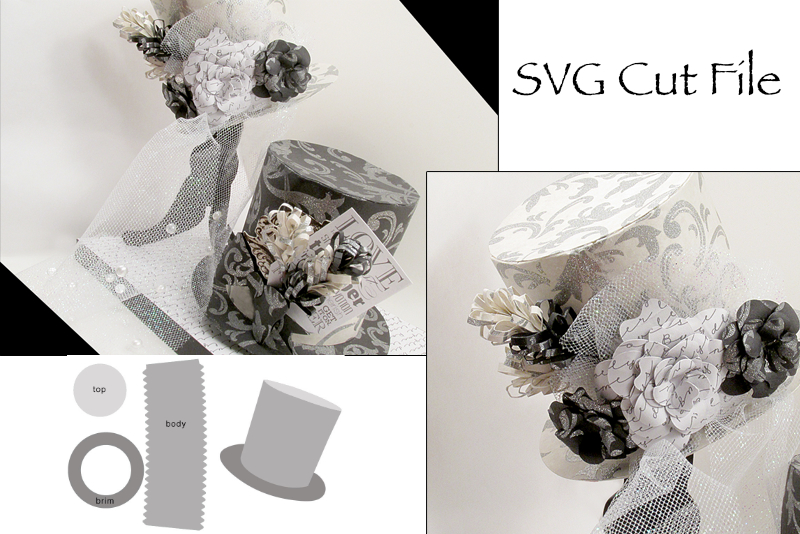
One thing about Illustrator® is that you can easily create a path for just about any shape. In this tutorial, we will learn how to create a 2.5 inches scalloped circle in Illustrator that will become an SVG cutting design for the Silhouette cutting machine.
Once you have the scalloped circle, you can set the Fill color to any color you need for your project, set the Stroke color of the path or set both to different colors.
Silhouette, Silhouette Studio, Silhouette Connect, PixScan, Silhouette CAMEOR and Silhouette Portrait are either registered trademarks or trademarks of Silhouette America, Inc. Product screen shot(s) reprinted with permission from Silhouette America, Inc.
Once you have the scalloped circle, you can set the Fill color to any color you need for your project, set the Stroke color of the path or set both to different colors.
- Open Illustrator and start a new project at 300 dpi. Set the Stroke to Null and the Fill to #000001.
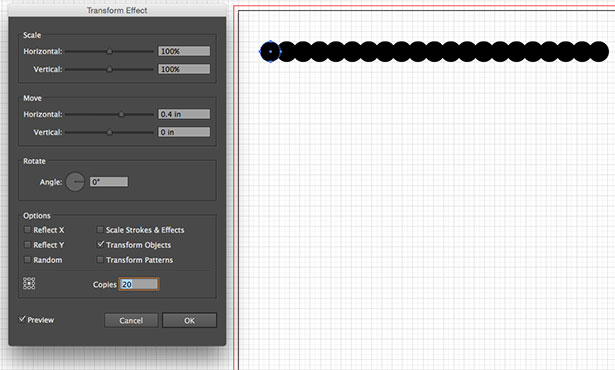
Our first step is to draw a small circle that we will duplicate along the circular path. - With the Eclipse tool draw a circle about .5 inch.
- With the circle selected, click Effect - Distort and Transform - Transform.
- At the bottom of the dialog box, check the Preview box and then set the number of Copies to 20.
- In the Move section, move the Horizontal slider to the right until the circles overlap slightly. For the sample, I set the slider to .4 in.
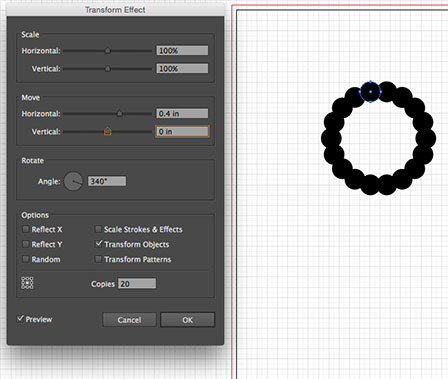
- Next, set the Angle to about 340 degrees, to bend the straight path into a circular path. Click OK.
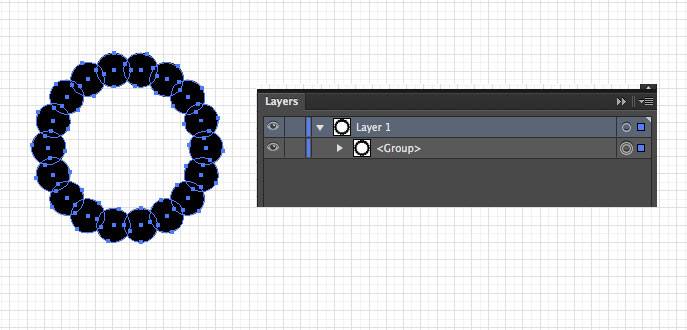
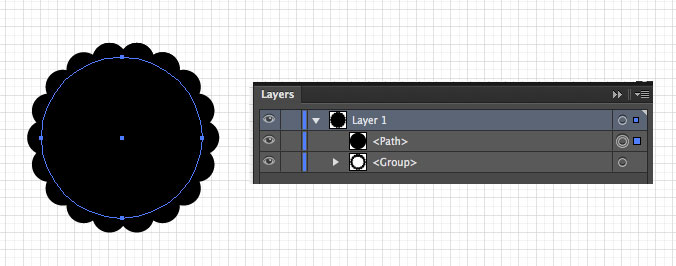
At this point, only the original circle is selected, indicated by the blue circular path. Now lets prepare to merge all the circles into one path. - Click Object - Expand Appearance. You should see a blue path around each of the circles. In the Layers panel, you will notice that the circles have all been combined into a Group.
We need to fill the center of our circle. An easy way is to draw a large circle inside our group of circles, covering any empty spaces. - For the sample, I drew a new circle 2.35 inches in width and with the same Fill color and Null Stroke.
At this point, we have our Group layer with all the little circles and a second layer with the large circle. Now we can merge all the circles into one path. - With the Selection tool, select all the circles.
- With all the circles still selected, switch to the Shape Builder tool. While holding down the Shift key, click and drag to select all the circles with this tool.
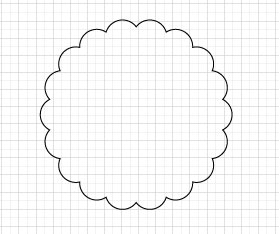
You will see that our Group and path layers have been merged into one path layer. Also there is only one blue path around the outside edge of our scalloped circle.
Our final step is to create a cutting path for an SVG cutting file for the Silhouette. - Switch the Stroke and Fill colors, giving you a Stroke color and a Fill of null.
- Set the Stroke color to 000001 and .1 pts.
Silhouette, Silhouette Studio, Silhouette Connect, PixScan, Silhouette CAMEOR and Silhouette Portrait are either registered trademarks or trademarks of Silhouette America, Inc. Product screen shot(s) reprinted with permission from Silhouette America, Inc.

Related Articles
Editor's Picks Articles
Top Ten Articles
Previous Features
Site Map
Content copyright © 2023 by Diane Cipollo. All rights reserved.
This content was written by Diane Cipollo. If you wish to use this content in any manner, you need written permission. Contact Diane Cipollo for details.


