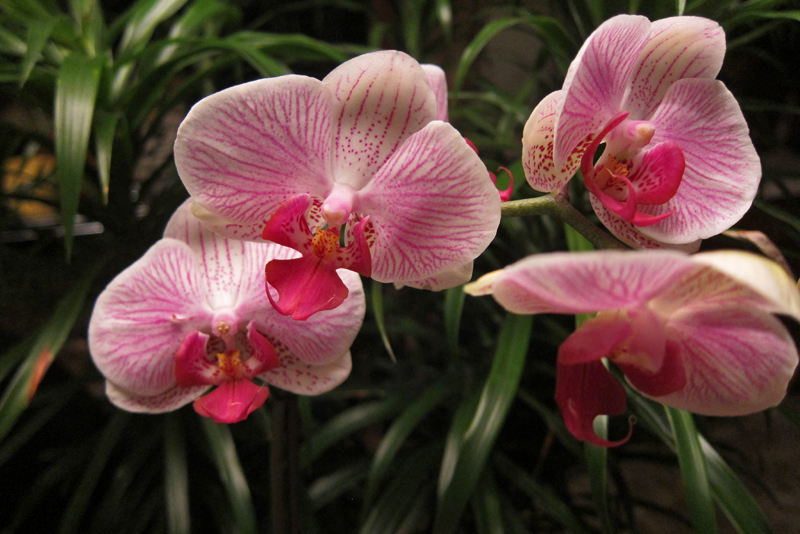
Photographing the Orchids

You can see excellent examples of orchid photography on the internet. Have you tried to master the skill of capturing these beauties on a film roll yourself or rather on your digital camera? I tried it with mixed results. I started taking pictures of orchid flowers out of necessity; we had to submit photographs at the time of thesis submission. So I ventured into field photography as a novice and whatever I have learnt about this subject is entirely self-taught.
Initially, I used a manual Vivitar SLR camera, which is now lying forgotten somewhere in my boxes (unfortunately!). I remember that while clicking photographs with this camera, I had to keep in mind a lot of things; like the time of the day, available light, exposure, depth etc. (many other requirements are long forgotten!).
To take the pictures of orchids growing on top of the tree branches, I had to buy a zoom lens. Due to monetary constraints, I could not buy a zoom lens for magnifying closer objects; so I innovated with a magnifying glass instead. I removed the magnifying glass from the holder and fixed it onto the lens of the camera. Here, I had to use a camera stand as focusing was not possible otherwise.
My preferred film roll was Kodak (ISO 100); I did not get sharp pictures with Fuji. I also used ISO 400 when photographing outdoors (in the jungle). But it was not possible to strictly use ISO 100 indoors and ISO 400 outdoors, so I tried to adjust the ISO settings on the camera for that. Here, I would like to point out that whether used indoors or outdoors ISO 100 gave better results.
In the beginning, I sent many unexposed film rolls for developing! Most of the time I did not fix the roll properly inside the camera. I learnt for my mistakes (after a lot of verbal bashing from my guide and husband!) and was finally able to load the roll properly.
In the Vivitar SLR I had to first set the ISO, then the program on the dial present on the top. After this, shutter time and the depth had to be adjusted taking into consideration the subject of photography, location etc. While adjusting, I had to keep peeping into the eye piece of the camera to check whether the adjustments made were okay or not. This was helped by an indicator which flashed green, yellow or red, within the eye piece. Red light indicated that light available is less and green was a go ahead signal. I don’t remember the function of the yellow light! (I might be wrong on the green light as well!)
Now the old ways of photography are slowly fading away in this age of digitalization. There are many programs available on internet, free or paid, by which you can retouch or improve your photographs. I have also switched to a digital Fuji camera, FinePix S3300. The pictures I take with it are nowhere near as good as those of my old pal Vivitar :-). Maybe, I am not handling this camera properly. There is definitely a lot to learn about its functions.

Related Articles
Editor's Picks Articles
Top Ten Articles
Previous Features
Site Map
Content copyright © 2023 by Anu Dharmani. All rights reserved.
This content was written by Anu Dharmani. If you wish to use this content in any manner, you need written permission. Contact Anu Dharmani for details.