
Designer 2 Custom Settings Step by Step
In the previous tutorial, we discussed a few commonly requested changes for the Affinity Designer user interface. Below, we have step-by-step instructions for making those changes.
Back | Next
Screenshots used by permission of Serif (Europe) Ltd. This article is not endorsed by Serif Ltd.
- Start a new project in Designer by clicking File - New. As the document is not important for this tutorial, just keep the defaults and click Create in the New Document window.
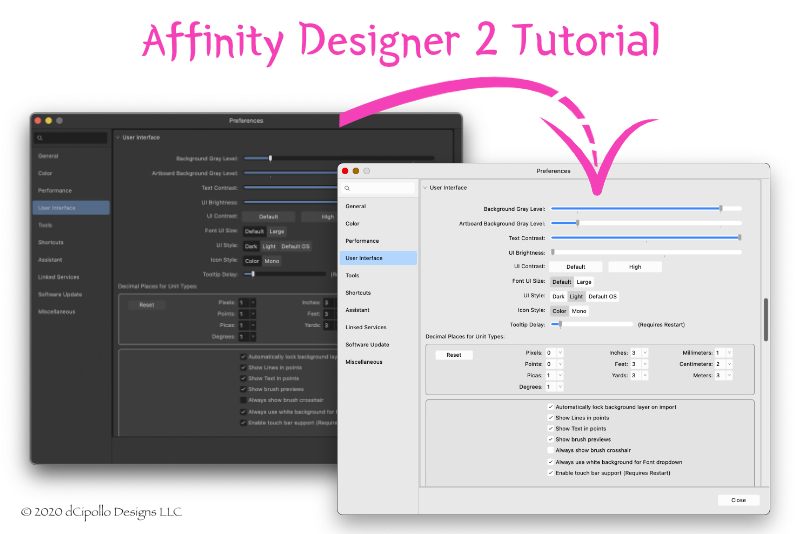
- To open the Preferences panel, go to the top Menubar and click Affinity Designer 2 - Preferences. Next, click User Interface in the side menu (see screenshot).
- Change the UI Contrast from Default to High, by clicking the High button and the UI Style from Dark to Light (see screenshot).
- Move down to the Decimal Places for Unit Types section.
- Use the slider to change the default value from 1 to zero for Pixels and Points (see screenshot).
- Close the Preferences panel.
- In the top Menubar, click on the small arrow next to the red magnet icon, to open the Snapping menu.
- From the Preset drop down list, choose UI Design (see screenshot).
- Check the box next to Move By Whole Pixels (see screenshot).
- Click the small icon to open the popup menu and select Create Preset (see screenshot).
- In the popup window, give your preset a name and click OK (see screenshot).
- Open the Stroke panel and check the box next to Scale with Object (see screenshot).
- To make this a Global setting, click Edit - Defaults - Save in the Menubar (see screenshot).
Let's start with the changes in the Preferences panel.
Now we will change the defaults for the unit measurements.
Next, we will continue with the Snapping settings.
We will keep the default settings except for the Pixel Alignment option. We will set this to whole pixels.
As you do this, the UI Design preset disappears from the Preset menu because you have changed the settings. Now let's make the new settings a new preset.
The next change we will make is in the Stroke panel. We will turn on the Scale with Object option and make it a Global, ie permanent, setting.
Back | Next
Screenshots used by permission of Serif (Europe) Ltd. This article is not endorsed by Serif Ltd.

Related Articles
Editor's Picks Articles
Top Ten Articles
Previous Features
Site Map
Content copyright © 2023 by Diane Cipollo. All rights reserved.
This content was written by Diane Cipollo. If you wish to use this content in any manner, you need written permission. Contact Diane Cipollo for details.


