
Design a Holiday Shopping List - Affinity Designer

In this Affinity® Designer tutorial, we will design a holiday shopping or to do list for your planner.
Open Affinity Designer and let's get started.
Index - How to Draw a Holiday Theme Collection of Elements
Screenshots used by permission of Serif (Europe) Ltd. This article is not endorsed by Serif Ltd.
Open Affinity Designer and let's get started.
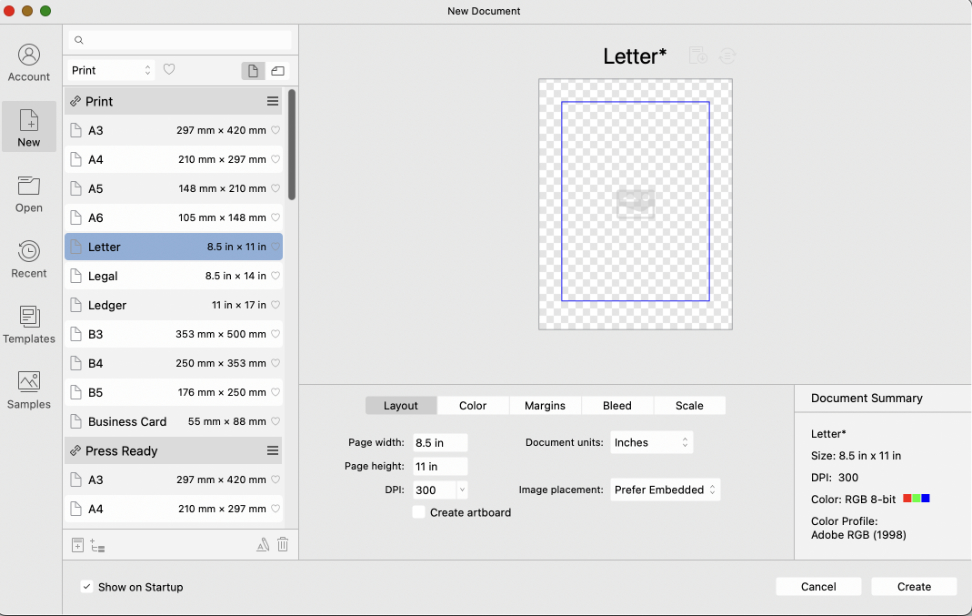
- Start a new document that is 8.5 by 11 inches at 300 dpi for print. (see screenshot)
- Select the Rectangle tool. In the Context toolbar, set the Fill to Red (BF1717) and the Stroke to null.
- With the Rectangle tool, draw a rectangle over the entire canvas. Deselect the rectangle.
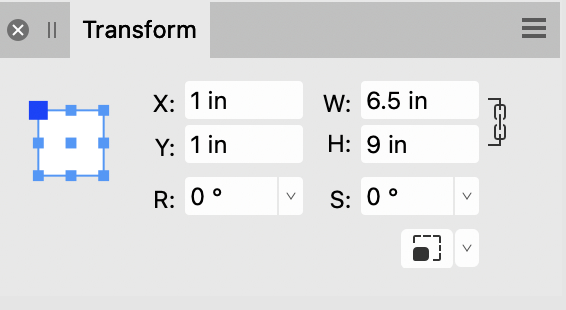
- With the Rounded Rectangle tool, change the Fill to white, Stroke to green (019154) and the Stroke Width to 4 pt.
- Draw a second rectangle over the first.
- In the Transform panel, set the Width to 6.5 in and the Height to 9 in. (see screenshot)
- From the top Menubar, click Layer - Alignment - Align Center.
- Click Layer - Alignment - Align Middle.
- In the Context toolbar, set the Corner to Rounded and 10%. (see screenshot)
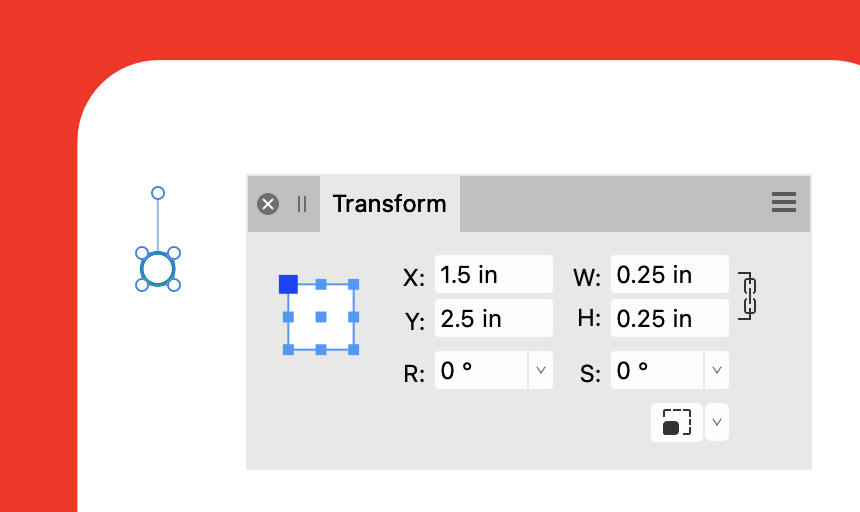
- Select the Ellipse tool and set the Fill to null, the Stroke to green (019154) and the Stroke Width to 2 pt.
- On the canvas draw a circle that is .25 inch diameter. (see screenshot)
- From the Transform panel, set the X value to 1.5 inches and the Y value to 2.5 inches.
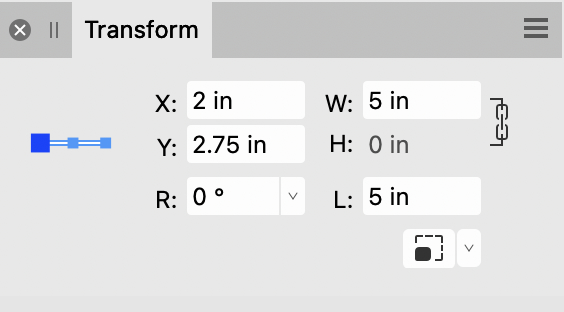
- With the Pen tool, draw a line that is 5 inches wide.
- From the Transform panel, set the X value to 2 inches and the Y value to 2.75 inches. (see screenshot)
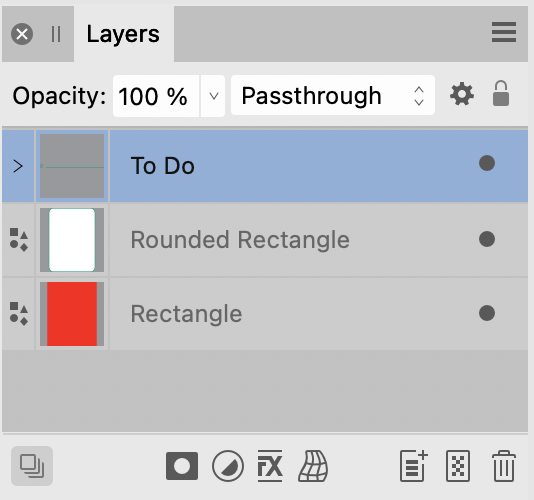
- In the Layers panel, select both the circle and the line. Right-click and choose Group. Name the group layer To Do. (see screenshot)
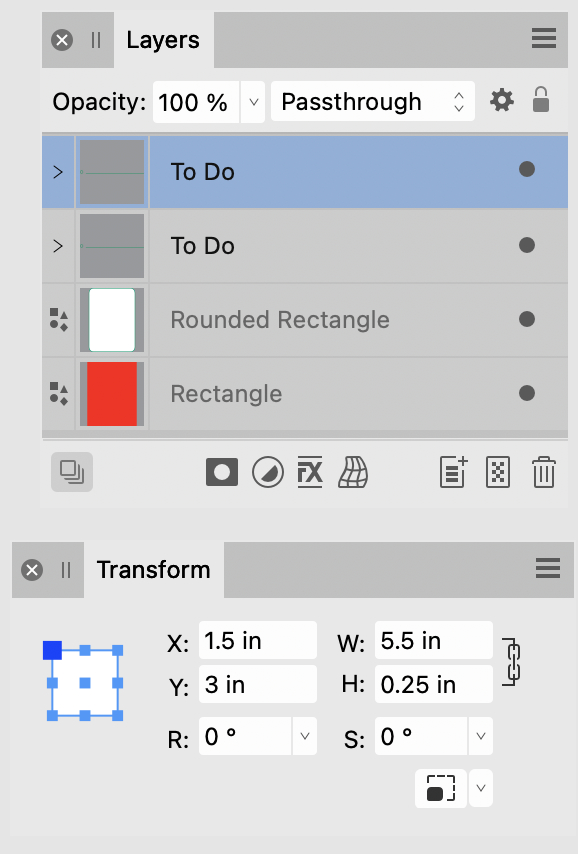
- In the Layers panel, right-click on the To Do layer and choose Duplicate. On the canvas, drag the new group down just a little.
- In the Transform panel, set the X to 1.5 inches and the Y to 3 inches. (see screenshot)
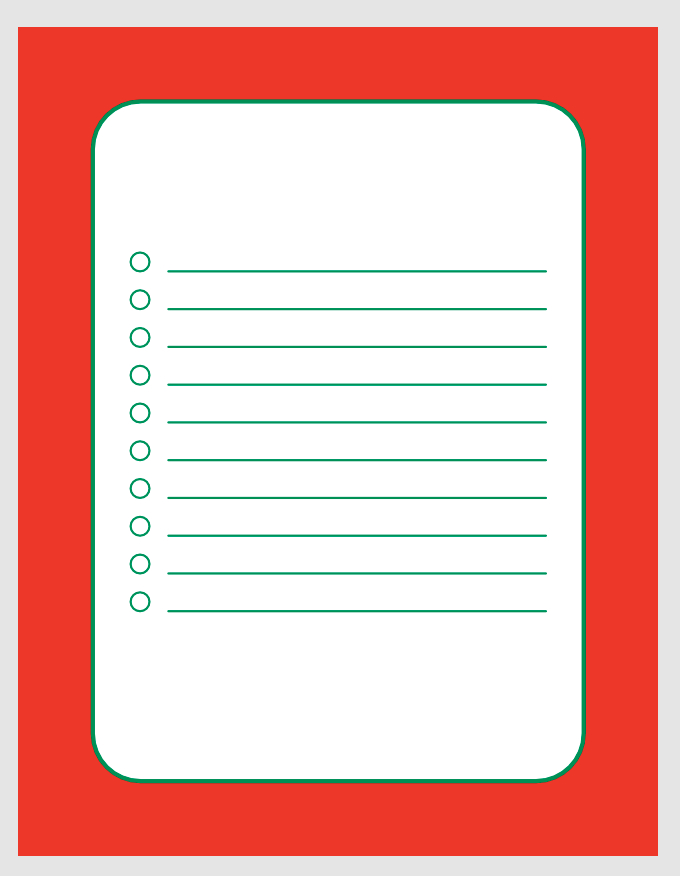
- Click Edit - Duplicate to create a new line, repeat for a total of 10 lines (see screenshot). In the Transform panel, verify that each line is .5 inch below the previous.
- In the Layers panel, select all of the To Do layers, right-click and choose Group. Name the group layer lines.
- Paste one snowflake at the upper left corner of the page. Rotate the snowflake slightly. (see screenshot)
- In the Layers panel, name the layer snowflake.
- In the Context toolbar, change the Fill color to white.
- Add a snowflake at each corner of the canvas.
- Reduce the size of the snowflake a little and place one at each side of the canvas.
- Reduce the size of the snowflake again and place one at each side again.
- In the Layers panel, select all of the snowflake layers, right-click and choose Group. Name the Group layer snowflakes.
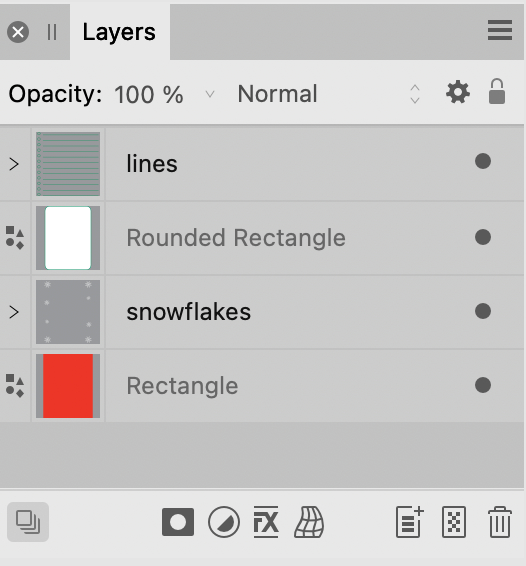
- Drag the snowflakes layer below the rounded rectangle layer. (see screenshot)
- First place two candy canes at the bottom center of the page.
- Place three evergreen branches over the candy canes. Rotate each branch a little.
- Center the poinsettia over the evergreens. (see screenshot)
- Finally, with the Artistic text tool, add the words Shopping List at the top of the page. In the Transform panel, set the Y value to 1.75 inches. (see screenshot)
- With the text still selected, click Layer - Alignment - Align Center.
Center the white rectangle on the canvas.
We will add rounded corners to this rectangle.
Now we will draw a few circles and lines for our to to or shopping list.
Now we will add a few more lines.
Use the power duplicate feature to add more lines.
Now let's add the details. First we will add a few snowflakes around the edge of the page. Copy the snowflake from your collection file.
Now we will add some evergreens, candy canes and a poinsettia.
Index - How to Draw a Holiday Theme Collection of Elements
Screenshots used by permission of Serif (Europe) Ltd. This article is not endorsed by Serif Ltd.

Related Articles
Editor's Picks Articles
Top Ten Articles
Previous Features
Site Map
Content copyright © 2023 by Diane Cipollo. All rights reserved.
This content was written by Diane Cipollo. If you wish to use this content in any manner, you need written permission. Contact Diane Cipollo for details.


