
Planner Stickers in Procreate - Day Covers
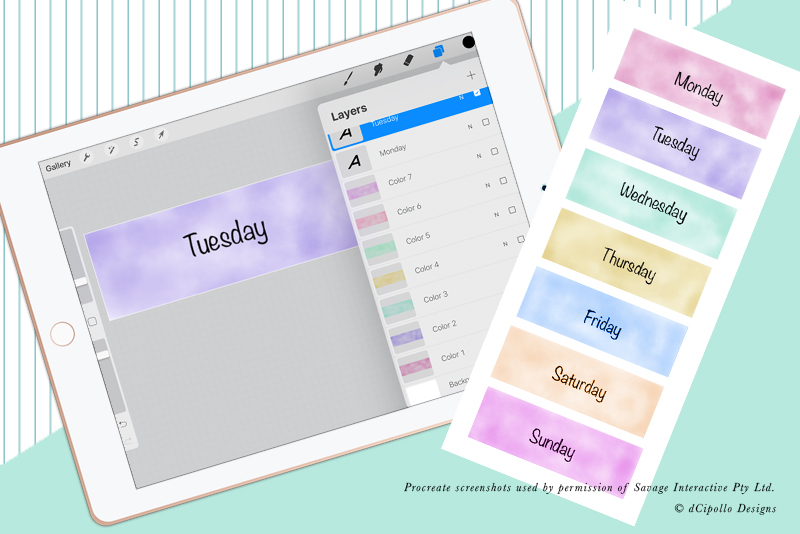
Let's continue working on the Day Covers planner stickers in Procreate. We have started a new canvas and painted a watercolor wash over the canvas for our first of seven Day Covers. Now we can add the date name. But let's change the color to black.
Back
- Tap the Color icon and select the black color swatch at the top of the list (see screenshot).
- Tap the Wrench icon at the top left, to open the Actions panel (see screenshot). Tap the Add icon and then tap Add Text.
- Use the keyboard to change the default text to Monday (see screenshot).
- To edit the text, tap the Edit Style button. On this panel (see screenshot), you can choose a Font (or import a font), set the Style, Design and Attributes as you wish. Tap Done to close the panel.
- Go back to the Layers panel and you should see the new text layer for Monday (see screenshot).
Let's create the second Day Cover. - Click the small check box to turn off of visibility for the Color 1 and Monday layers.
- Select the Color 1 layer and then tap the Plus icon at the top of the panel to add a new layer above the Color 1 layer. Name this layer Color 2.
- Go back to the Color panel and choose a new color. Paint a wash over the canvas (see screenshot).
- Add the Tuesday text.
Repeat the steps above. You will want seven color layers (see screenshot) and seven text layers (see screenshot).
Save the project to your cloud drive. - Go back to the Actions panel and choose Share (see screenshot). Tap the Procreate format. On the next panel, select your cloud drive (see screenshot).
- On the next panel, tap Upload (see screenshot).
Now we can save each Day Cover as a png for GoodNotes. - Turn on the visibility for the Color 1 and Monday layers and turn off all other layers.
- In the Actions panel, choose Share and the png format.
- Save to your cloud drive.
Note: To save your image to your iPad Photos, select Save Image.
Repeat the previous steps to save all seven Day Covers (see screenshot). Just change the visibility of the layers as needed.
Back

Related Articles
Editor's Picks Articles
Top Ten Articles
Previous Features
Site Map
Content copyright © 2023 by Diane Cipollo. All rights reserved.
This content was written by Diane Cipollo. If you wish to use this content in any manner, you need written permission. Contact Diane Cipollo for details.


