
How to Create a Faux Leather Finish

Paper is so versatile that it can be used to mimic the texture of other materials. Today we’ll look at a deceivingly simple way to make a faux leather finish using tissue paper and freezer paper, which is available in the food packaging section of your supermarket. It’s a good idea to use tissue paper that doesn’t bleed a lot when wet, as you’ll be brushing on some acrylic varnish on it once you’re done. Are you ready? Let’s begin!
You will need: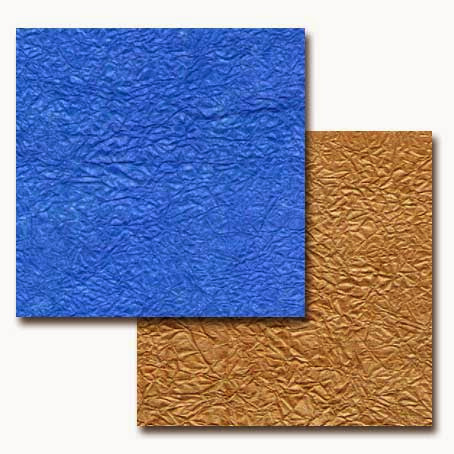
* Tissue paper (color fast, if possible)
* Freezer paper
* Acrylic varnish
* Dry iron
* Ironing board
* Brush
* Scissors
Additional materials for money envelope:
* Decorative paper
* Cardstock
* Embossing stencil
* Embossing stylus
* White glue
* Template (available here or use your own)
* Pencil
* Ruler
Cut a piece of tissue paper into the size you need, say 8-1/2 by 11 inches. Cut a piece of freezer paper that’s slightly smaller than the tissue paper. Crumple the tissue into a tight ball, and then flatten it out again.
Lay your freezer paper, shiny side up, onto your ironing board. Lay the crumpled tissue paper on the freezer paper. Plug your flat iron and set it to high. Then iron the tissue paper until it fuses to the freezer paper. Unplug the flat iron and set the fused sheets aside to cool. Brush on a coat of acrylic varnish to protect the tissue paper.
How to make the money envelope:
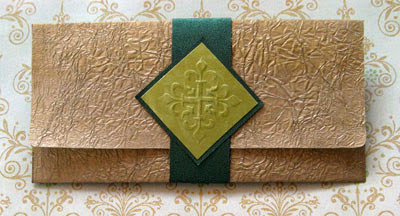
Using the template as a guide, trace and cut the money envelope from the faux leather paper. Fold along the lines and glue the tabs to the inside of the envelope.
Cut a band of decorative paper about 8 inches by 1-1/8 inches. Wrap this around the envelope, and glue the ends together. The band should be snug, but still loose enough to slip off the envelope.
Using a brass embossing stencil and stylus, emboss a motif onto a piece of cardstock. Cut out the motif and glue it to another piece of the decorative paper. Cut around the motif, leaving a narrow border around it. Glue the motif onto the band.
Don’t forget to put the bills into the envelope before giving it!
You will need:
* Tissue paper (color fast, if possible)
* Freezer paper
* Acrylic varnish
* Dry iron
* Ironing board
* Brush
* Scissors
Additional materials for money envelope:
* Decorative paper
* Cardstock
* Embossing stencil
* Embossing stylus
* White glue
* Template (available here or use your own)
* Pencil
* Ruler
Cut a piece of tissue paper into the size you need, say 8-1/2 by 11 inches. Cut a piece of freezer paper that’s slightly smaller than the tissue paper. Crumple the tissue into a tight ball, and then flatten it out again.
Lay your freezer paper, shiny side up, onto your ironing board. Lay the crumpled tissue paper on the freezer paper. Plug your flat iron and set it to high. Then iron the tissue paper until it fuses to the freezer paper. Unplug the flat iron and set the fused sheets aside to cool. Brush on a coat of acrylic varnish to protect the tissue paper.
How to make the money envelope:
Using the template as a guide, trace and cut the money envelope from the faux leather paper. Fold along the lines and glue the tabs to the inside of the envelope.
Cut a band of decorative paper about 8 inches by 1-1/8 inches. Wrap this around the envelope, and glue the ends together. The band should be snug, but still loose enough to slip off the envelope.
Using a brass embossing stencil and stylus, emboss a motif onto a piece of cardstock. Cut out the motif and glue it to another piece of the decorative paper. Cut around the motif, leaving a narrow border around it. Glue the motif onto the band.
Don’t forget to put the bills into the envelope before giving it!

Related Articles
Editor's Picks Articles
Top Ten Articles
Previous Features
Site Map
Content copyright © 2023 by Mia C. Goloy. All rights reserved.
This content was written by Mia C. Goloy. If you wish to use this content in any manner, you need written permission. Contact Mia C. Goloy for details.
