
Washi Tape Luggage Tag

If you want a quick and fun way to decorate just about anything, try washi tape. Washi tape is adhesive tape made of paper, much like masking tape, that comes in a variety of colors and designs. It’s rather thin and translucent, so any print behind it will somehow show through, which makes it great for layering. You can also tear it by hand and reposition it if you like. Using it can be very addicting, and once you start paper crafting with washi tape, you’ll find it difficult to stop!
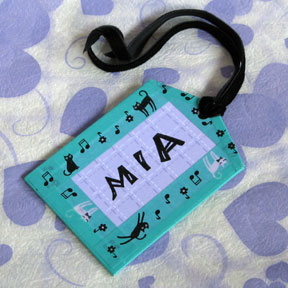
Our project for today is a luggage tag decorated with washi tape. It’s a sure way to make your luggage stand out!
You will need:
* Sturdy cardboard, 3.5 by 2.5 inches. Illustration board or a page from a discarded board book will work nicely.
* Plain copy paper
* Decorative paper
* Printed washi tape in a matching color
* Plain washi tape in a matching color (optional)
* Alphabet rubber stamps
* Ink pad
* Ribbon
* Glue stick
* Clear packing tape, 2 inches wide
* Pencil
* Ruler
* Box knife
* Cutting mat
* Scissors
* Hole punch
Measure, mark and cut the cardboard to the specified size. Cut of the corners of one end to form a tag shape. Glue a piece of plain copy paper to one side of the tag, burnish it well and trim off the excess. Do the same with the decorative paper on the other side of the tag.
Stamp your name in the center of the decorative paper, leaving a wide enough margin for the washi tape. Let dry. Laminate the decorative paper with clear packing tape, making sure to not have any wrinkles or air bubbles trapped below it. Burnish it well, and trim off any excess.
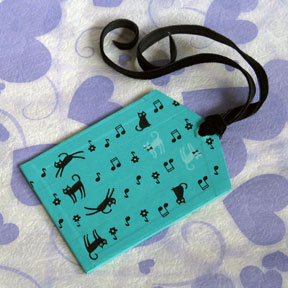
Cover the edges of the tag with plain washi tape (you may use the decorative washi tape if you wish). On the front of the tag, line the sides with washi tape to form a border around your name. Trim off the excess tape. Turn the tag over and cover the back with washi tape, seeing to it that there are no gaps between the strips of tape. Trim off the excess.
Punch a hole at the tapered end of the tag. Bring together the ends of the ribbon to form a loop, and thread the loop through the hole in the tag. Thread the ends through the loop to form a lark’s head knot. Tie the luggage tag securely to your bag.

Related Articles
Editor's Picks Articles
Top Ten Articles
Previous Features
Site Map
Content copyright © 2023 by Mia C. Goloy. All rights reserved.
This content was written by Mia C. Goloy. If you wish to use this content in any manner, you need written permission. Contact Mia C. Goloy for details.
