
InDesign Fixed Layout ePub Spring Animation
In this InDesign® tutorial, we will begin working on page 7 of our fixed layout ePub project. On page 7, we animate two toys, which are a ball and a rocking horse.
View Sample Project Page 7
The Animation Graphics and Sound
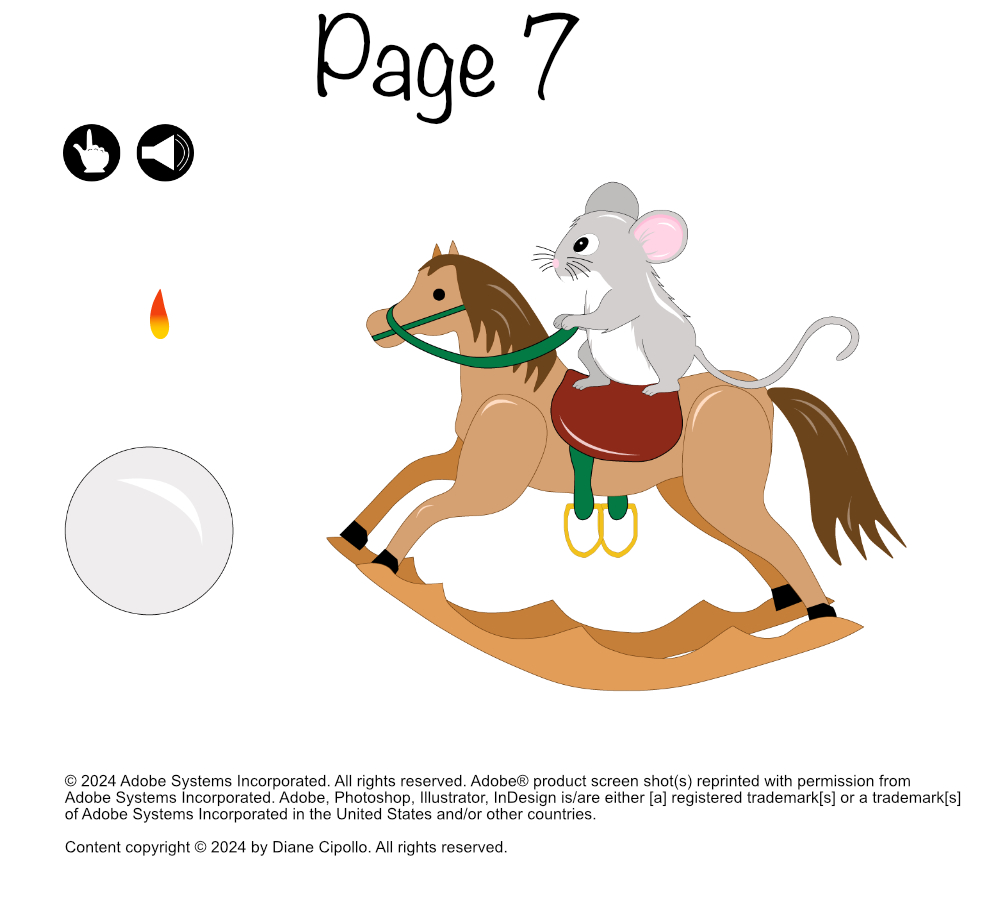
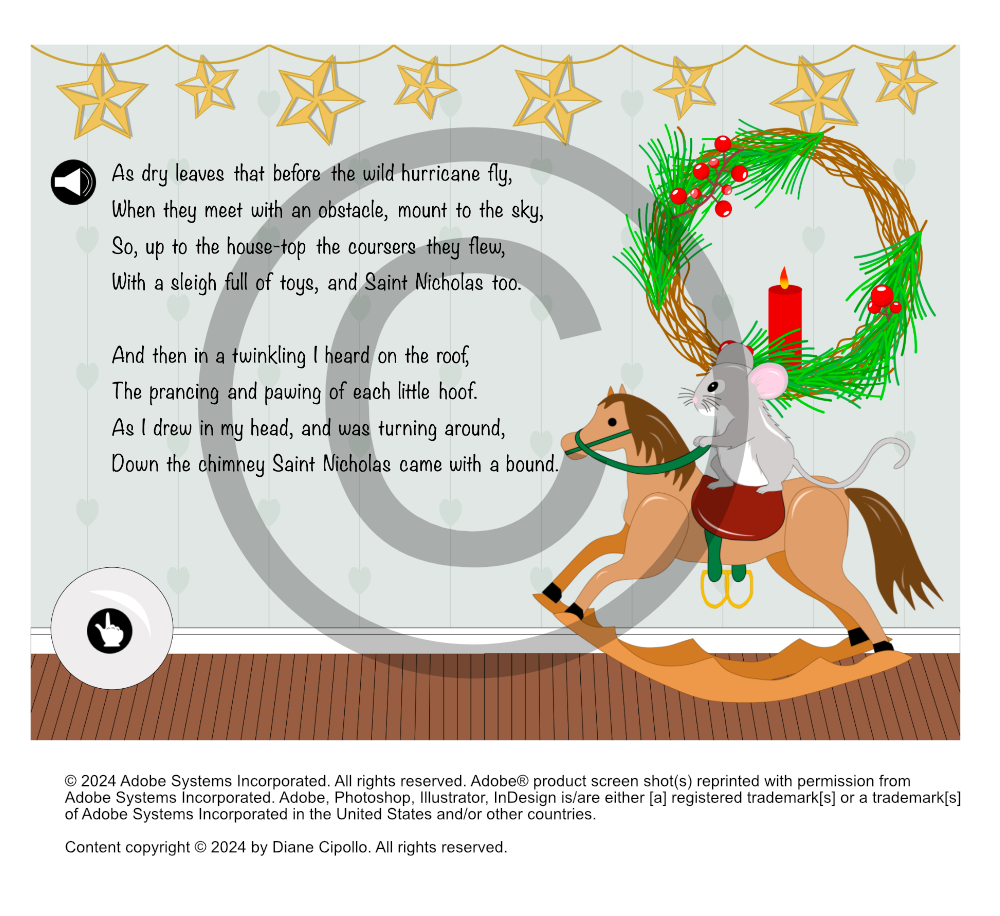
We will be adding three animation graphics to the page and one mp3 sound. There is a candle on the wreath, so we will add a flame to the candle and add a pulse animation to the flame. For the ball, we will add a Spring Right animation. This will cause the ball to move to the right for a certain amount and then spring back slightly to the left. Finally, we have the mouse riding a rocking horse. We will add the Dance animation to the rocking horse, which will give the illusion that the horse is rocking in place (see screenshot).
The Timing
The ball and horse animations will be triggered by an interactive button. After the button is clicked the ball moves right and touches the horse. The horse then begins to rock and we hear a Yippee sound.
For the ball and the horse, we have a timing challenge. We want the ball to move right and appear to bounce against the horse. The horse should not rock until the ball touches the horse. Also the sound should not play until after the horse begins rocking.
First, we will add the interactive button and place it at the bottom left of the page.
Index - InDesign Fixed Layout ePub
© 2024 Adobe Systems Incorporated. All rights reserved. Adobe® product screen shot(s) reprinted with permission from Adobe Systems Incorporated. Adobe, Photoshop, Illustrator, InDesign is/are either [a] registered trademark[s] or a trademark[s] of Adobe Systems Incorporated in the United States and/or other countries.
View Sample Project Page 7
The Animation Graphics and Sound
We will be adding three animation graphics to the page and one mp3 sound. There is a candle on the wreath, so we will add a flame to the candle and add a pulse animation to the flame. For the ball, we will add a Spring Right animation. This will cause the ball to move to the right for a certain amount and then spring back slightly to the left. Finally, we have the mouse riding a rocking horse. We will add the Dance animation to the rocking horse, which will give the illusion that the horse is rocking in place (see screenshot).
The Timing
The ball and horse animations will be triggered by an interactive button. After the button is clicked the ball moves right and touches the horse. The horse then begins to rock and we hear a Yippee sound.
For the ball and the horse, we have a timing challenge. We want the ball to move right and appear to bounce against the horse. The horse should not rock until the ball touches the horse. Also the sound should not play until after the horse begins rocking.
First, we will add the interactive button and place it at the bottom left of the page.
- Open your project file and load page 7.
- Click File - Place to add the interactive button graphic. Place the button at the bottom left corner.
- Click File - Place to add the mp3 file. In the Layers panel, drag the mp3 file layer below the background graphic layer.
- Click File - Place and add the horse to the bottom right side of the page.
- Finally, click File - Place and add the ball to the bottom left side of the page.
- In the Layers panel, drag the ball graphic layer below the button layer.
- On the page, center the button over the ball (see screenshot).
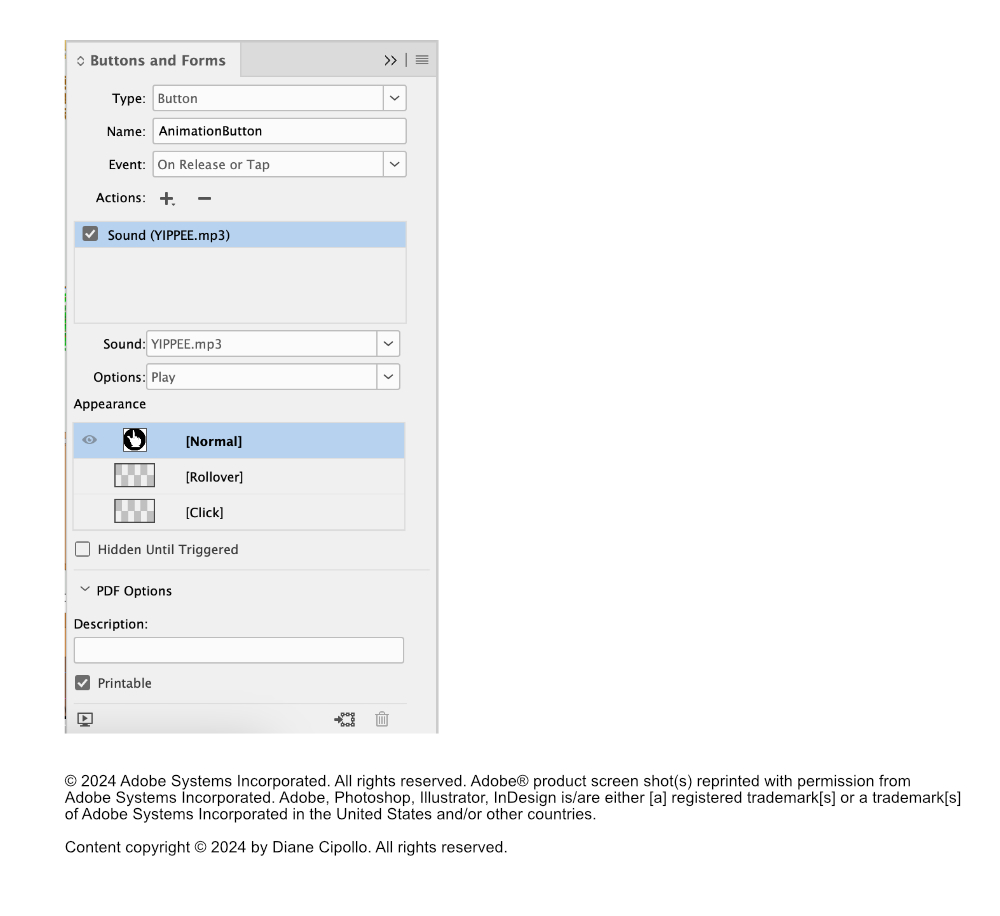
- Select the button graphic layer in the Layers panel and open the Buttons and Forms panel. Set the Type to Button.
- Click the Action plus icon to add a new Sound action. Open the Sound menu, and select the Yippee sound file.
- Rename this button to AnimationButton (see screenshot).
Now let's add the Yippee mp3 sound file. For this page, we will hide the mp3 file below the background graphics.
Now we will add the horse and ball.
We want the interactive button to be centered over the ball.
Now we will add the animations to the objects.
Test your button and you should hear the Yippee sound.
Index - InDesign Fixed Layout ePub
© 2024 Adobe Systems Incorporated. All rights reserved. Adobe® product screen shot(s) reprinted with permission from Adobe Systems Incorporated. Adobe, Photoshop, Illustrator, InDesign is/are either [a] registered trademark[s] or a trademark[s] of Adobe Systems Incorporated in the United States and/or other countries.

Related Articles
Editor's Picks Articles
Top Ten Articles
Previous Features
Site Map
Content copyright © 2023 by Diane Cipollo. All rights reserved.
This content was written by Diane Cipollo. If you wish to use this content in any manner, you need written permission. Contact Diane Cipollo for details.


