
Silhouette Studio Designer Ed Software How-Tos
At first glance, the Silhouette Studio Designer Edition® software can be a bit confusing. But you will soon find that it is a very easy software to use. Below are a few basic tips for using your Silhouette®.
How To Set Blade and Paper Media Cut Settings in Silhouette
How To Make A Regular Cut With Your Silhouette Cameo®
Before we begin cutting, decide on the weight and type of the paper you wish to use. You will need to set the Silhouette Cut Settings as needed for your choice. See the instructions above.
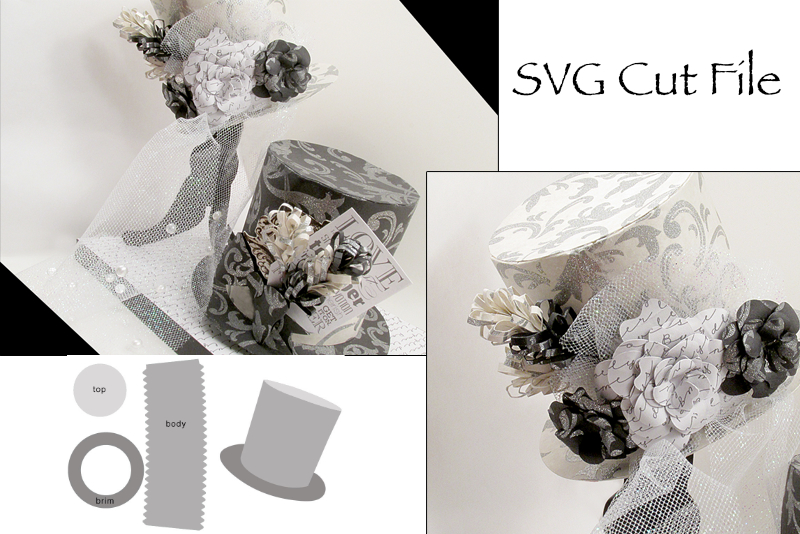
Many times you will need to cut a shape in your Silhouette more than once. For example, a flower SVG cut file may have three petal layers in small, medium and large sizes but the flower calls for six petal layers (two of each size). The easiest way to do this in one cutting is to copy and paste the petal layer shapes so that you have two of each shape in the cutting area.
How To Set Blade and Paper Media Cut Settings in Silhouette
- Open the Silhouette Studio® software. From the Silhouette Studio screen, click Design. Turn on the Silhouette machine.
- Open your SVG or .studio file into Silhouette or draw your design.
- Click the (Blade) Cut Settings icon to open the Silhouette Cut Settings pane For a simple (regular) cut, we will use the Standard option for the Cut Mode in the Cut Conditions section.
- In the Material Type section, change the material as needed for the type of media you are cutting. You will see the corresponding Speed, Thickness, Blade and other settings for that material choice in the Editing section below the Material Type section.
- Set the blade in your Silhouette machine to the suggested Blade setting.
How To Make A Regular Cut With Your Silhouette Cameo®
Before we begin cutting, decide on the weight and type of the paper you wish to use. You will need to set the Silhouette Cut Settings as needed for your choice. See the instructions above.
- Open the Silhouette Studio Designer Edition program. From the Silhouette Studio screen, click Design.
- Click File - Open to open the SVG cut file into the Silhouette workspace or choose a .studio file from the Library. If not using a cut file, draw the cutting lines on the Drawing Area.
- Adhere the paper onto the cutting mat and load the mat into the cutting machine.
- Click the Page Settings icon to open the Page Settings pane. Set the Paper Size, Orientation, Rotate View and Cutting Mat settings.
- Click the Cut Settings icon at the upper right of the workspace. This will display the Cut Settings pane. See instructions above for how to choose a Material Type and set the Silhouette blade accordingly.
- Click the Send to Silhouette button to open the Send to Silhouette pane on the right. Click the Start Cutting button to begin the process.
Many times you will need to cut a shape in your Silhouette more than once. For example, a flower SVG cut file may have three petal layers in small, medium and large sizes but the flower calls for six petal layers (two of each size). The easiest way to do this in one cutting is to copy and paste the petal layer shapes so that you have two of each shape in the cutting area.
- Assuming that you already have the SVG file open in the Silhouette workspace and ready to cut, select the shape that you wish to duplicate (Edit - Copy).
- Click Edit - Paste to duplicate the shape on the screen.
- The duplicate shape should still be selected. Click and drag the shape to an empty space in the cutting area.
- Repeat this for any other shapes that you wish to duplicate and follow the steps above to make a regular cut with the Silhouette.

Related Articles
Editor's Picks Articles
Top Ten Articles
Previous Features
Site Map
Content copyright © 2023 by Diane Cipollo. All rights reserved.
This content was written by Diane Cipollo. If you wish to use this content in any manner, you need written permission. Contact Diane Cipollo for details.


