
Digital Manikin - Moveable Joints
In this Affinity Designer tutorial, we will work on the Transform Origin points that will make the joints moveable. We have already set up the layer hierarchy in the Layers panel and identified, by the word POSE in the layer names, which layers are the control layers for the shoulder, elbow and wrist joints.
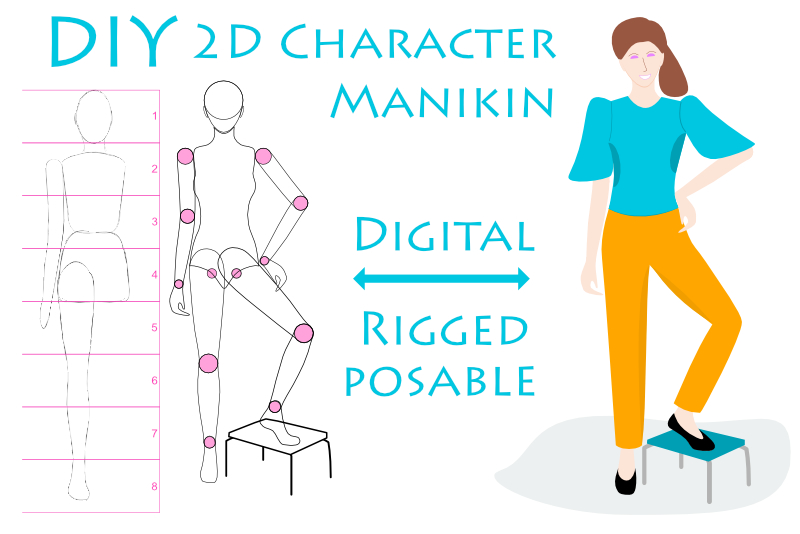
We will start with the shoulder joint (see screenshot) and work our way down the arm, which is the same order you will follow when posing the arm.
We will start with the shoulder joint (see screenshot) and work our way down the arm, which is the same order you will follow when posing the arm.
- Select the POSE right arm layer in the Layers panel and select the Move tool. Notice that a Bounding Box appears around the entire arm.
- With the layer still selected, click the Enable Transform Origin icon in the Context toolbar. You should see the Transform Origin point appear in the center of the Bounding Box. It looks like a circle with a plus sign in the center.
- With the Move tool still selected, click and drag the Transform Origin point to the center of the shoulder joint circle.
- To test the joint, drag the Rotation Handle to move the entire arm away and upward from the side of the manikin.
- This time select the POSE right lower arm and hand layer.
- Then, drag the Transform Origin point to the center of the elbow joint circle.
- Use the rotation handle to rotate the lower arm and hand toward the body.
- Select the POSE right hand and wrist joint layer.
- Drag the Transform Origin point to the center of the wrist joint circle.
- With the Rotation Handle, rotate the wrist until the hand is touching the hip of the manikin.
- Right-click on the POSE right arm group layer and choose Duplicate.
- Open the duplicate group layer and change all the right words to left.
- With the POSE left arm group layer still active, click the Flip Horizontally icon on the Context toolbar.
- On the canvas, drag the POSE left arm layer contents to the left side of the manikin.
- Open the manikin line art group layer. Select both the POSE left arm and POSE right arm group layers. Drag these two group layers in to the manikin line art group and place them under the torso layer (see screenshot).
- Save your work.
If we were to rotate the arm now, it would rotate around this point in the center of the arm. But we want to rotate the arm around the shoulder joint. So we need to move this Transform Origin point to the shoulder joint circle.
Next we will work on the elbow joint rotation (see screenshot).
Finally we will set the Transform Origin point for the wrist joint (see screenshot).
Lastly, we need to move the POSE right arm group layer in to the manikin line art layer. But first, we need a left arm for our manikin. Let's duplicate the POSE right arm layer and make a few changes.
INDEX - Artist Manikin in Affinity Designer
Screenshots used by permission of Serif (Europe) Ltd. This article is not endorsed by Serif Ltd.
Related Articles
Editor's Picks Articles
Top Ten Articles
Previous Features
Site Map
Content copyright © 2023 by Diane Cipollo. All rights reserved.
This content was written by Diane Cipollo. If you wish to use this content in any manner, you need written permission. Contact Diane Cipollo for details.


