Quilt Blocks of the States - Texas
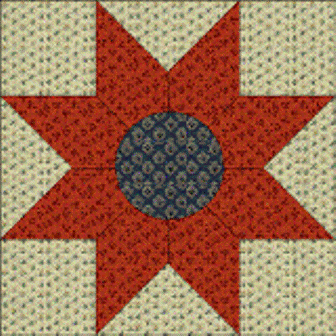 Texas- 12" Quilt Block
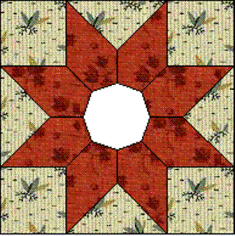
The next block in our State Quilt Block Series is Texas. This block depicts the Texas Star pattern and is quite easy to master. There are "set-in seams" in this block and I have included the "Set-in Seam How to Instructions", just a click of the mouse away! The centre circle is appliqued into place after the remainder of the block has been pieced. To print out the A, B, and C templates Click here.
To print out the Set-in Seam How to instructionsClick here.
Here’s a black and white map for easy identification of templates and their location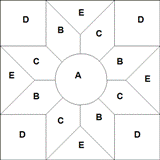
Cutting Instructions
 Light Fabric (White):
 - cut four 3 7/8" squares
- cut one 6 3/8" square cut diagonally twice to make 4 half square triangles.(D&E)
 Medium Fabric (Red):
- cut four B templates(seam allowance already included)
- cut four C templates (seam allowance already included)
 Dark Fabric (Blue):
- cut one A template onto light weight cardboard The fabric will be cut out later.
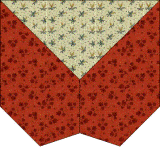
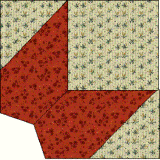
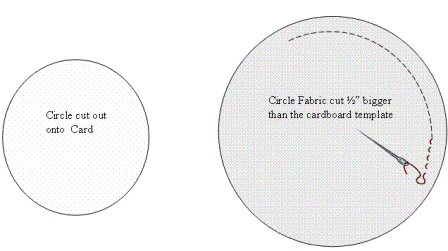
Step 1: Cut out all of the pieces required (except A), according to the template map above and lay them out on your work surface Step 2: Sew a B piece to a C piece to make a BC unit. Do likewise with the other BC pieces. Step 3: Following the Set-in Seam How to Instructions, set in an E piece between the B&C shapes.(see diagram) Step 4: Do the same to make the other three BCE units. Step 5: Following the Set-in Seam How to Instructions, set in a D square piece to create a corner.(see diagram) Step 6: Do likewise with the remaining corners. You will now have created a block with the centre piece missing. A gentle press with a hot iron will help the block to sit flat ready for the centre piece to be appliqued on. Step 7: Place the cardboard A template onto the wrong side of the Dark fabric and drawn around the circle. Cut out the fabric 1/2" outside the line. Using a needle and doubled thread (knotted at the end), stitch a running stitch around the fabric circle about 1/4" outside the drawn line. Place the cardboard A template onto the centre of the fabric circle and gently draw the thread to pull the fabric circle tightly around the cardboard template. Using a hot iron, press the fabric over the card template. Gently release the stitches slightly, and take the card template out of the fabric shape. Repress the circle to keep the circular shape. Use a fine needle and single thread, applique the circle to the centre of the block making sure that all the raw edges of the B&C units are covered by the centre piece. Congratulations. Your block should measure 12-1/2" on all sides. It will measure 12" finished size when it is sewn into a quilt.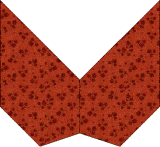
You Should Also Read:
Quilt Blocks of the States Series

Related Articles
Editor's Picks Articles
Top Ten Articles
Previous Features
Site Map
Content copyright © 2023 by Judie Bellingham. All rights reserved.
This content was written by Judie Bellingham. If you wish to use this content in any manner, you need written permission. Contact Judie Bellingham for details.


