Draw a Candle in Illustrator CS6

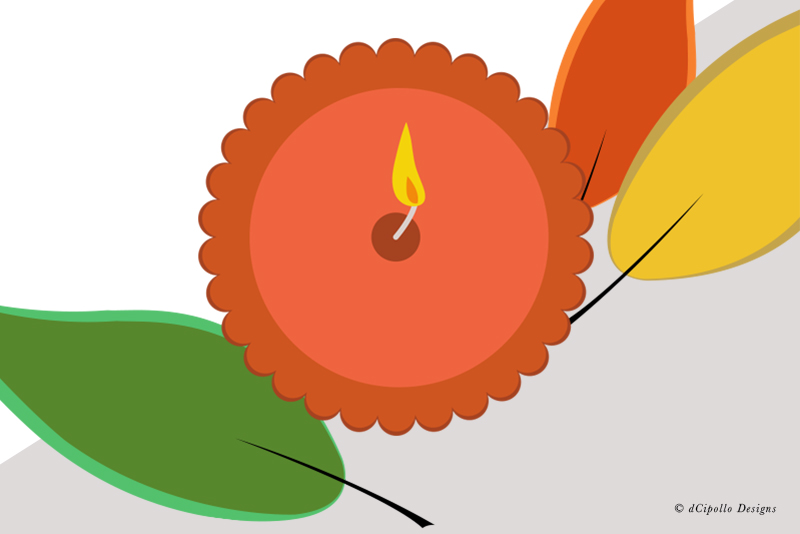
We can use the Merge feature in the Illustrator Pathfinder to draw a tart wax melt candle in Illustrator®.
I love the shape of the tart wax melt candles. Let's use that as our inspiration for this tutorial. Our wax melt candle will be a circle with a scalloped edge. We will create this shape by first drawing a circle the size that we want our candle to be and then drawing several small circles edge to edge, which will create the scalloped edge around the candle.
Copyright 2018 Adobe Systems Incorporated. All rights reserved. Adobe product screen shot(s) reprinted with permission from Adobe Systems Incorporated. Adobe, Illustrator is/are either [a] registered trademark[s] or a trademark[s] of Adobe Systems Incorporated in the United States and/or other countries.
I love the shape of the tart wax melt candles. Let's use that as our inspiration for this tutorial. Our wax melt candle will be a circle with a scalloped edge. We will create this shape by first drawing a circle the size that we want our candle to be and then drawing several small circles edge to edge, which will create the scalloped edge around the candle.
- Draw a circle, making it a little smaller than the final size of the candle. I drew an 8.5 inch circle.
- On a new layer, draw one smaller circle that will determine the size of the scallop. I drew a 1 inch circle.
- Place the smaller circle on the top edge of the larger circle.
- Select both circles and click the Align Horizontal Center icon.
- With both still selected, select the Rotate tool. While pressing the Option key (Alt), click the center of the circle. This will move the rotation point to the center of the large circle and open the Rotate panel.
Now we will rotate both objects. - In the Rotate panel, set the Angle to the amount of rotation you wish. This number should divide evenly in to 360 degrees. I used a 12 degree Angle setting, which will allow the smaller circles to overlap slightly.
- Press the Copy button, to get a new copy of both circles.
- To repeat this around the entire circle, click the Command and D keys on your keyboard repeatedly.
- Now we can remove all the copies of the larger circle, keeping only the original large circle and all of the smaller circles.
- To merge what is left in to one object. Select all and click the Merge icon in the Pathfinder panel. There's our candle shape.
- Select the candle and change the Stroke color to null and the Fill color to orange. (ce5520)
- With the object still selected, click Edit - Copy and then Edit - Paste in Place. This should put a copy of the candle on a layer above.
- Go back to the original candle shape (one layer below), select it and change the Fill color to a slightly darker orange color (a54220). This will be our shadow shape.
- Use the arrow keys to nudge the shadow shape slightly to the right and downward.
Now we can make the small indentation in the center for the wick area. - Add a new layer at the top of the Layers panel. Draw a small circle at the center of the candle, using the same darker orange Fill color.
- Add a new layer. With the Pen tool, draw the stroke path for the candle wick. Set the Stroke color to #dbd0cc and the Stroke width to 10 pt. In the Stroke panel, set the Cap to Round Cap.
Copyright 2018 Adobe Systems Incorporated. All rights reserved. Adobe product screen shot(s) reprinted with permission from Adobe Systems Incorporated. Adobe, Illustrator is/are either [a] registered trademark[s] or a trademark[s] of Adobe Systems Incorporated in the United States and/or other countries.

Related Articles
Editor's Picks Articles
Top Ten Articles
Previous Features
Site Map
Content copyright © 2023 by Diane Cipollo. All rights reserved.
This content was written by Diane Cipollo. If you wish to use this content in any manner, you need written permission. Contact Diane Cipollo for details.


