
Boken Background in Illustrator CS6
One of the best techniques to use in Illustrator® for Christmas and holiday graphics is a Bokeh background. There are several ways to do this in Illustrator but this technique doesn't result in rasters in the final vector file.
If you sell vectors on microstock sites such as Shutterstock and iStock, then you know that all custom brushes and effects need to be expanded before the export of the final .eps file for upload. Also, these .eps files need to be exported as Illustrator version 10.
After experimenting a little, I developed this technique for my own microstock vectors. It uses only a gradient and semi opacity.
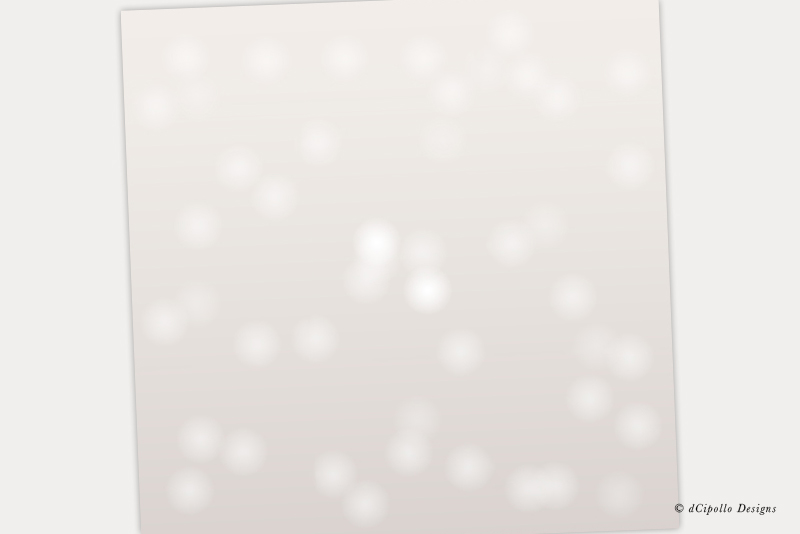
The first decision is the gradient for the background. The colors you use in this gradient will set the tone for the graphic. Let's use a festive silver gradient.
Now that you have the basic Bokeh layout, you can make many variations by changing the color of the gradient and the circles.
Extra: To add a glow to the Bokeh circles, just set the Fill to a gradient.
If you sell vectors on microstock sites such as Shutterstock and iStock, then you know that all custom brushes and effects need to be expanded before the export of the final .eps file for upload. Also, these .eps files need to be exported as Illustrator version 10.
After experimenting a little, I developed this technique for my own microstock vectors. It uses only a gradient and semi opacity.
The first decision is the gradient for the background. The colors you use in this gradient will set the tone for the graphic. Let's use a festive silver gradient.
- Start a new document and draw a rectangle over the entire Artboard that will become our background.
- In the Gradient pane, apply a gradient to the Fill of the rectangle. Set the dark color for the gradient to #d6d1ce and the light color to #f0ede8. Set the Gradient Type to Linear and the Angle to -90.
This will put the lightest part of the gradient at the top. Of course, you can change the Angle to put the lightest part to any angle, to emphasize the point of interest in your graphic.
The next decision is the size of the Bokeh circles. I like to use a circle about 10% of size of the image. - Using the Ellipse tool, draw a circle about 100 px. Set the Fill color and Opacity level of your choice. In the example, I used white as the Fill color at an Opacity of 50%.
You will need about 45 of these circles. - Select the circle, hold down the Option key and drag (Option-drag) to make a duplicate of the circle.
- Repeat the previous step, placing the circles over the area. Overlap a few of the circles.
- To add a little randomness, set the Opacity of a few of the circles to 30%.
Now that you have the basic Bokeh layout, you can make many variations by changing the color of the gradient and the circles.
Extra: To add a glow to the Bokeh circles, just set the Fill to a gradient.
- Select one of the circles and set the Opacity to 100%.
- Set the Fill to a gradient. In the Gradient pane, set two Color Stops to white.
Now we can create the glow. - In the Gradient pane, set the Opacity of the right Color Stop to 0%.
- To apply the gradient fill to more or all the circles, select the other circles. Apply the gradient from the first circle, by clicking that circle with the Eyedropper tool.

Related Articles
Editor's Picks Articles
Top Ten Articles
Previous Features
Site Map
Content copyright © 2023 by Diane Cipollo. All rights reserved.
This content was written by Diane Cipollo. If you wish to use this content in any manner, you need written permission. Contact Diane Cipollo for details.


