
Tatting Plus Needleweaving

I remember reading many decades ago that one should not mix media when creating needlework. I happily ignored that stricture. As I have continued my study of tatting, I have found that many other needle workers, especially tatters, have ignored it, too. In the files of the Online Tatting Class there are many examples of tatting mixed with other needlework types.
Tatting has been combined with needle weaving with stunning results.
Sudie Sherrod in Needlecraft Magazine April 1933 pg. 24 shows "An Especially Pretty Van Dyke Border" in tatting and needle weaving. Each triangle is tatted separately in the original method, however, using a split ring for the center of the corner trefoil, it is possible to make them in pairs. Needleweaving is done last. This pattern is available for free download here on BellaOnline.com: https://www.bellaonline.com/articles/art14352.asp
This vintage tatted collar with needle weaving was rescued by Anne Dent. Two types of needle weaving are seen. In the center of the tatted wheels, thread was stretched between picots across the open space and then needle weaving was done across 5 strands of thread. A few open spaces in the collar also show needle woven spiders.
Although white, ecru and black are the most typical colors on these vintage pieces, one adventurous tatter did her needle weaving in brilliant green pearl cotton. The method is still very simple. Stretch the threads across the open center and then weave around.
 |  |
Modern tatters have access to a rainbow of colors and they use them to good effect. Here is a favorite example of mine. It is by Kathleen Duling. It required good planning. After the threads were strung across the open center, six strands on bottom right and left were gathered in groups of twos and the weaving was done in a manner to emulate cluny tatted leaves. Threads above and below the rose were gathered to the center and the rose worked in a manner to give dimension to the weaving. Beautiful work. Kathleen also worked the blue and pink example. She added some additional needle lace elements to the needle weaving which gave the appearance of tatted chains.

Good planning also allowed these two tatters to tat long picots into the work. These picots were then used for the needle weaving instead of laying separate threads across the opening.
 |  |
Modern tatters also add unique touches to their work by incorporating unusual designs into both the tatting and the needle weaving.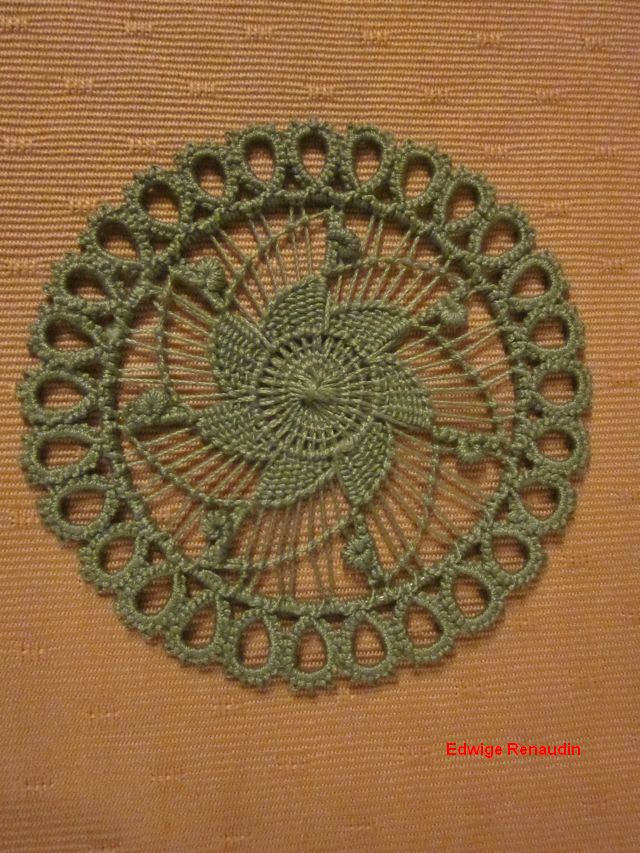

Don't be afraid to experiment!
You Should Also Read:
Tatting Plus Crochet
Tatting Plus Rickrack
Tatting Plus Coronationa Cord

Related Articles
Editor's Picks Articles
Top Ten Articles
Previous Features
Site Map
Content copyright © 2023 by Georgia Seitz. All rights reserved.
This content was written by Georgia Seitz. If you wish to use this content in any manner, you need written permission. Contact Georgia Seitz for details.


