
Affinity Designer DIY Vector Brush - The Brush
Now that we have our new base image for our custom brush exported as a .png, we can turn it into a vector brush. We could place our new brush in to any of the existing categories. But we already created a new category for our custom brushes in the first part of the tutorial.
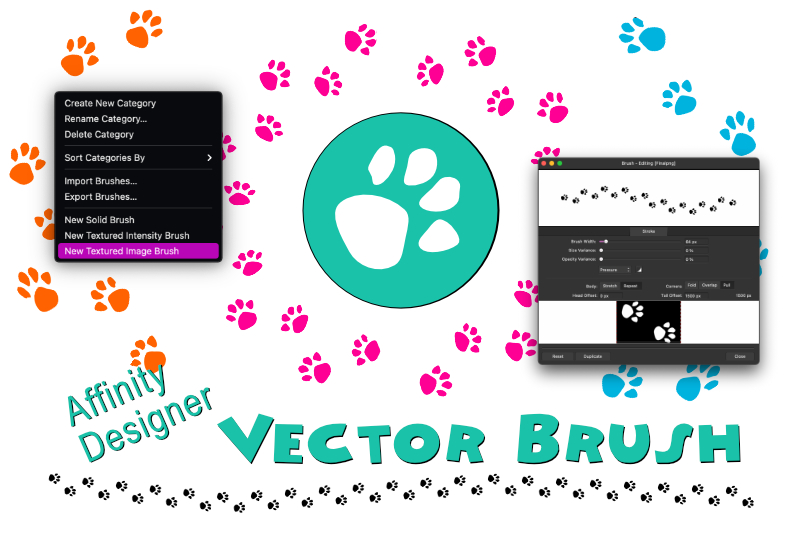
Let's start by setting the Brushes panel to receive our base image (see screenshot).
Screenshots used by permission of Serif (Europe) Ltd. This article is not endorsed by Serif Ltd.
Let's start by setting the Brushes panel to receive our base image (see screenshot).
- Open the Category menu and find our new category (see screenshot). Select the category, to make it the active category in the Brushes panel.
- Click the Panel Preferences icon to open the menu and choose New Textured Image Brush (see screenshot).
- In the file window, choose the brush .png file that you exported.
- Double-click on the new brush thumbnail to open the Edit window (see screenshot).
- Set the Brush Width as you like, watching the changes in the Preview.
- Keep the Size and Opacity Variance set to the default.
- Keep the Pressure set to the default.
- Change the Body option from Stretch to Repeat.
- Keep the Corners option set to the default, which is Pull.
- With the new brush selected in the Brushes panel, select the Vector Brush tool and draw a path on the canvas.
- Switch to the Pen tool and draw a path.
- With the path still active, click on the brush thumbnail in the Brushes panel, to apply the brush.
Note: When working with the Brushes panel, always set the category first.
You will see your new brush thumbnail listed in the Brushes panel. It probably looks a little skewed. We will keep most of the default settings, but let's take care of the brush shape (see screenshot).
This will correct the skewed shape and repeat the paw prints along the vector path.
Now let's test our new brush with the Brush and Pen tools.
You will see the brush repeat along the path as you draw (see screenshot).
You will see the path but the brush has not been applied automatically (see screenshot).
Note: The Vector Brush Tool will apply the active brush to the path automatically. However, for the Pencil, Pen and Shape tools, you need to select the brush thumbnail from the Brushes panel.
Screenshots used by permission of Serif (Europe) Ltd. This article is not endorsed by Serif Ltd.

Related Articles
Editor's Picks Articles
Top Ten Articles
Previous Features
Site Map
Content copyright © 2023 by Diane Cipollo. All rights reserved.
This content was written by Diane Cipollo. If you wish to use this content in any manner, you need written permission. Contact Diane Cipollo for details.


