
Color Palette Book Template Cover Master
In the previous tutorials, we built the Affinity Publisher two-page spread master page for our color palette eBook template. Now we will build a new Master for the eBook Cover.
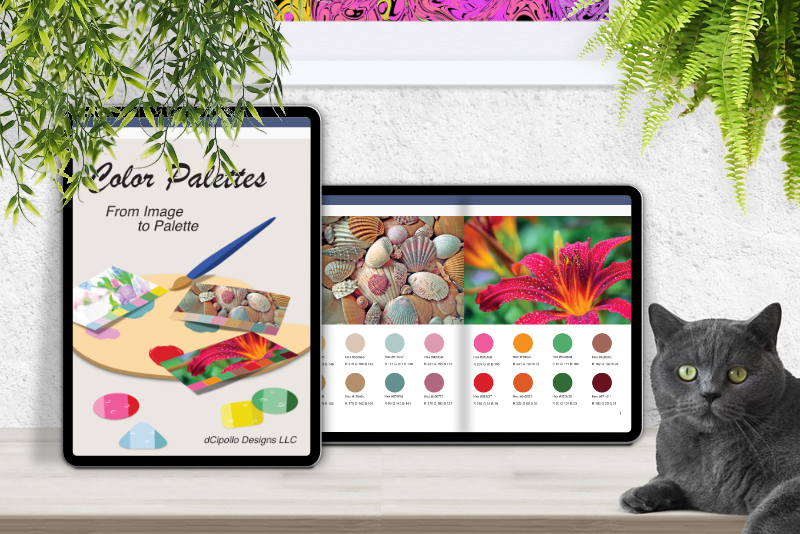
It is customary to create the cover of a magazine or book separately from the inner pages. For example, when creating the InDesign files for MUSED BellaOnline Review, I created one file for the inner pages and one for the cover spread, as requested by LuLu.com. However, as this project is a simple reference eBook of color palettes, we will simplify the process by creating the cover on the first page and the inner pages will begin on the second page of the same Publisher file.
The cover master template will have a full page picture frame for the cover graphic. We will be placing the book title and other information in the open areas around the graphics. There will be text placeholders for the book title, subtitle and name of the author. These placeholders can be repositioned as needed for the cover artwork.
In the next tutorial, we will learn how to add the color palette information and graphics for a few pages.
INDEX Color Palette Book Template Affinity Publisher - Series Index
Screenshots used by permission of Serif (Europe) Ltd. This article is not endorsed by Serif Ltd.
It is customary to create the cover of a magazine or book separately from the inner pages. For example, when creating the InDesign files for MUSED BellaOnline Review, I created one file for the inner pages and one for the cover spread, as requested by LuLu.com. However, as this project is a simple reference eBook of color palettes, we will simplify the process by creating the cover on the first page and the inner pages will begin on the second page of the same Publisher file.
The cover master template will have a full page picture frame for the cover graphic. We will be placing the book title and other information in the open areas around the graphics. There will be text placeholders for the book title, subtitle and name of the author. These placeholders can be repositioned as needed for the cover artwork.
- At the top of the Master Page panel, click on the Add Master icon. In the Add Master popup window, name this new master Cover. Click the Layout tab. For the Show Dimensions of, click the Page button. Set the Dimensions to 612 x 792 px. Click the Portrait button. For the Page Layout click the Single button. Click the OK button. (see screenshot)
- If the Cover master is not loaded in to the workspace, double-click on the Cover thumbnail.
- Select the Picture Frame Rectangle tool and draw a frame over the entire page. (see screenshot)
- In the transform panel, set the Width to 612, Height to 792 and X and Y to zero.
- Select the Artistic tool. Click on the canvas in the upper left corner and add the text Book Title. (see screenshot)
- Set the text style controls to the following in the Context toolbar. Of course, you can change these settings for each eBook cover that you create.
- In the Transform panel, set X to 72 and Y to 72.
- In the Layers panel, the Book Title layer should already be named Book Title and above the Picture Frame layer.
- Also in the Layers Panel, duplicate the Book Title layer and drag it below the original layer. Rename this new layer Book Subtitle. (see screenshot)
- Change the text on the canvas to Book Subtitle.
- In the Transform panel, set the X to 72 and the Y to 144 for the book subtitle placeholder text. In the Context toolbar, set the Font Size to 36 pt.
- In the Layers panel, repeat the previous step to duplicate the Subtitle placeholder text layer. Name the new layer Author Name. Drag this layer below the Book Subtitle layer. (see screenshot)
- In the Context toolbar, set the Font Size to 24. In the Transform panel, set X to 375 and Y to 735. This should place the placeholder text at the bottom right corner.
- With the text still selected, change the Text Alignment to Right Align.
You should see a new Cover master thumbnail in the Master Pages panel.
Now we will add the placeholder text.
| Font Face | Helvetica |
| Font Size | 64 |
| Text Alignment | Left Align |
Now we will duplicate this text layer again to create the author name placeholder text. We will place this placeholder text at the bottom right cover. As with the page number, we will change the text alignment to right aligned.
In the next tutorial, we will learn how to add the color palette information and graphics for a few pages.
INDEX Color Palette Book Template Affinity Publisher - Series Index
Screenshots used by permission of Serif (Europe) Ltd. This article is not endorsed by Serif Ltd.

Related Articles
Editor's Picks Articles
Top Ten Articles
Previous Features
Site Map
Content copyright © 2023 by Diane Cipollo. All rights reserved.
This content was written by Diane Cipollo. If you wish to use this content in any manner, you need written permission. Contact Diane Cipollo for details.


