
INDEX - Artist Manikin in Affinity Designer
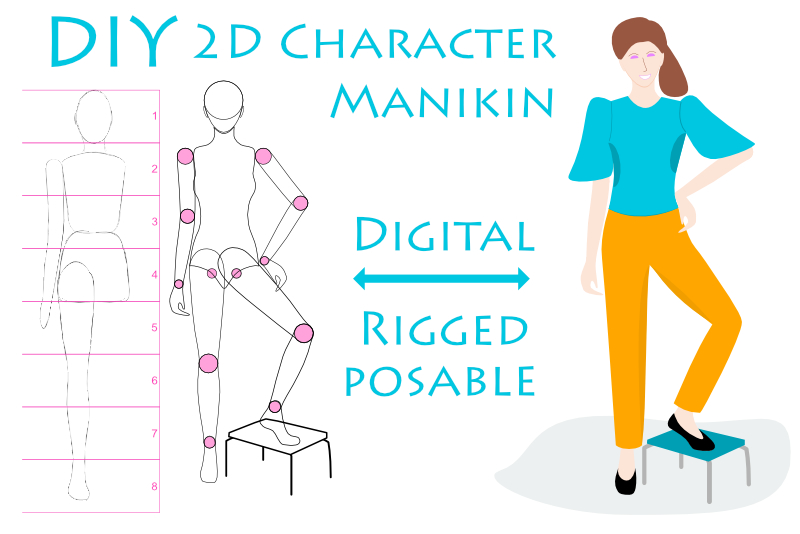
In the next few Affinity Designer tutorials, we will make our own digital version of an artist manikin. What is an artist manikin? A manikin is a posable wooden doll used as a reference when studying human proportions. Because ours will be digital, you can save as many different poses as you wish. You can even add skin, hair and clothes and turn the manikin in to a real character for your project.
For a visual reference as we draw the basic shapes for our manikin, have a family member or friend take a picture of you or grab a CC0 image from the web. Let's work on the manikin's right side, virtually cutting the doll in half. Once we are happy with the the doll's right side, we can duplicate the layers for the other side.
Let's sketch the basic body shapes, using your photo reference and the Vector Brush or Pencil tool. Of course, you can use your favorite drawing tool or brush. It might be easier if you reduce the opacity of the reference image layer in the Layers panel. Also, you could drag a guide from the side Ruler and place it at the center of your manikin.
In the example (see screenshot), I used the Vector Brush tool to draw the head, neck, body, arm and leg.
Note: Before we start, let's clarify what "right or left side" means. It can get confusing because the doll's left side is on the right side of our screen and her right side is on the left of our screen. So, let's always refer to the right and left sides of the manikin and not the screen.
Screenshots used by permission of Serif (Europe) Ltd. This article is not endorsed by Serif Ltd.
For a visual reference as we draw the basic shapes for our manikin, have a family member or friend take a picture of you or grab a CC0 image from the web. Let's work on the manikin's right side, virtually cutting the doll in half. Once we are happy with the the doll's right side, we can duplicate the layers for the other side.
Let's sketch the basic body shapes, using your photo reference and the Vector Brush or Pencil tool. Of course, you can use your favorite drawing tool or brush. It might be easier if you reduce the opacity of the reference image layer in the Layers panel. Also, you could drag a guide from the side Ruler and place it at the center of your manikin.
In the example (see screenshot), I used the Vector Brush tool to draw the head, neck, body, arm and leg.
Note: Before we start, let's clarify what "right or left side" means. It can get confusing because the doll's left side is on the right side of our screen and her right side is on the left of our screen. So, let's always refer to the right and left sides of the manikin and not the screen.
- Open your reference image in to Affinity Designer.
- In the Layers panel, set the Opacity of the image layer to 50%.
- Using your favorite tool, roughly sketch the right side of the doll, dividing the doll into the sections below. As you finish each section, select all the layers for that section in the Layers panel. Right-click and choose Group from the popup menu. Name each group according to the sections below.
- When you are finished, select all the group layers, right-click and choose Group. Name this new Group layer step 1 - rough sketch (see screenshot).
- Save your file.
head
ear
neck
upper body
lower body
manikin's right arm and hand
manikin's right leg and foot
Note: If you prefer, you can sketch the body and neck together as one piece.
INDEX - Artist Manikin in Affinity Designer
- Digital Manikin - Loose Sketch
- Digital Manikin - Body Proportions
- Digital Manikin - The Head
- Digital Manikin - The Face
- Digital Manikin - The Torso
- Digital Manikin - The Arm
- Digital Manikin - The Arm Joints
- Digital Manikin - Layers Panel
- Digital Manikin - Layer Hierarchy
- Digital Manikin - Moveable Joints
Screenshots used by permission of Serif (Europe) Ltd. This article is not endorsed by Serif Ltd.

Related Articles
Editor's Picks Articles
Top Ten Articles
Previous Features
Site Map
Content copyright © 2023 by Diane Cipollo. All rights reserved.
This content was written by Diane Cipollo. If you wish to use this content in any manner, you need written permission. Contact Diane Cipollo for details.


