
Plaid Background in Affinity Designer V2
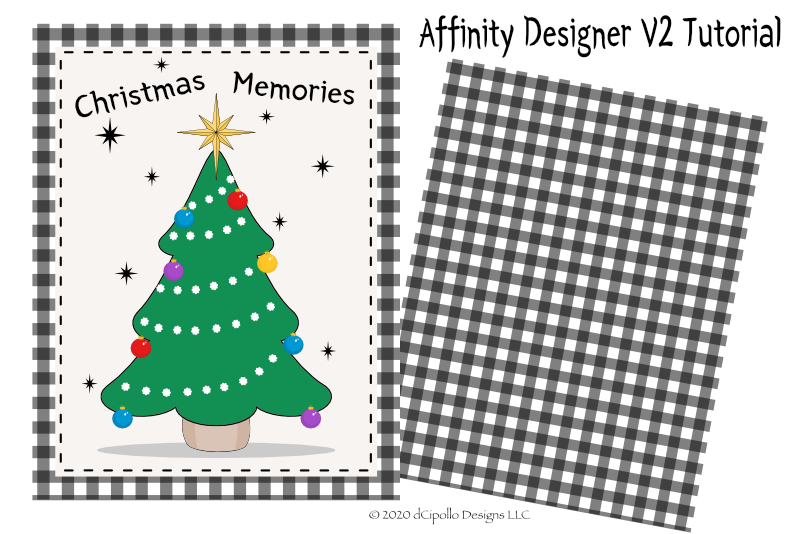
In this Affinity Designer 2 tutorial, we will make a plaid background that can be used for any project. We will create a black and white plaid but we can change the color as needed for each project.
Let's set up the document and create the first line that we will use for the plaid pattern. We will start with an 8.5 inches by 11 inches document at 300 dpi. This is a good size to start with, as it's ready for printing. However, as we are creating it in vector format, you can also scale the document without loss of image quality. We will also set up the first line at 50 pixels thick.
Next
Powered by Creative Market Screenshots used by permission of Serif (Europe) Ltd. This article is not endorsed by Serif Ltd.
Let's set up the document and create the first line that we will use for the plaid pattern. We will start with an 8.5 inches by 11 inches document at 300 dpi. This is a good size to start with, as it's ready for printing. However, as we are creating it in vector format, you can also scale the document without loss of image quality. We will also set up the first line at 50 pixels thick.
- Open the new Affinity Designer 2 and you will see the New Document dialog box (see screenshot). Set the Category to Print and the Preset to Letter. Keep the default settings and click Create.
- From the Menubar, click View and then Show Rulers (see screenshot).
- Right-click on the corner of the Ruler and choose pixels (see screenshot).
- From the Tools panel, click the Rectangle tool and draw a long rectangle along the top of the Canvas (see screenshot).
- Now select the Move tool from the Tools panel and select the line with the Move tool.
- In the Transform panel, set the Height to 50 pixels.
- With the line still selected, set the Stroke color to Null and the Fill color to Black (or your choice of color) in the Context toolbar (see screenshot).
- With the line still selected, set the Opacity to 50% in the Layers panel (see screenshot).
If you prefer to work in pixels, as I do, you can change the setting from the default inches to pixels. If the Rulers are not showing, let's open the Rulers into the Workspace.
In the upper left corner of the canvas, you will see the Units value is set to inches. Let's change that.
On the Canvas you will see the default margins for the Print preset, but we will create the background graphic to fill the entire canvas. Our first step is to decide on the size of the lines in the plaid. Let's use the Rectangle shape tool to draw a 50 pixel line.
In the Transform panel, the Width should be 2550 pixels (width of canvas) and the X and Y values should be set to Zero. Let's set the Height of the line to 50 pixels (see screenshot).
Now let's set the color of the line to black.
Finally, we need to reduce the Opacity of the line to 50%. This will give us those dark spaces where the vertical and horizontal lines overlap (see screenshot).
Next
Powered by Creative Market Screenshots used by permission of Serif (Europe) Ltd. This article is not endorsed by Serif Ltd.

Related Articles
Editor's Picks Articles
Top Ten Articles
Previous Features
Site Map
Content copyright © 2023 by Diane Cipollo. All rights reserved.
This content was written by Diane Cipollo. If you wish to use this content in any manner, you need written permission. Contact Diane Cipollo for details.


