7 Photography Exercises For Beginners

Set Yourself a Daily Shot Goal
Set yourself a number between 50 and 100 and take that many photos a day for a month. When you do this, you become consistent and you?ll acquire the skill to take photos quickly. It?s great for your decision making as you have to learn to think quickly to achieve your daily quota. Don't let yourself become complacent though and make sure that you do try to take images that you are happy with. You?ll soon find that you will get an eye for finding photographic opportunities.
Take All Your Shots With One Lens
Choose a focal length and take all your images using that lens. It?s easy to zoom into shots to get the composition that you want but when you only have one focal length you need to move your feet more, to get the frame that you desire for your photo. This will also give you a feel for which subject matter suits that focal length.
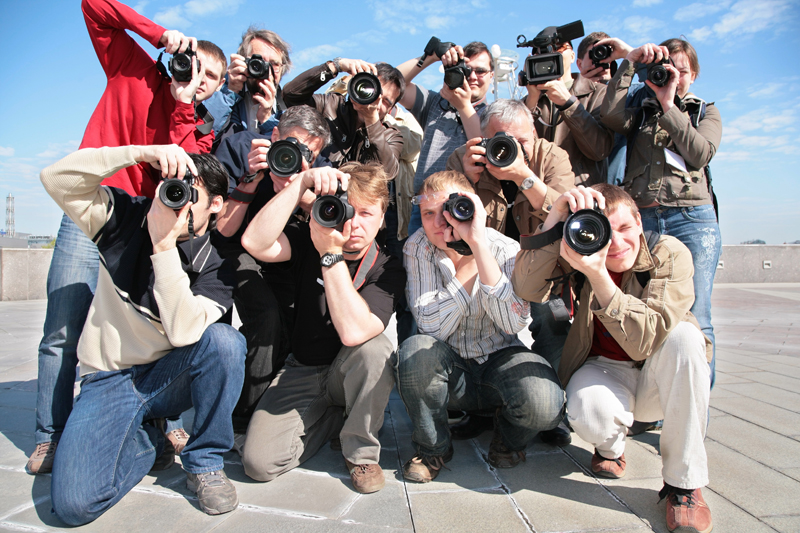
Take All Your Shots From Below
Most people tend to stay upright when taking their shots but when you are forced to take photos of everything from the ground, you get to see the subject matter from a very different viewpoint. It?s not easy on the knees but it will make you stop and think about how you frame your shots and what subjects will work well from this angle.
Monochrome
We see the world in colour and most of the photos we see every day are in colour too. Take a step back and revisit black and white photography. Monochrome images help you to focus in on specific details in the images and without the use of colour you need to rely on contrast and light and shade for impact. Take all your photos in black and white and see if you can create drama and interest in your images.
Use a Film Camera For a Day
Use a film camera for a day. Photographers that started before digital photography was available had to really know their craft. There was no room for mistakes and if you under or overexposed your shot then you couldn?t rely on all the great software we have these days to try to save the image. Using film makes you more measured and thoughtful about your images, as you have to pay for each shot of film and for the film to be developed. These days many photographers try to sell you on the amount of images you will get at the end of a shoot when the emphasis should always be on quality. There is no point in giving someone hundreds of images if they are all mediocre! Take your time when taking your film shots and see how well you do.
Try Something New
If you like taking photos of people, then take pictures of something completely different for the day. Maybe you like to take your time on landscape shots? In that case, try your hand at taking photos of moving objects instead. We can all become accustomed to taking photos of the same things every day so taking images that are a little different will challenge you to be more creative.
One Main Color
Choose one color that must be somewhere in each shot. Take photos that work well with that color and create a cohesive theme based around it. You?ll have to keep your eyes alert to find things of that color, which will help you to be more aware of the world around you and all the photographic opportunities that are out there.
It?s always good to challenge yourself and try something new to add some extra creativity into your day and get you out of your comfort zone.
Enjoy your creativity!
Here is a book that I particularly like as it has so many great exercises in it to keep your creative thinking fresh each week. Click on this link if you would like to have a look:
Creative 52: Weekly Projects to Invigorate Your Photography Portfolio
Set yourself a number between 50 and 100 and take that many photos a day for a month. When you do this, you become consistent and you?ll acquire the skill to take photos quickly. It?s great for your decision making as you have to learn to think quickly to achieve your daily quota. Don't let yourself become complacent though and make sure that you do try to take images that you are happy with. You?ll soon find that you will get an eye for finding photographic opportunities.
Take All Your Shots With One Lens
Choose a focal length and take all your images using that lens. It?s easy to zoom into shots to get the composition that you want but when you only have one focal length you need to move your feet more, to get the frame that you desire for your photo. This will also give you a feel for which subject matter suits that focal length.
Take All Your Shots From Below
Most people tend to stay upright when taking their shots but when you are forced to take photos of everything from the ground, you get to see the subject matter from a very different viewpoint. It?s not easy on the knees but it will make you stop and think about how you frame your shots and what subjects will work well from this angle.
Monochrome
We see the world in colour and most of the photos we see every day are in colour too. Take a step back and revisit black and white photography. Monochrome images help you to focus in on specific details in the images and without the use of colour you need to rely on contrast and light and shade for impact. Take all your photos in black and white and see if you can create drama and interest in your images.
Use a Film Camera For a Day
Use a film camera for a day. Photographers that started before digital photography was available had to really know their craft. There was no room for mistakes and if you under or overexposed your shot then you couldn?t rely on all the great software we have these days to try to save the image. Using film makes you more measured and thoughtful about your images, as you have to pay for each shot of film and for the film to be developed. These days many photographers try to sell you on the amount of images you will get at the end of a shoot when the emphasis should always be on quality. There is no point in giving someone hundreds of images if they are all mediocre! Take your time when taking your film shots and see how well you do.
Try Something New
If you like taking photos of people, then take pictures of something completely different for the day. Maybe you like to take your time on landscape shots? In that case, try your hand at taking photos of moving objects instead. We can all become accustomed to taking photos of the same things every day so taking images that are a little different will challenge you to be more creative.
One Main Color
Choose one color that must be somewhere in each shot. Take photos that work well with that color and create a cohesive theme based around it. You?ll have to keep your eyes alert to find things of that color, which will help you to be more aware of the world around you and all the photographic opportunities that are out there.
It?s always good to challenge yourself and try something new to add some extra creativity into your day and get you out of your comfort zone.
Enjoy your creativity!
Here is a book that I particularly like as it has so many great exercises in it to keep your creative thinking fresh each week. Click on this link if you would like to have a look:
Creative 52: Weekly Projects to Invigorate Your Photography Portfolio
You Should Also Read:
Find inspiration For Your Photography

Related Articles
Editor's Picks Articles
Top Ten Articles
Previous Features
Site Map
Content copyright © 2023 by Ewa Sapinska. All rights reserved.
This content was written by Ewa Sapinska. If you wish to use this content in any manner, you need written permission. Contact Ewa Sapinska for details.