
Designing A Logo With The Logo Creator - I - 3

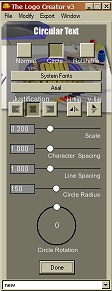
| Step 8. Add your company name. Now we will add your company name to the logo. Type the name into the text input box on the Element Setter. Then click Add New Text. Repeat Step 7 to format this text. For this text I used the Textile built-in font and resized it to .076. Then I used the eyedropper to select the yellow color from his shoes. If the text is not already centered on the canvas, click and drag it into position.
This is a good looking logo, but we will add more style and detail to it in part two of this tutorial. For now let's save the logo in the program's default format (.tlc). From the main Menubar click File > Save As to open the Save Your Logo dialog box. Give your logo a name and click Save. ← Back The Logo Creator material used by permission of Laughingbird Software LLC. Copyright ©2000-2004 All Rights Reserved. | ||

This site needs an editor - click to learn more!

Editor's Picks Articles
Top Ten Articles
Previous Features
Site Map
Content copyright © 2023 by Diane Cipollo. All rights reserved.
This content was written by Diane Cipollo. If you wish to use this content in any manner, you need written permission. Contact
BellaOnline Administration
for details.

