
Designing A Logo With The Logo Creator - II

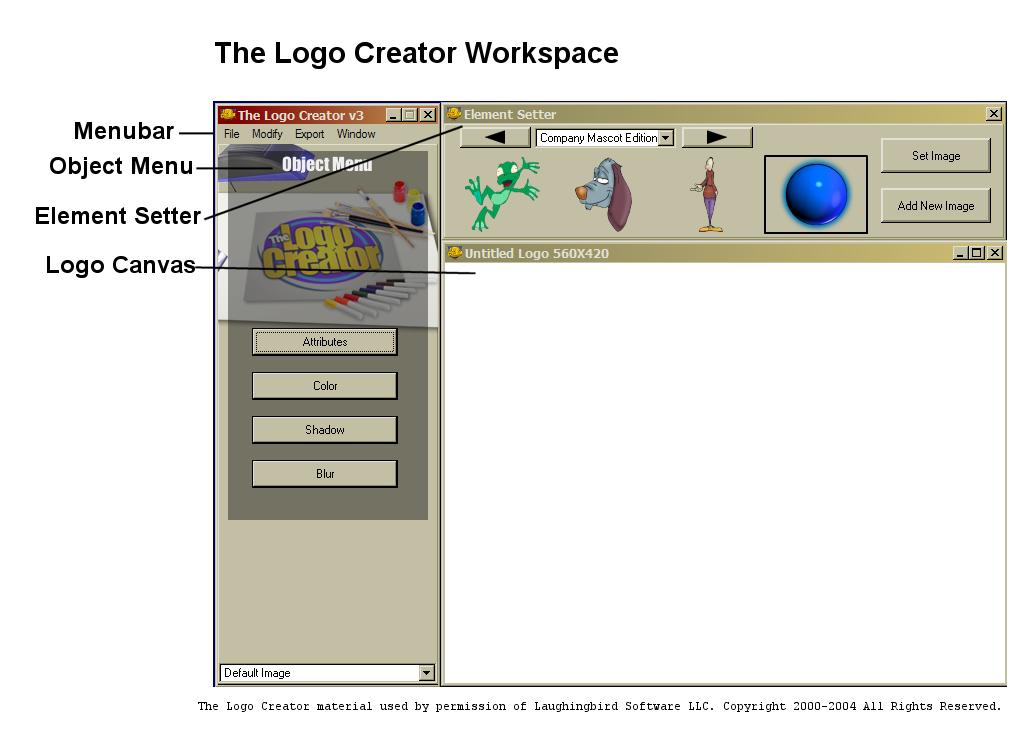
| Project Information: • Skill level: Basic • The Logo Creator by Laughingbird Software - Company Mascot and Cartoon Editions • Diagram of The Logo Creator Workspace • Inkjet Printer (optional) • Blank stationary and business card paper (optional) In Part I of this tutorial we designed a company logo for your website. This was a nice simple logo but the design needed something more. In this part of the tutorial we will add a few more style and design elements.  Step 1. Open your image from the first part of the tutorial. To open your image into the program again click File > Open Logo. After the "Rendering" message disappears you are ready to start working on the image.
Step 2. Add the first design element. We will now add the first design element which will be a semitransparent disk. Click Modify > New Image Element on the main Menubar. After the Element Setter opens select the Cartoon Edition from the Object Libraries drop-down list. Move along the element list until you find the ctoon_|11_Disk element. Click on this element to place it in the input box and then click the Set Image button to replace the default image with this disk.
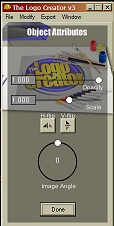
The first adjustment we need to make is to resize this disk to cover most of the canvas. Click on the Attributes button on the Object Menu to open the Object Attributes dialog box. Now move the Scale slider bar to 2. We also want this disk to be semitransparent, so move the Opacity slider bar to .185. Now click Done. At this point the disk is still on the top layer of the design. We need to move the disk to the back layer. On the main Menubar click Modify > Send To Back. Step 3. Add a second disk. We will add a second semitransparent disk (ctoon_|12_Disk) to the design. Repeat the previous step to add the ctoon_|12_Disk element. Click on this element in the Element Setter and then click Add New Image. Go to the Object Attributes dialog box and set the Scale slider bar to 1.193 and the Opacity slider bar to .084. Click Done to close the Object Attributes dialog box. Finally click Modify > Send To Back to move this disk to the bottom layer of the design. Next → The Logo Creator material used by permission of Laughingbird Software LLC. Copyright ©2000-2004 All Rights Reserved. | ||||


This site needs an editor - click to learn more!

Editor's Picks Articles
Top Ten Articles
Previous Features
Site Map
Content copyright © 2023 by Diane Cipollo. All rights reserved.
This content was written by Diane Cipollo. If you wish to use this content in any manner, you need written permission. Contact
BellaOnline Administration
for details.

