
Simple 5 x 5 Box With Lid SVG Cut File
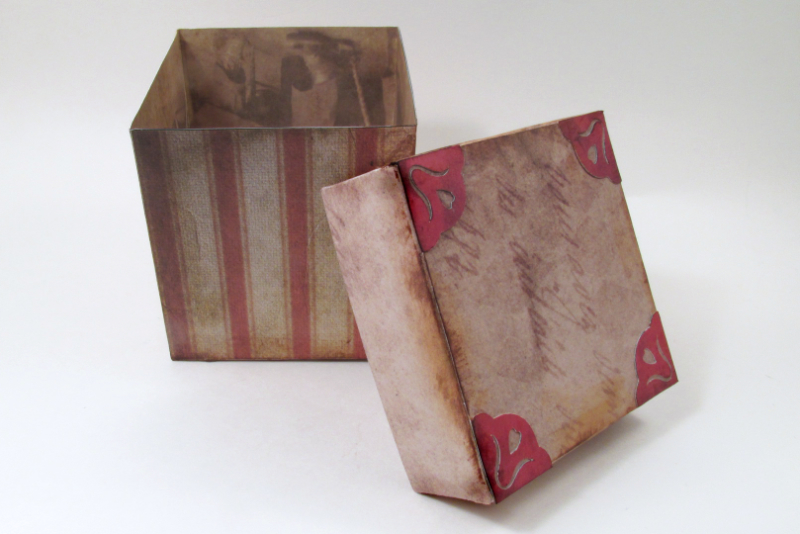
Sometimes, you need a simple box, which can be turned into just about anything, as the foundation of your project. In this tutorial, we will create an Illustrator® SVG cut file for a 5 x 5 inch box.
As we already have the width and length dimensions for the bottom of the box, we only need to decide the height of the sides of the box. One inch is a nice height for a small box. From that one inch, we can decide that the lid height would be .75 inch, leaving the side of the lid slightly shorter than the side of the box. Finally, the lid should be slightly larger so that it can slip nicely over the box. Let's use a clearance of .125 inch.
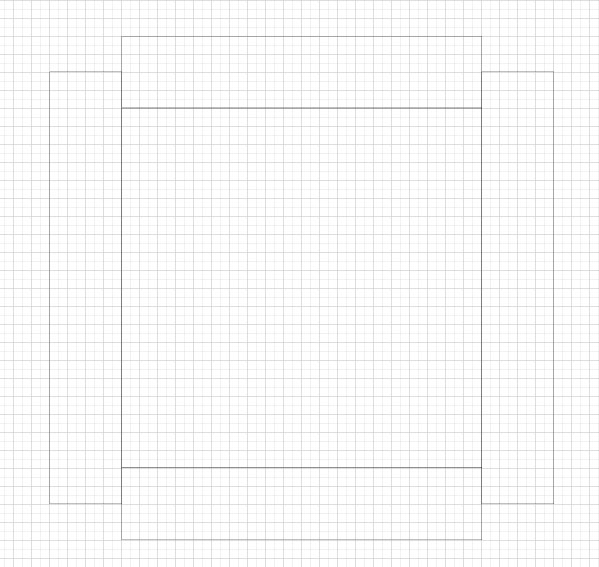
Now we can go into Illustrator and draw the cut lines for our SVG cut file. I like to start by drawing the individual rectangles that make up the box bottom and sides. On two of the four sides, we need to add a .5 inch tab for glueing the box together.
Note: If you wish to make a taller box, just increase the height of the sides from 1 inch to whatever height you wish to use.
Copyright 2018 Adobe Systems Incorporated. All rights reserved. Adobe product screen shot(s) reprinted with permission from Adobe Systems Incorporated. Adobe, Photoshop, Photoshop Album, Photoshop Elements, Illustrator, InDesign, GoLive, Acrobat, Cue, Premiere Pro, Premiere Elements, Bridge, After Effects, InCopy, Dreamweaver, Flash, ActionScript, Fireworks, Contribute, Captivate, Flash Catalyst and Flash Paper is/are either [a] registered trademark[s] or a trademark[s] of Adobe Systems Incorporated in the United States and/or other countries.
As we already have the width and length dimensions for the bottom of the box, we only need to decide the height of the sides of the box. One inch is a nice height for a small box. From that one inch, we can decide that the lid height would be .75 inch, leaving the side of the lid slightly shorter than the side of the box. Finally, the lid should be slightly larger so that it can slip nicely over the box. Let's use a clearance of .125 inch.
Now we can go into Illustrator and draw the cut lines for our SVG cut file. I like to start by drawing the individual rectangles that make up the box bottom and sides. On two of the four sides, we need to add a .5 inch tab for glueing the box together.
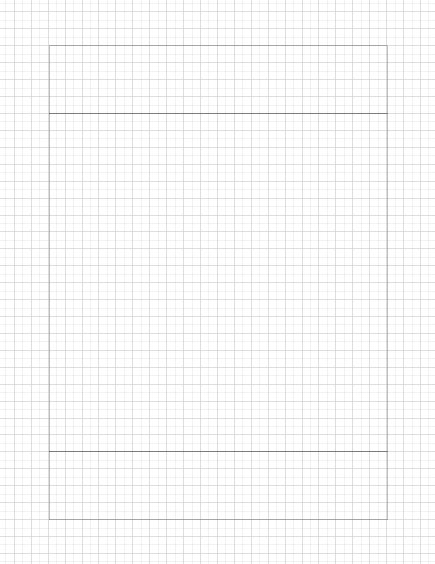
- In Illustrator, draw a 5 x 5 inch rectangle for the box bottom.
- Draw a 5 x 1 inch rectangle for the side of the box and place it at the top of the larger rectangle. Duplicate this rectangle as the second side of the box and place it at the bottom of the larger rectangle.
- For the side with tabs, draw a 6 x 1 inch rectangle and place it at the left of the larger rectangle. Duplicate the rectangle and place at the right side of the larger rectangle.
- All of these path lines should be in the default Layer 1 in the Layers pane. Lock this layer.
- Add a new layer to the Layers pane and name it bottom.
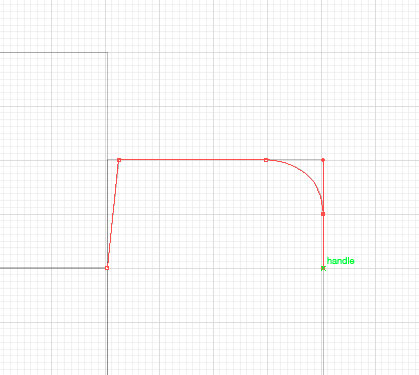
- Using the rectangles on Layer 1 as a guide, draw around the edge of the box with the Pen tool. If you wish, you can slant one of the edges of the tab and draw a curved corner at the other edge.
To create the lid we need to add the .125 clearance and shorten the sides to .75 inch. We can do that easily with the Direct Selection Tool. - Duplicate the box bottom and lock the box bottom layer.
- Add a new layer and name it lid. Paste the box into this new layer.
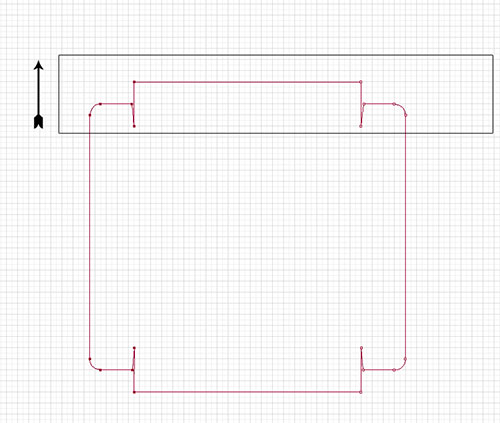
Let's move the left side of the box further to the left to add the .125 clearance to the width of the box lid. - Select all the anchor points for the left side and edge of the box lid. Drag these points .125 inch to the left.
- Repeat this for the height of the lid. Select all the anchor points for the top side of the box lid and drag upward.
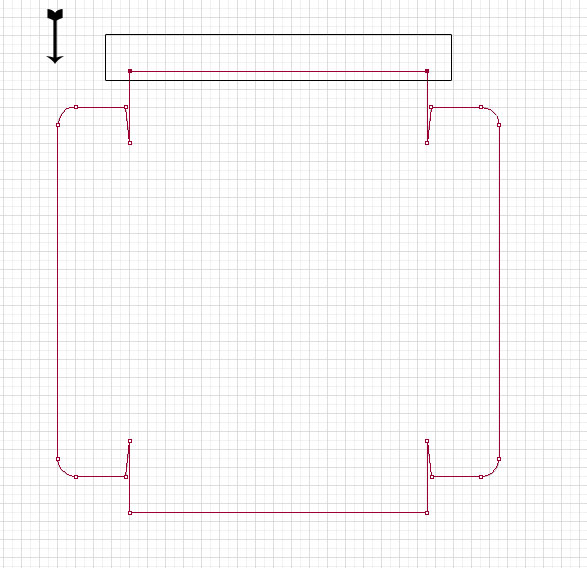
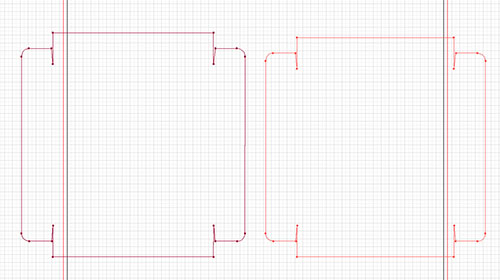
Now our lid has the clearance needed to fit over the box bottom. Let's reduce the height of the sides. - This time select only the two anchor points on the outside edge of one side with the Direct Selection tool. Move these two points inward .25 inch.
- Repeat this for the other three sides. For the two sides with rounded corners, also select the anchor points that create the curve.
Note: If you wish to make a taller box, just increase the height of the sides from 1 inch to whatever height you wish to use.
Copyright 2018 Adobe Systems Incorporated. All rights reserved. Adobe product screen shot(s) reprinted with permission from Adobe Systems Incorporated. Adobe, Photoshop, Photoshop Album, Photoshop Elements, Illustrator, InDesign, GoLive, Acrobat, Cue, Premiere Pro, Premiere Elements, Bridge, After Effects, InCopy, Dreamweaver, Flash, ActionScript, Fireworks, Contribute, Captivate, Flash Catalyst and Flash Paper is/are either [a] registered trademark[s] or a trademark[s] of Adobe Systems Incorporated in the United States and/or other countries.

Related Articles
Editor's Picks Articles
Top Ten Articles
Previous Features
Site Map
Content copyright © 2023 by Diane Cipollo. All rights reserved.
This content was written by Diane Cipollo. If you wish to use this content in any manner, you need written permission. Contact Diane Cipollo for details.


