
Sewing Shoes on Cloth Dolls

The best thing about making your own cloth dolls is the freedom to make them truly your own, to express your own creativity. Cloth dolls can be anything from the simplest primitive baby, to a very elaborate and detailed confection. The only limit is your own imagination.
One easy way to give your dolls a little individual design and personality is to give them feet, or shoes to match their outfit. This may seem a little scary if you are new to doll making, but it is quite simple, and I will explain how to do it.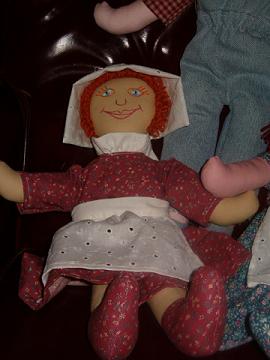
In the photo you can see that I put shoes on the doll that match her dress. If you prefer to have more flexibility with your dolls wardrobe you can make the shoes in a solid brown or black, so that they will coordinate with more than one dress.
The pattern for this, the 21 Inch Lalena Doll can be found by clicking Here. This pattern already has a separate piece for the shoes, but you can achieve the same effect with any cloth doll pattern by simply cutting the foot part off of the bottom of the leg, if it is all one piece. Just make sure you allow a seam allowance on the top of the shoe and the bottom of the leg, to match the seam allowance around the outside of the pattern pieces.
The Lalena doll requires two fabric pieces for each leg and two fabric pieces for each foot. Make sure the fabric is folded when you pin the pattern pieces to the fabric. This will ensure that a shoe piece is cut in each direction for each leg, so that you create a shoe that lines up and faces forward. After cutting out the shoes and the legs, pin a foot to the bottom of each leg, with right sides together. Stitch them in place.
Now, with right sides together, pin the leg pieces together, to form the leg and foot, and make sure the seams at the top of the foot line up at the front and back of the leg, than stitch in place.
That's all there is to it!
Making and Dressing Cloth Dolls
Ebook with patterns and instructions to make 5 cloth dolls as well as chapters on general doll making techniques.The book includes 21 inch Lalena Doll, 21 inch David Doll, Bear Dolls, 9 inch Destiny Doll and 15 inch Annie Doll, all together in one handy book. 53 pages.Making and Dressing Cloth Dolls
You Should Also Read:
21 Inch Lalena Doll
21 Inch David Cloth Doll
15 Inch Annie Doll

Related Articles
Editor's Picks Articles
Top Ten Articles
Previous Features
Site Map
Content copyright © 2023 by Helen B. Wharton. All rights reserved.
This content was written by Helen B. Wharton. If you wish to use this content in any manner, you need written permission. Contact Helen B. Wharton for details.
