
Coffin Box - Silhouette Cut by Line Color
Let's continue to work on our Halloween coffin box project in Silhouette Studio®. We are ready to cut the pieces to the coffin box.
Cutting by Line Color
We have drawn the lines that will tell the Cameo® where to cut and score the lines. Score lines are different from cut lines because the blade cuts only slightly into the cardstock. Score lines make it easier to fold the tabs evenly. But how does the Cameo know a cut line from a score line? That's easy. The default color for a cut line is red. We kept the cut lines red but changed the score lines to blue. This is called cutting by line color.
Back
Patterned paper Gilded Lily Collection by Graphic 45.
Silhouette, Silhouette Studio, Silhouette Connect, PixScan, Silhouette CAMEO and Silhouette Portrait are either registered trademarks or trademarks of Silhouette America, Inc. Product screen shot(s) reprinted with permission from Silhouette America, Inc
Cutting by Line Color
We have drawn the lines that will tell the Cameo® where to cut and score the lines. Score lines are different from cut lines because the blade cuts only slightly into the cardstock. Score lines make it easier to fold the tabs evenly. But how does the Cameo know a cut line from a score line? That's easy. The default color for a cut line is red. We kept the cut lines red but changed the score lines to blue. This is called cutting by line color.
- Open the SEND panel and click the Line tab (see screenshot).
- Select the red line color and set the drop-down Action list to Cut.
- Select the blue line color and set the Action to Score.
- Load your 12 x 12 inches black cardstock in to the Cameo and click SEND (see screenshot).
- If your patterned paper is 8.5 x 11 inches, return to the PAGE SETUP panel. Change the Media Size setting from 12 x 12 to 8.5 x 11 inches.
- Remove all the cut lines from the cutting area, except for the coffin shape.
- Return to the SEND panel and load your paper in to your Cameo. Click SEND.
You will see two line colors listed. We need to set the Action for each color.
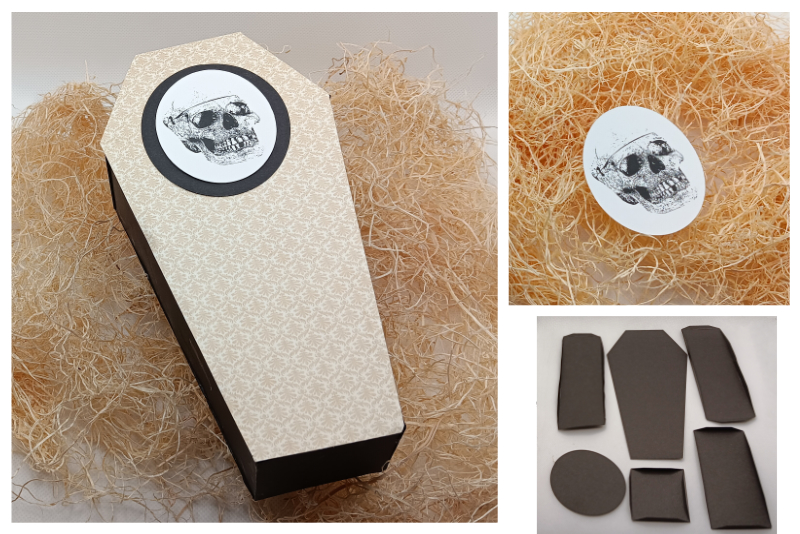
Now we are ready to cut the pieces for the coffin box.
We need to cut a second coffin shape. This will be for the lid of the coffin, so you will want to cut it from a patterned paper cardstock.
- Start by glueing the long side pieces to the black coffin piece.
- Next, glue the bottom piece to the coffin and side pieces. Repeat this for the top piece.
- Glue the sides, top and bottom pieces to the coffin lid piece.
- Finally, glue the black oval to the front of the coffin (see screenshot).
Now you should have the coffin glued together except for the coffin lid piece (see screenshot).
Back
Patterned paper Gilded Lily Collection by Graphic 45.
Silhouette, Silhouette Studio, Silhouette Connect, PixScan, Silhouette CAMEO and Silhouette Portrait are either registered trademarks or trademarks of Silhouette America, Inc. Product screen shot(s) reprinted with permission from Silhouette America, Inc

Related Articles
Editor's Picks Articles
Top Ten Articles
Previous Features
Site Map
Content copyright © 2023 by Diane Cipollo. All rights reserved.
This content was written by Diane Cipollo. If you wish to use this content in any manner, you need written permission. Contact Diane Cipollo for details.


