
Witch Hat - Final Cut Lines
Now that we have built our template for a witch hat, we can create the final SVG cut lines for our Silhouette SVG cut file.
Let's start with a new Adobe® Illustrator® 12 x 12 inch 300 dpi document. Name this file "Witch Hat SVG". Since the hat brim is a simple circular cut line, we can just copy/paste the path from our template file into the final SVG cut file. The other cut lines will take a little more customization.
Paper by Doodlebug Design
Copyright 2018 Adobe Systems Incorporated. All rights reserved. Adobe product screen shot(s) reprinted with permission from Adobe Systems Incorporated. Adobe, Photoshop, Photoshop Album, Photoshop Elements, Illustrator, InDesign, GoLive, Acrobat, Cue, Premiere Pro, Premiere Elements, Bridge, After Effects, InCopy, Dreamweaver, Flash, ActionScript, Fireworks, Contribute, Captivate, Flash Catalyst and Flash Paper is/are either [a] registered trademark[s] or a trademark[s] of Adobe Systems Incorporated in the United States and/or other countries.
Let's start with a new Adobe® Illustrator® 12 x 12 inch 300 dpi document. Name this file "Witch Hat SVG". Since the hat brim is a simple circular cut line, we can just copy/paste the path from our template file into the final SVG cut file. The other cut lines will take a little more customization.
- Select and copy the Brim path in the template file. Return to the new document file and paste the path in to the default Layer 1. You now have a new path in this layer. Rename this cut line from the default <path> to "Brim". Rename the layer to "Witch Hat".
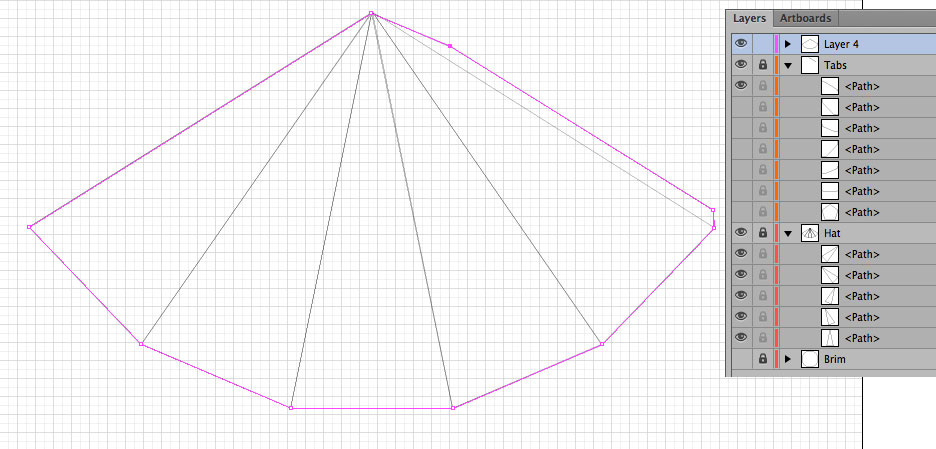
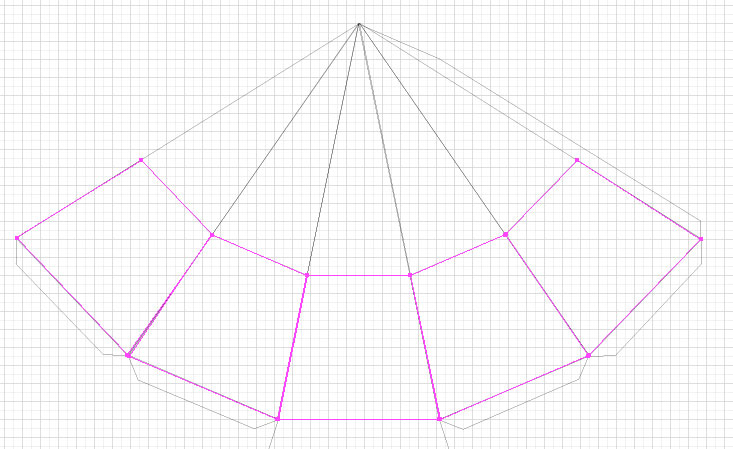
Now we will return to the template file and draw the cut line for the top of the witch hat. This piece of the hat will have five triangular sides and only one tab. This one tab is on the long edge.
- To make this task easier, turn off the visibility of the five bottom tabs.
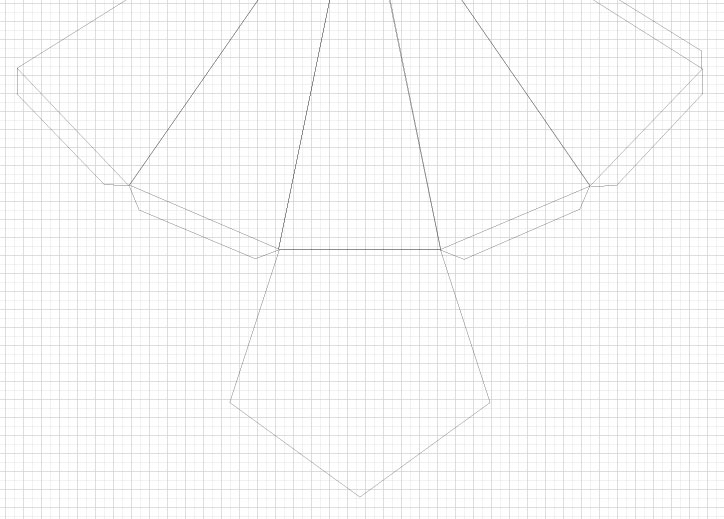
- In the template file, add a new layer at the top of the Layers palette. On this layer, draw or trace the outline of the hat template, click over each of the outside anchor points.
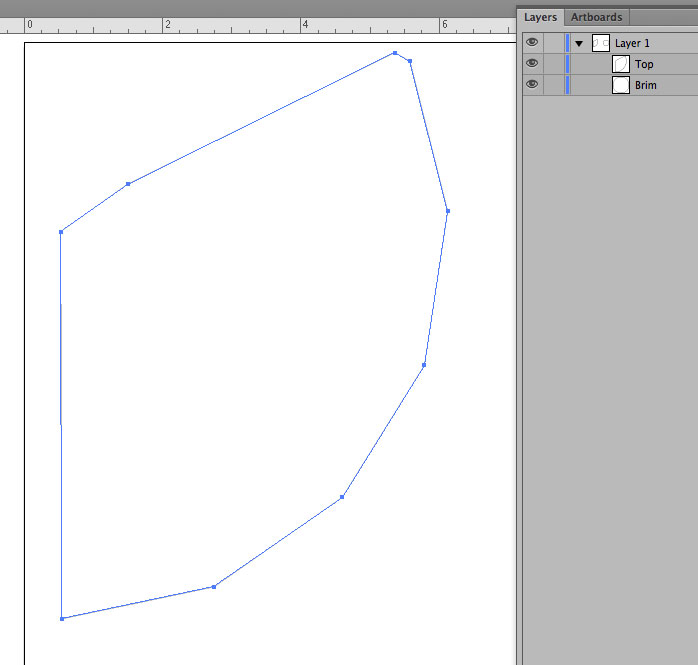
- Copy the outline path that you just drew and paste it in to your Witch Hat SVG document. Rename this new path "Top".
- At this point, the cut line expands to about 10 inches wide. For those with an 8.5 by 11 inch Silhouette Portrait, we need to rotate this cut line counter clockwise to fit within that smaller cutting area. This time you will want to keep the Reference Point for the Rotate tool at the center.
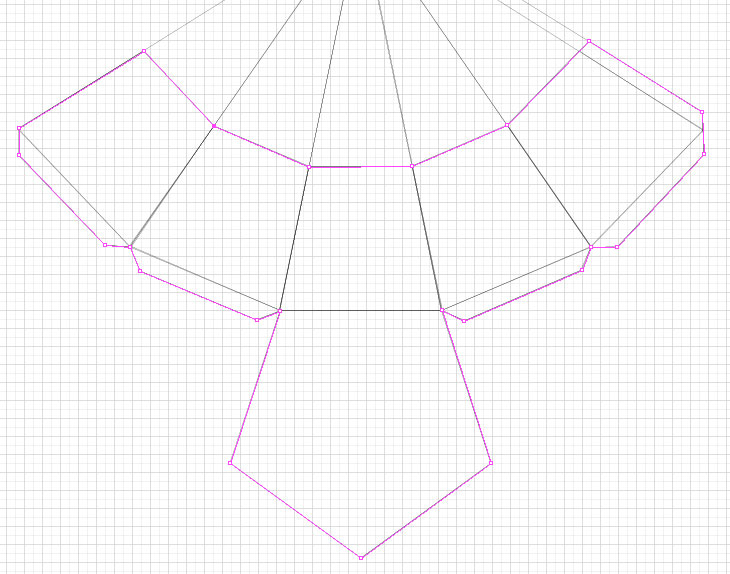
Our next task is to return to the template file and draw the small candy box cut line. This candy box will be hidden under the top of the hat. When the top of the hat is removed, the box is revealed. To create the box we will "cut off" the points of the five triangular sides, add a few tabs and the pentagon base.
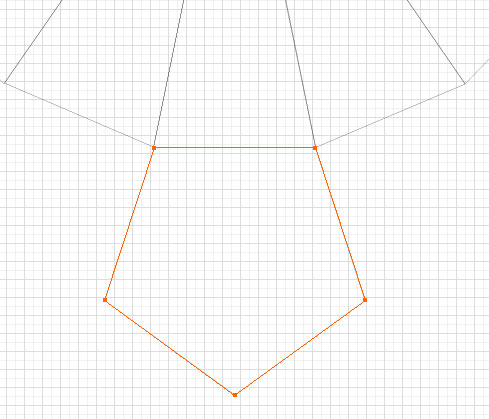
- In the template file, turn on the visibility of the pentagon base shape. Position this pentagon under the center triangle.
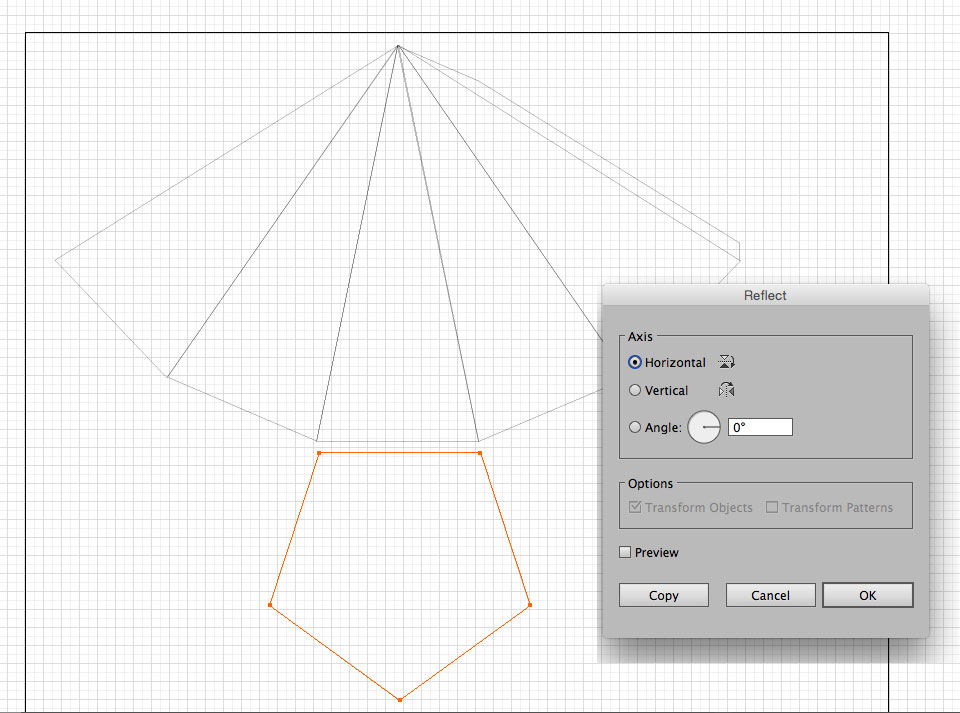
We need to align the pentagon with the short edge of the triangle. So, let's first flip the pentagon.
- With the pentagon selected, click Object - Transform - Reflect. In the dialog box, set the Axis to Horizontal and click OK.
- Position the pentagon so that the anchor points overlap the anchor points at the bottom of the center triangle.
- Turn on the visibility of the tabs at the bottom of the other four triangles.
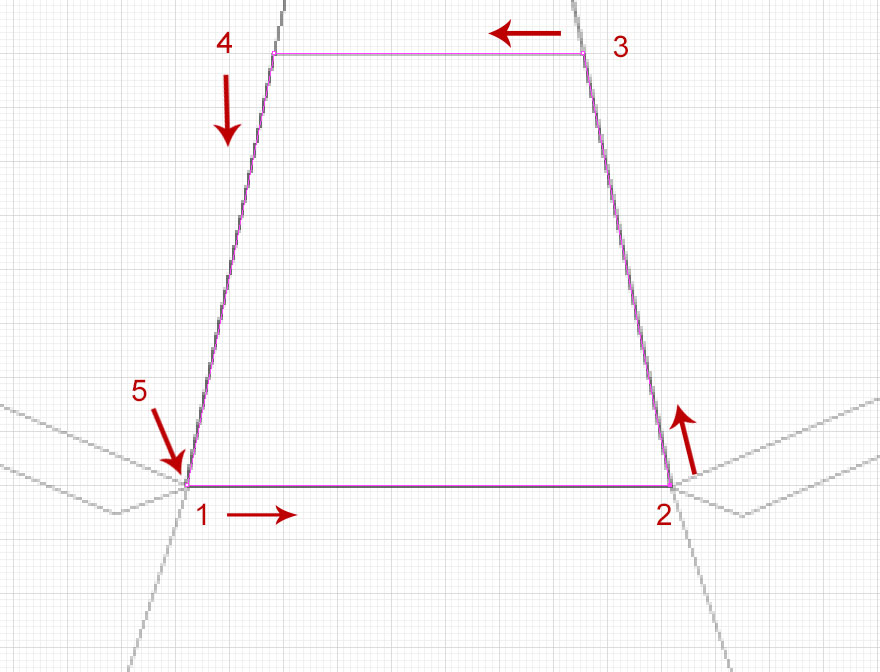
Now we need to "cut off" the tops of the triangles, leaving only a height of two inches.
- On a new layer, use the Pen tool to set an anchor point over the bottom left anchor point of the center triangle below.
- Moving to the right, set an anchor point over the bottom right anchor point.
- Moving up 2 inches along the path, add an anchor point on the path.
- Move to the left horizontally and add another anchor point on the left side of the triangle.
- Finally, close this new path by clicking on the first anchor point.
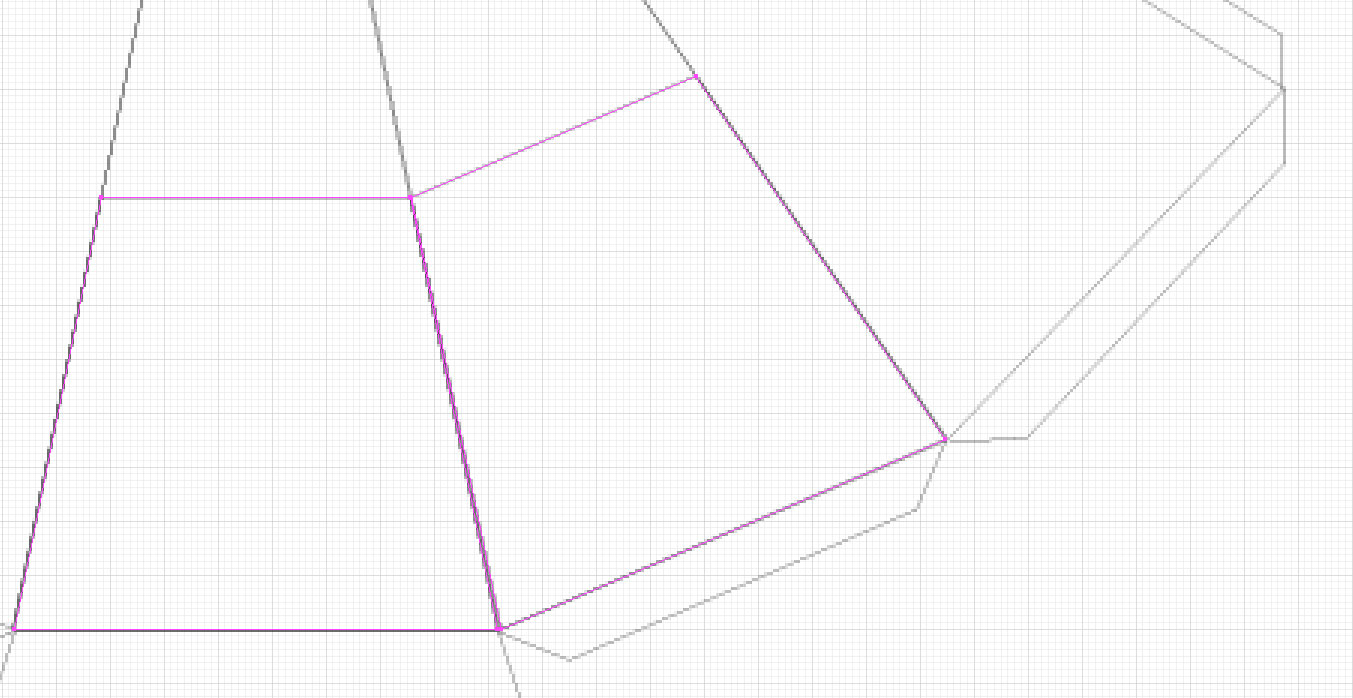
As with the triangles, we will make copies of this shorten box side, place them over the other triangular sides and rotate them into place.
- Select the shorten box side, copy/paste, drag to the right and rotate into place over the first triangle to the right.
- Repeat the previous step for the other three triangles.
- Now that we have our new shorter sides, we can add a new layer and draw the final cut line around the outside edge of the template, including the four bottom tabs, the pentagon base, the long side tab and the five short sides.
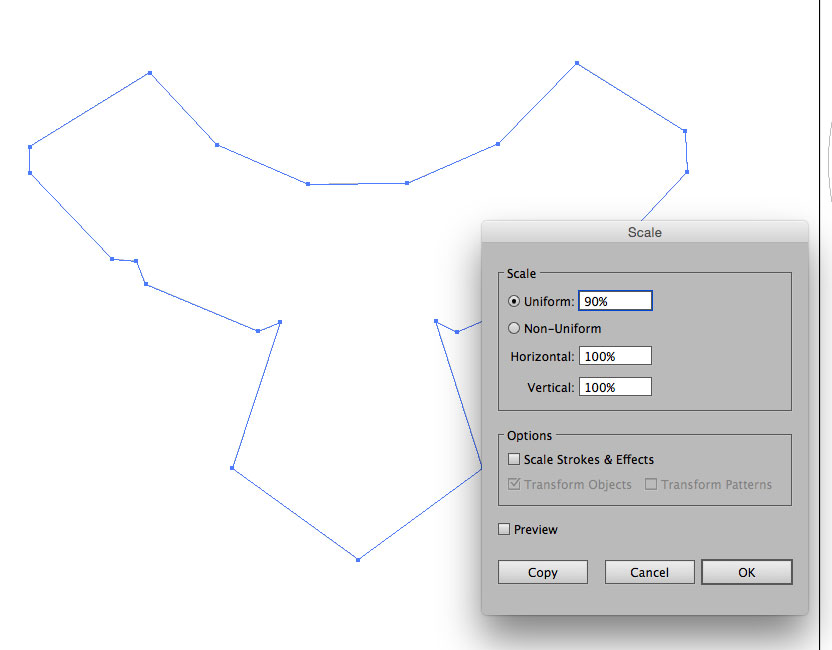
That's our candy box cut line. Now we can move it to the Witch Hat SVG file. At this point, the hat top and the candy box are the same size. Our next task is to reduce the scale of the candy box, so that the hat top can be placed over the candy box.
- With the candy box cut line selected, click Object - Transform - Scale. In the dialog box, set the Scale value to Uniform 90%.
- Finally, let's rotate the candy box cut line counter clockwise to fit within the 8.5 by 11 inch cutting area.
Paper by Doodlebug Design
Copyright 2018 Adobe Systems Incorporated. All rights reserved. Adobe product screen shot(s) reprinted with permission from Adobe Systems Incorporated. Adobe, Photoshop, Photoshop Album, Photoshop Elements, Illustrator, InDesign, GoLive, Acrobat, Cue, Premiere Pro, Premiere Elements, Bridge, After Effects, InCopy, Dreamweaver, Flash, ActionScript, Fireworks, Contribute, Captivate, Flash Catalyst and Flash Paper is/are either [a] registered trademark[s] or a trademark[s] of Adobe Systems Incorporated in the United States and/or other countries.

Related Articles
Editor's Picks Articles
Top Ten Articles
Previous Features
Site Map
Content copyright © 2023 by Diane Cipollo. All rights reserved.
This content was written by Diane Cipollo. If you wish to use this content in any manner, you need written permission. Contact Diane Cipollo for details.


