
How to Propagate a Sun Parasol Mandevilla
The leaves on this evergreen shrub grow 3 inches in length and are about 2 inches wide. They are oval in shape and dark glossy green in color. Even the flowers are a magnificent show on the plant. The colors range from pink, dark red or creamy pink, growing 3 to 4 inches across. The Mandevilla Stars and Stripes have red star-shaped flowers with white stripes running through the center of each petal. During the summer months, take the Sun Parasol plant outdoors. The flowers begin in May and will continue until frost. Hummingbirds and butterflies frequently visit this plant which is an added bonus to its attraction.
If you want to add to your collection of Sun Parasol plants or give them as gifts, you can do that quite successfully. The best time to take cuttings is in the spring or early summer. Before you take any cuttings, it is a good idea to prepare your pots. This minimizes the amount of moisture lost.
Prepare the Pots
Find a 4 inch pot and place a coffee filter at the bottom. The coffee filter keeps the soil in the pot, but allows the excess water to drain out. Fill the pot with well-drained potting soil. You can buy the potting soil at a garden supply center, or mix your own by combining equal amounts of compost, peat moss and perlite together.
Gather Your Cuttings
Go out and take your cuttings. You will want to find a healthy stem. Try to find a stem that does not have any flowers or buds. Cut off a section that measure 4 to 10 inches. Before taking the cutting, disinfect your pruning shears by washing blades in rubbing alcohol. This prevents germs or disease from transferring from the shears to your plant.
Prepare the Cuttings
Remove all the leaves except for the top two to four leaves at the top. If your stem cutting has flowers or buds, remove them also. If you leave the flower buds on, the cutting will put all its energy into the flowers instead of forming roots.
Wet the leafless end in a glass of water and shake off the excess water. Dip the wet end into rooting hormone. Shake off the excess hormone. If you do not have rooting hormone, that is no problem. Some people believe that the rooting hormone helps the cutting to form roots better and faster than without. It is basically personal preference.
Make a hole, 2 inches deep, in the soil with a pencil, and insert the leafless end inside. Firm the soil around the stem with your fingers.
Pour some water into a tub or container that is bigger than your pot. The water should come up to the rim of the pot, but not too much that it is higher than the pot. Place the pot in the water, and allow the soil to soak up the moisture. When the top of the soil is visibly wet, remove the pot.
Cover and Grow
Place a clear plastic bag over the top of the pot, but leave the bag loose. Place the pot in a bright location, but not in direct sunlight, where the temperature remains 70 to 80 degrees F.
It takes about a month before the cutting forms any roots. It is important to check the soil for moisture every day. The soil should be kept moist, but do not let the pot sit in standing water. When you see your cutting forming new leaves, remove the plastic bag.
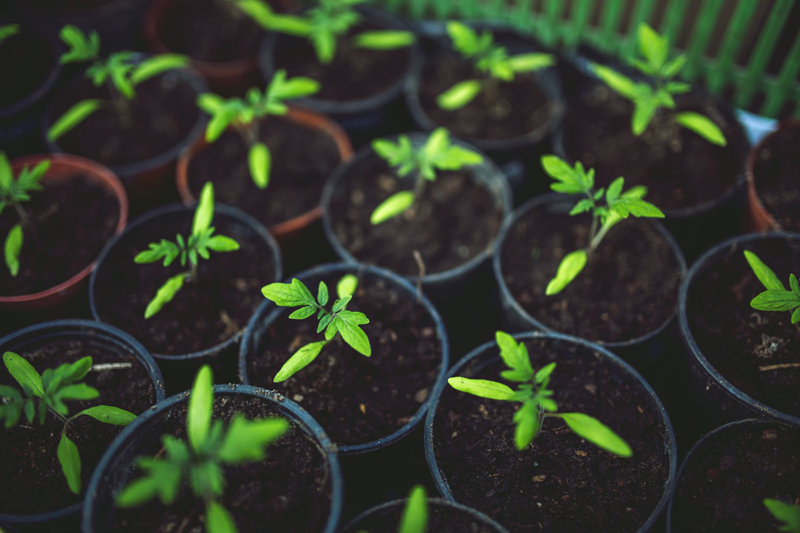
Continue to grow them in the smaller pots until the cutting has substantial roots. Transplant them to the next larger pot and care for them as a mature plant.
If you want to add to your collection of Sun Parasol plants or give them as gifts, you can do that quite successfully. The best time to take cuttings is in the spring or early summer. Before you take any cuttings, it is a good idea to prepare your pots. This minimizes the amount of moisture lost.
Prepare the Pots
Find a 4 inch pot and place a coffee filter at the bottom. The coffee filter keeps the soil in the pot, but allows the excess water to drain out. Fill the pot with well-drained potting soil. You can buy the potting soil at a garden supply center, or mix your own by combining equal amounts of compost, peat moss and perlite together.
Gather Your Cuttings
Go out and take your cuttings. You will want to find a healthy stem. Try to find a stem that does not have any flowers or buds. Cut off a section that measure 4 to 10 inches. Before taking the cutting, disinfect your pruning shears by washing blades in rubbing alcohol. This prevents germs or disease from transferring from the shears to your plant.
Prepare the Cuttings
Remove all the leaves except for the top two to four leaves at the top. If your stem cutting has flowers or buds, remove them also. If you leave the flower buds on, the cutting will put all its energy into the flowers instead of forming roots.
Wet the leafless end in a glass of water and shake off the excess water. Dip the wet end into rooting hormone. Shake off the excess hormone. If you do not have rooting hormone, that is no problem. Some people believe that the rooting hormone helps the cutting to form roots better and faster than without. It is basically personal preference.
Make a hole, 2 inches deep, in the soil with a pencil, and insert the leafless end inside. Firm the soil around the stem with your fingers.
Pour some water into a tub or container that is bigger than your pot. The water should come up to the rim of the pot, but not too much that it is higher than the pot. Place the pot in the water, and allow the soil to soak up the moisture. When the top of the soil is visibly wet, remove the pot.
Cover and Grow
Place a clear plastic bag over the top of the pot, but leave the bag loose. Place the pot in a bright location, but not in direct sunlight, where the temperature remains 70 to 80 degrees F.
It takes about a month before the cutting forms any roots. It is important to check the soil for moisture every day. The soil should be kept moist, but do not let the pot sit in standing water. When you see your cutting forming new leaves, remove the plastic bag.
Continue to grow them in the smaller pots until the cutting has substantial roots. Transplant them to the next larger pot and care for them as a mature plant.

Related Articles
Editor's Picks Articles
Top Ten Articles
Previous Features
Site Map
Content copyright © 2023 by Gail Delaney. All rights reserved.
This content was written by Gail Delaney. If you wish to use this content in any manner, you need written permission. Contact Gail Delaney for details.
